Assignment Four: Applying Lighting Techniques

For this assignment, you will draw together the different lighting techniques you have been studying and apply them to one object. The idea is to use your new knowledge of lighting to bring out particular physical properties of the same object. It is also a test of your observation. Choose any subject that you can move around and take 8 photographs based on the 4 themes of this assignment. At the core of this assignment, you should aim to show the following qualities of your subject, one at a time, by means of lighting.

  • Shape:

This quality has to do with the outline of an object- its edges. These are likely to stand out more clearly if they contrast with the background, and if there is minimum detail visible in the object.

  • Form:

This is another way of describing the volume of an object, how 3 dimensional it looks. The modelling effect of the lighting, and the way you deal with the shadows is all important. Try to show as much depth as possible in the subject.

  • Texture:

This is a quality of the surface detail. Fine detail, such as that on sandstone or skin. This stands out best with a pattern of small, hard shadows, so you will have to consider both the diffusion (Or lack of it) and the angle of the light.

  • Colour:

Choose a kind of lighting and exposure setting that shows the subject’s colour (Or colours) as strongly as possible. In addition, you could photograph your subject in any other interesting, unusual or attractive lighting.

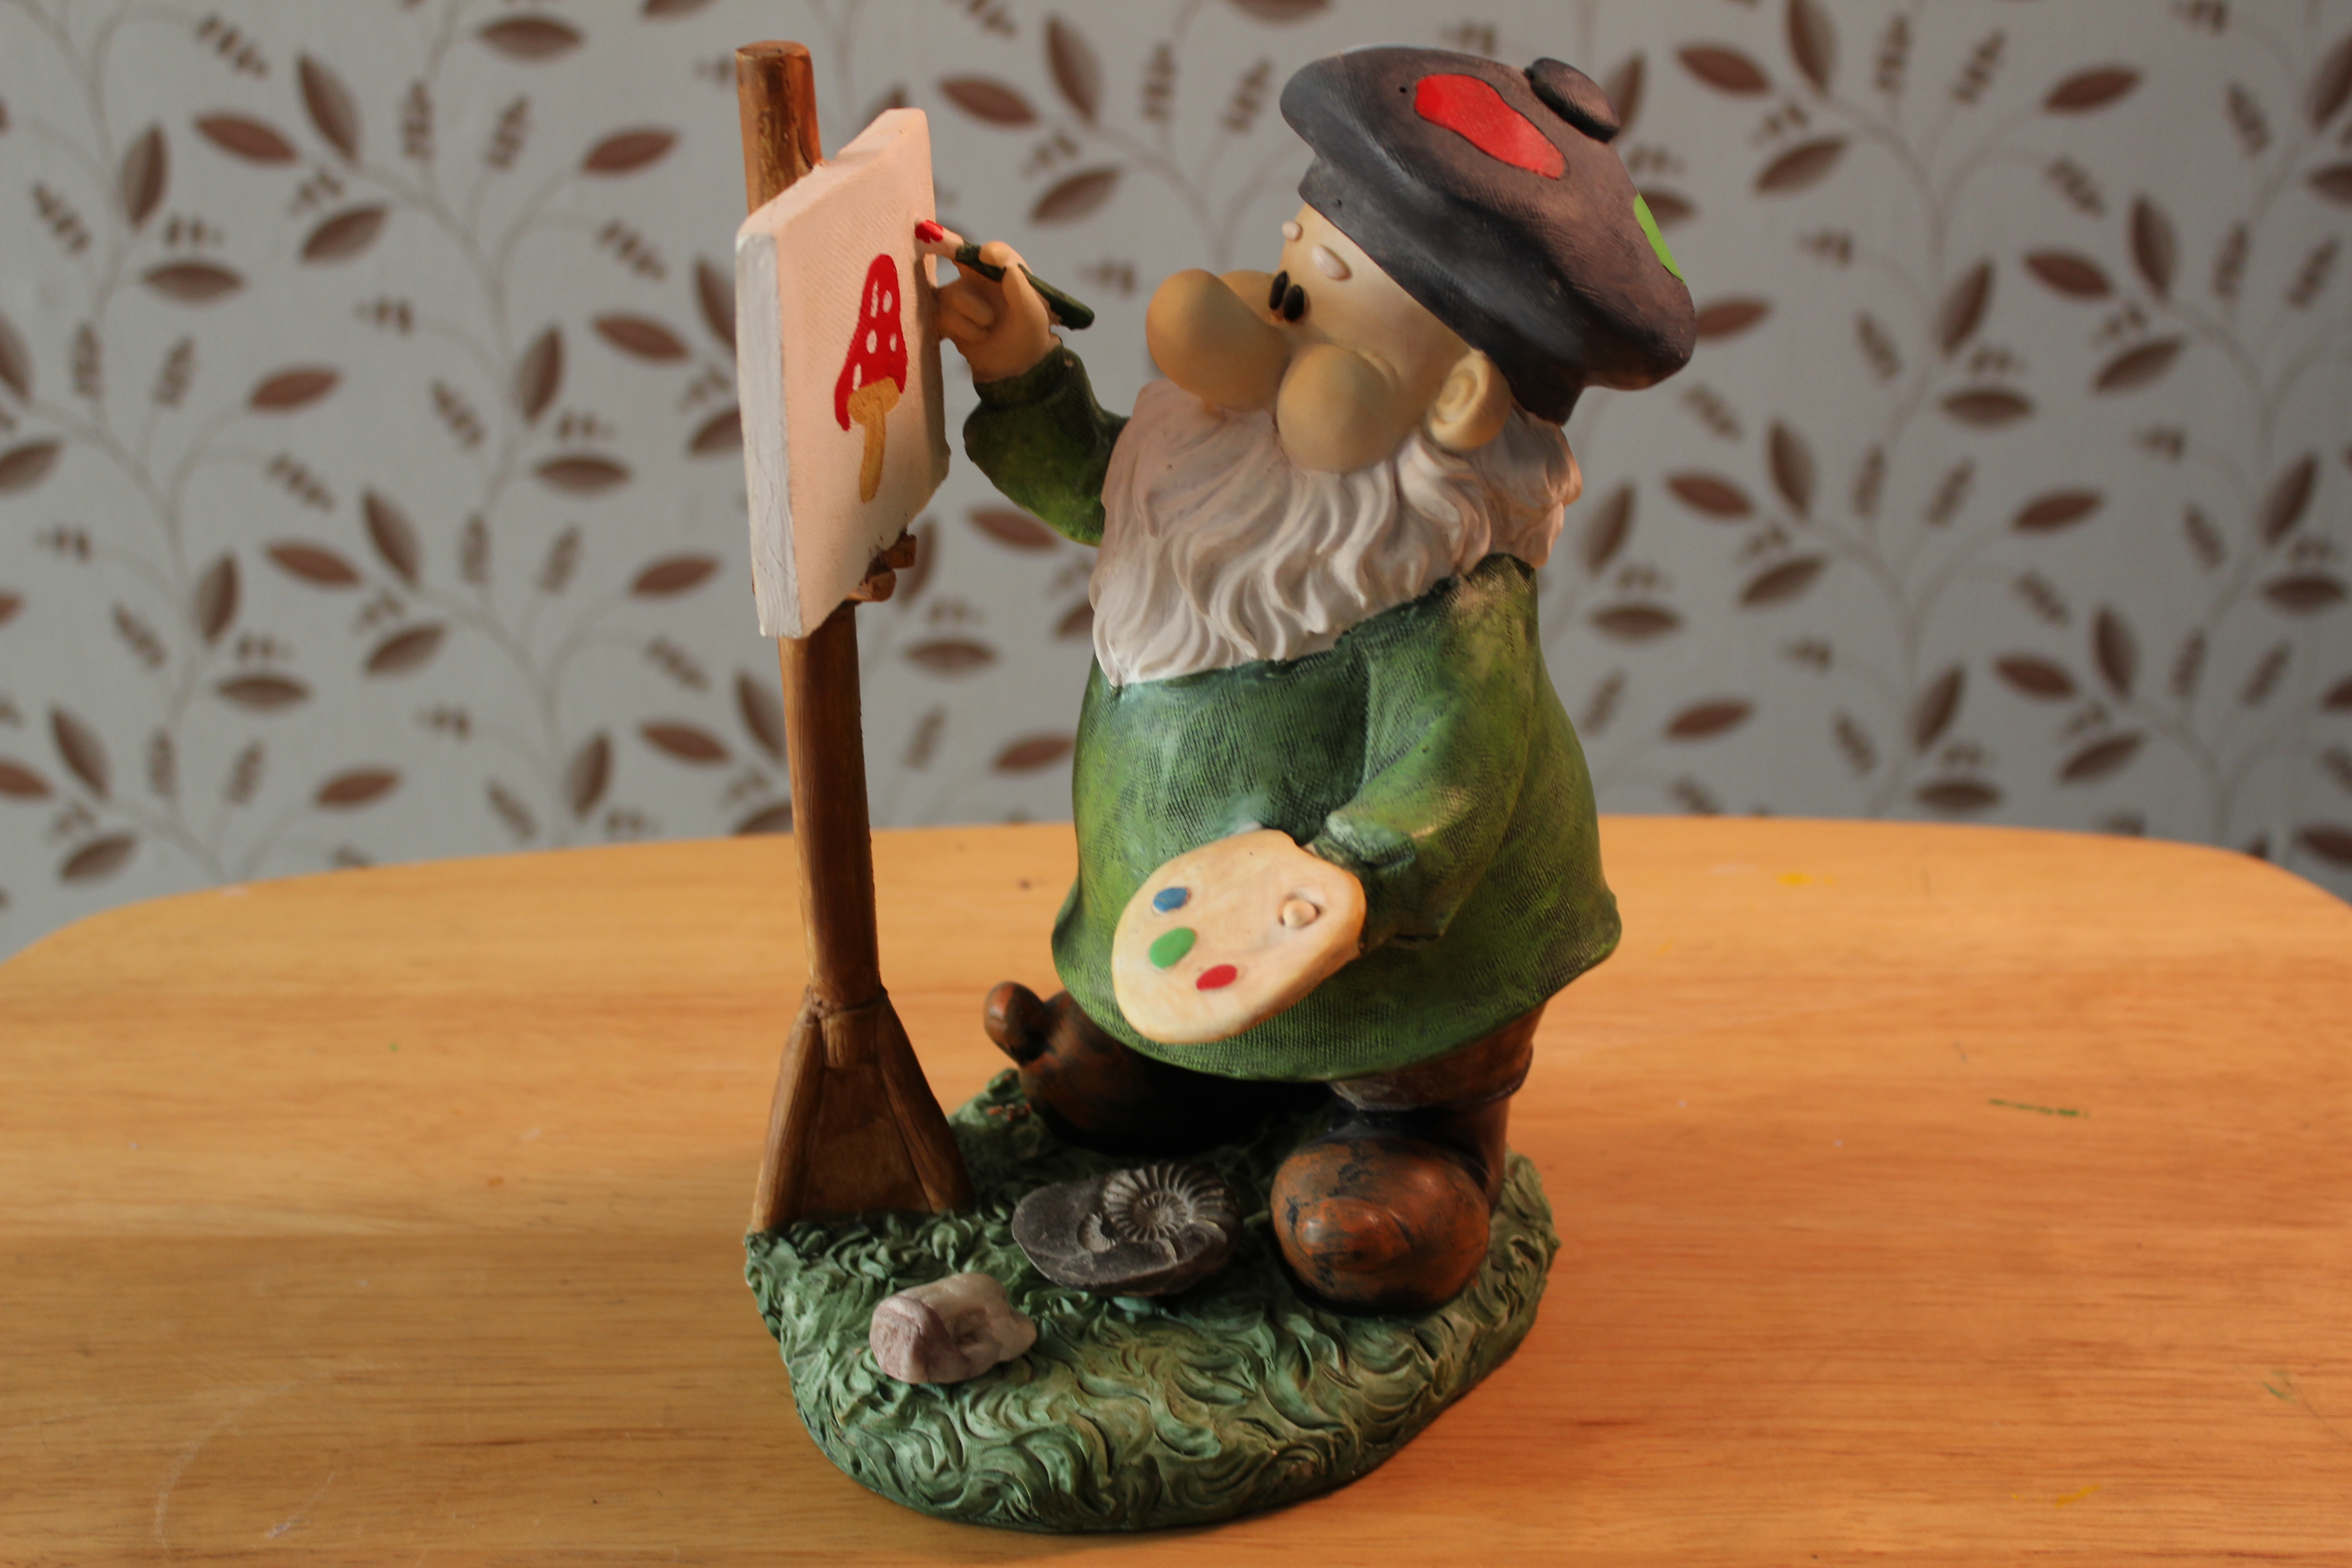
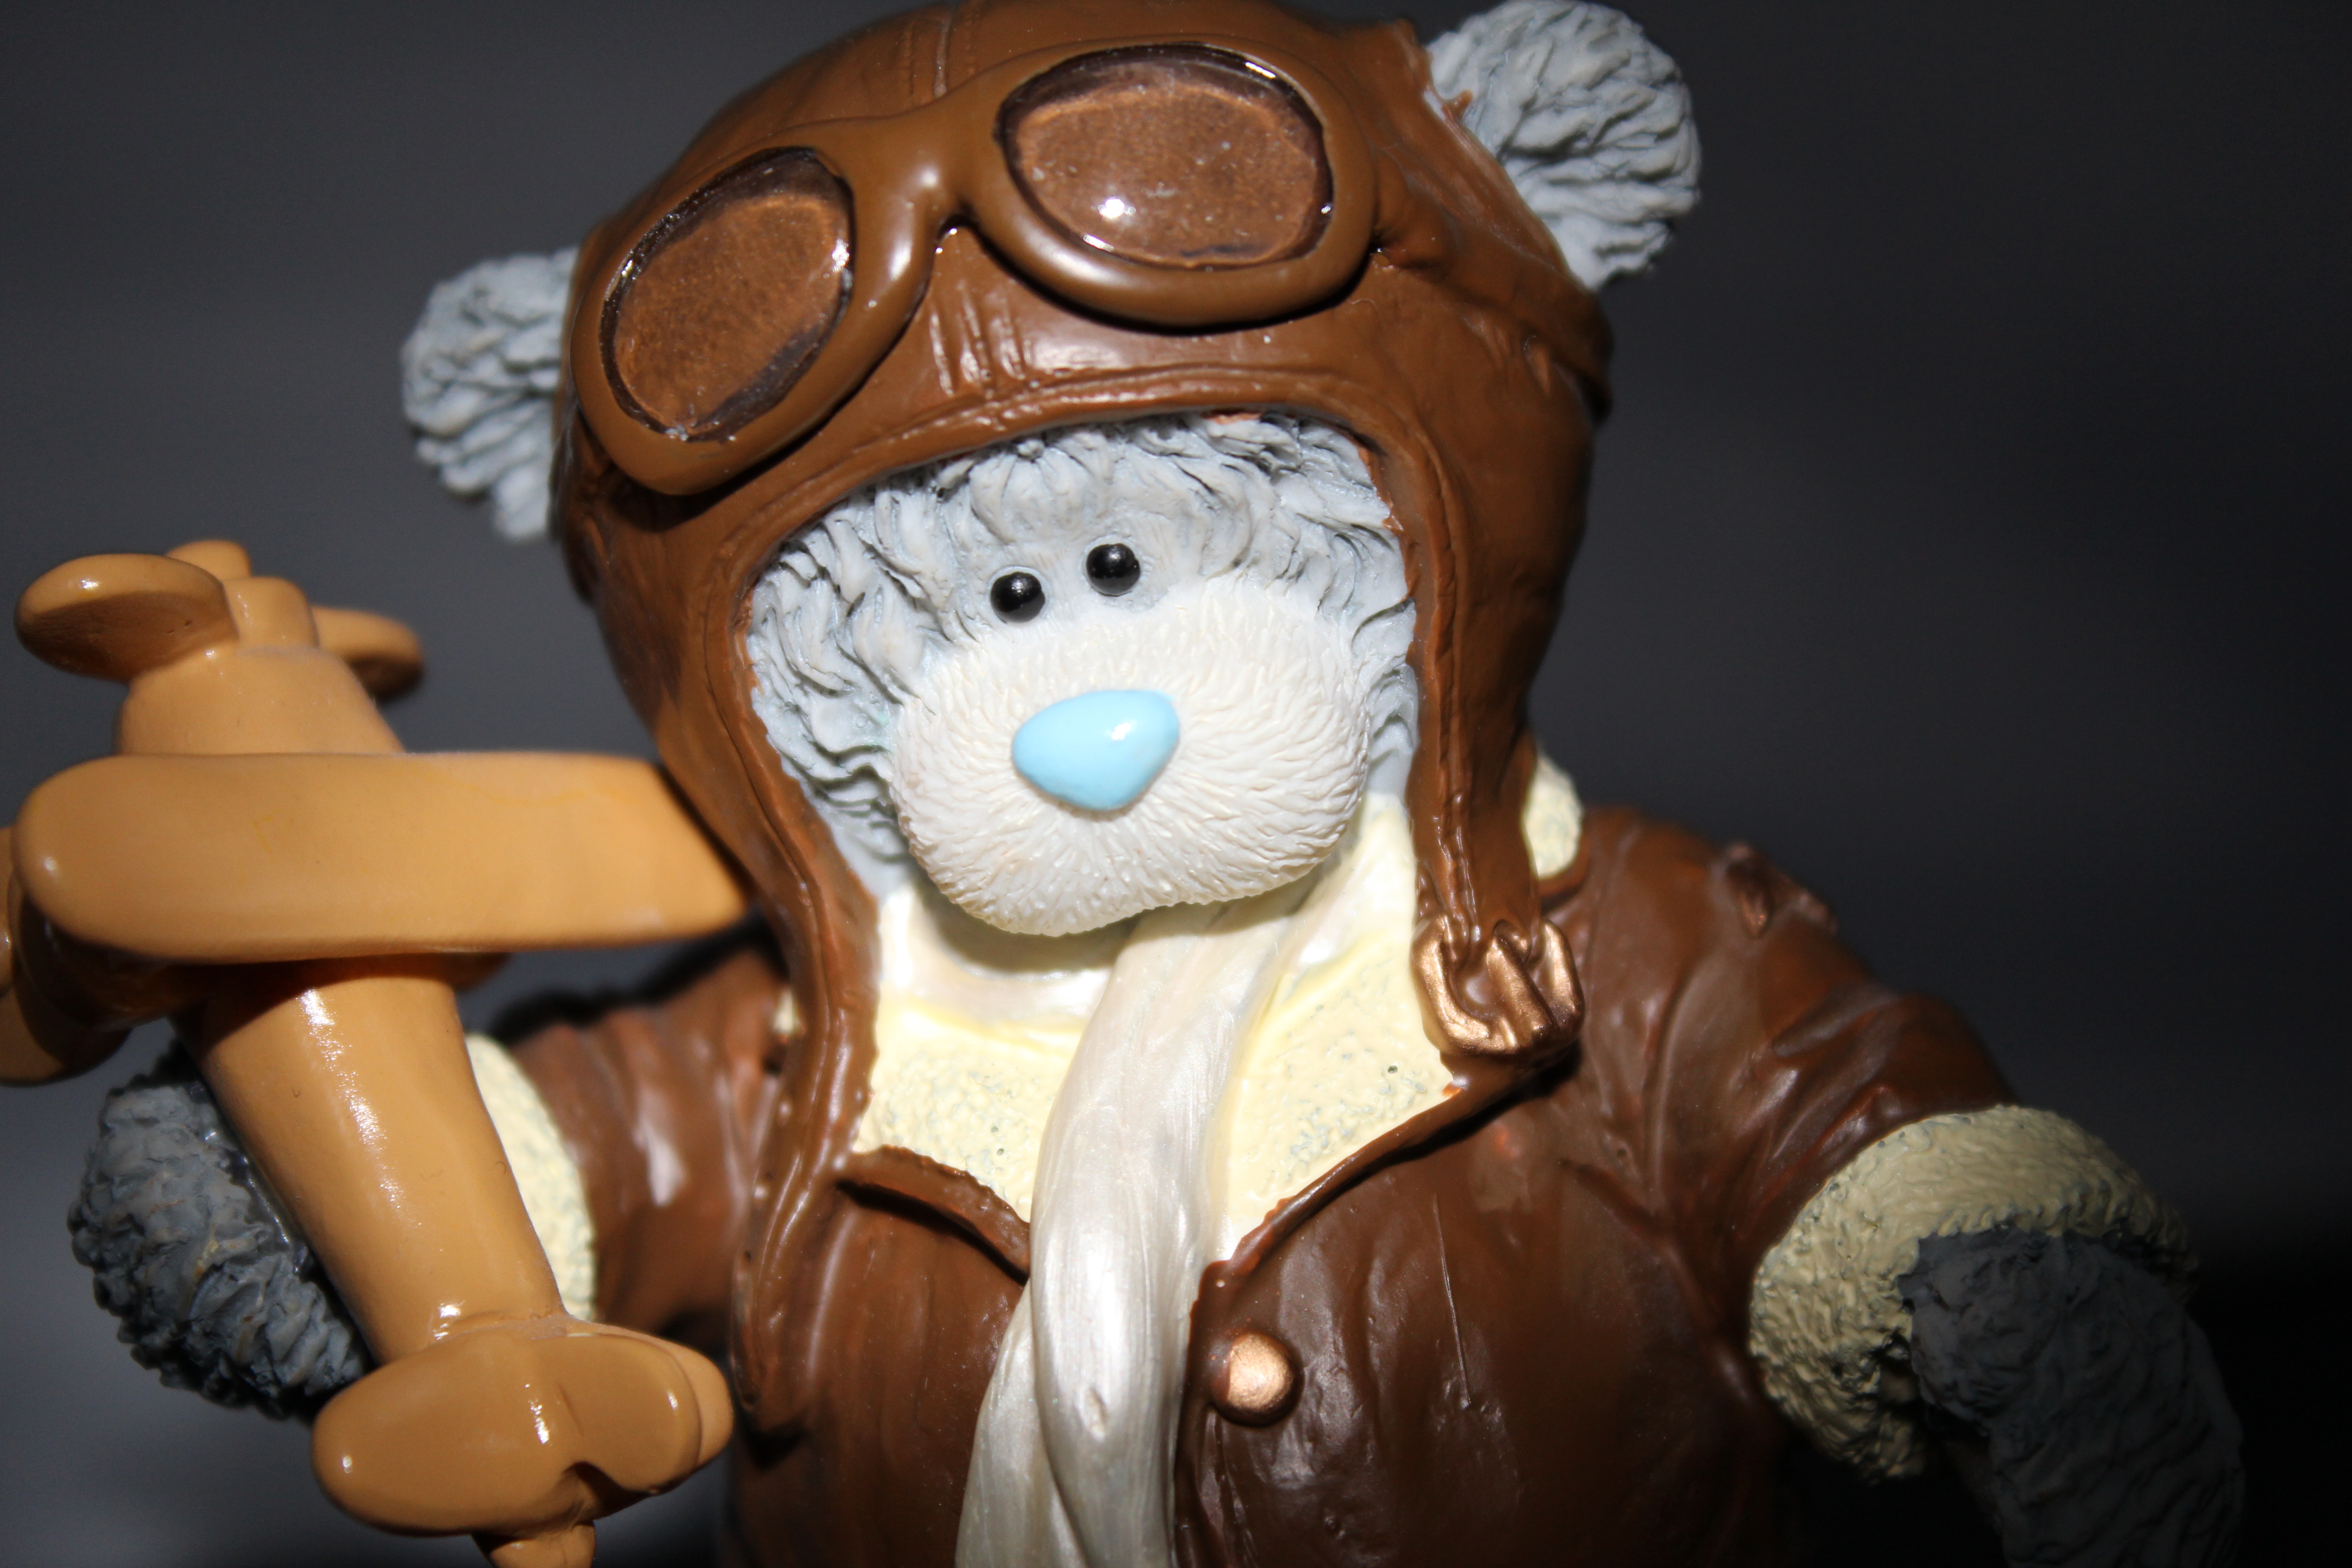
For this assignment, I used a small figurine as I was able to move it around and change the location and backgrounds easily. I used a mixture of outdoor lighting (Natural lighting), as the sun was shining strongly. I also used diffused artificial lighting with plane backgrounds, it depended on what theme I was trying to show.

Shape: Outline the edges of the object.

IMG_9891

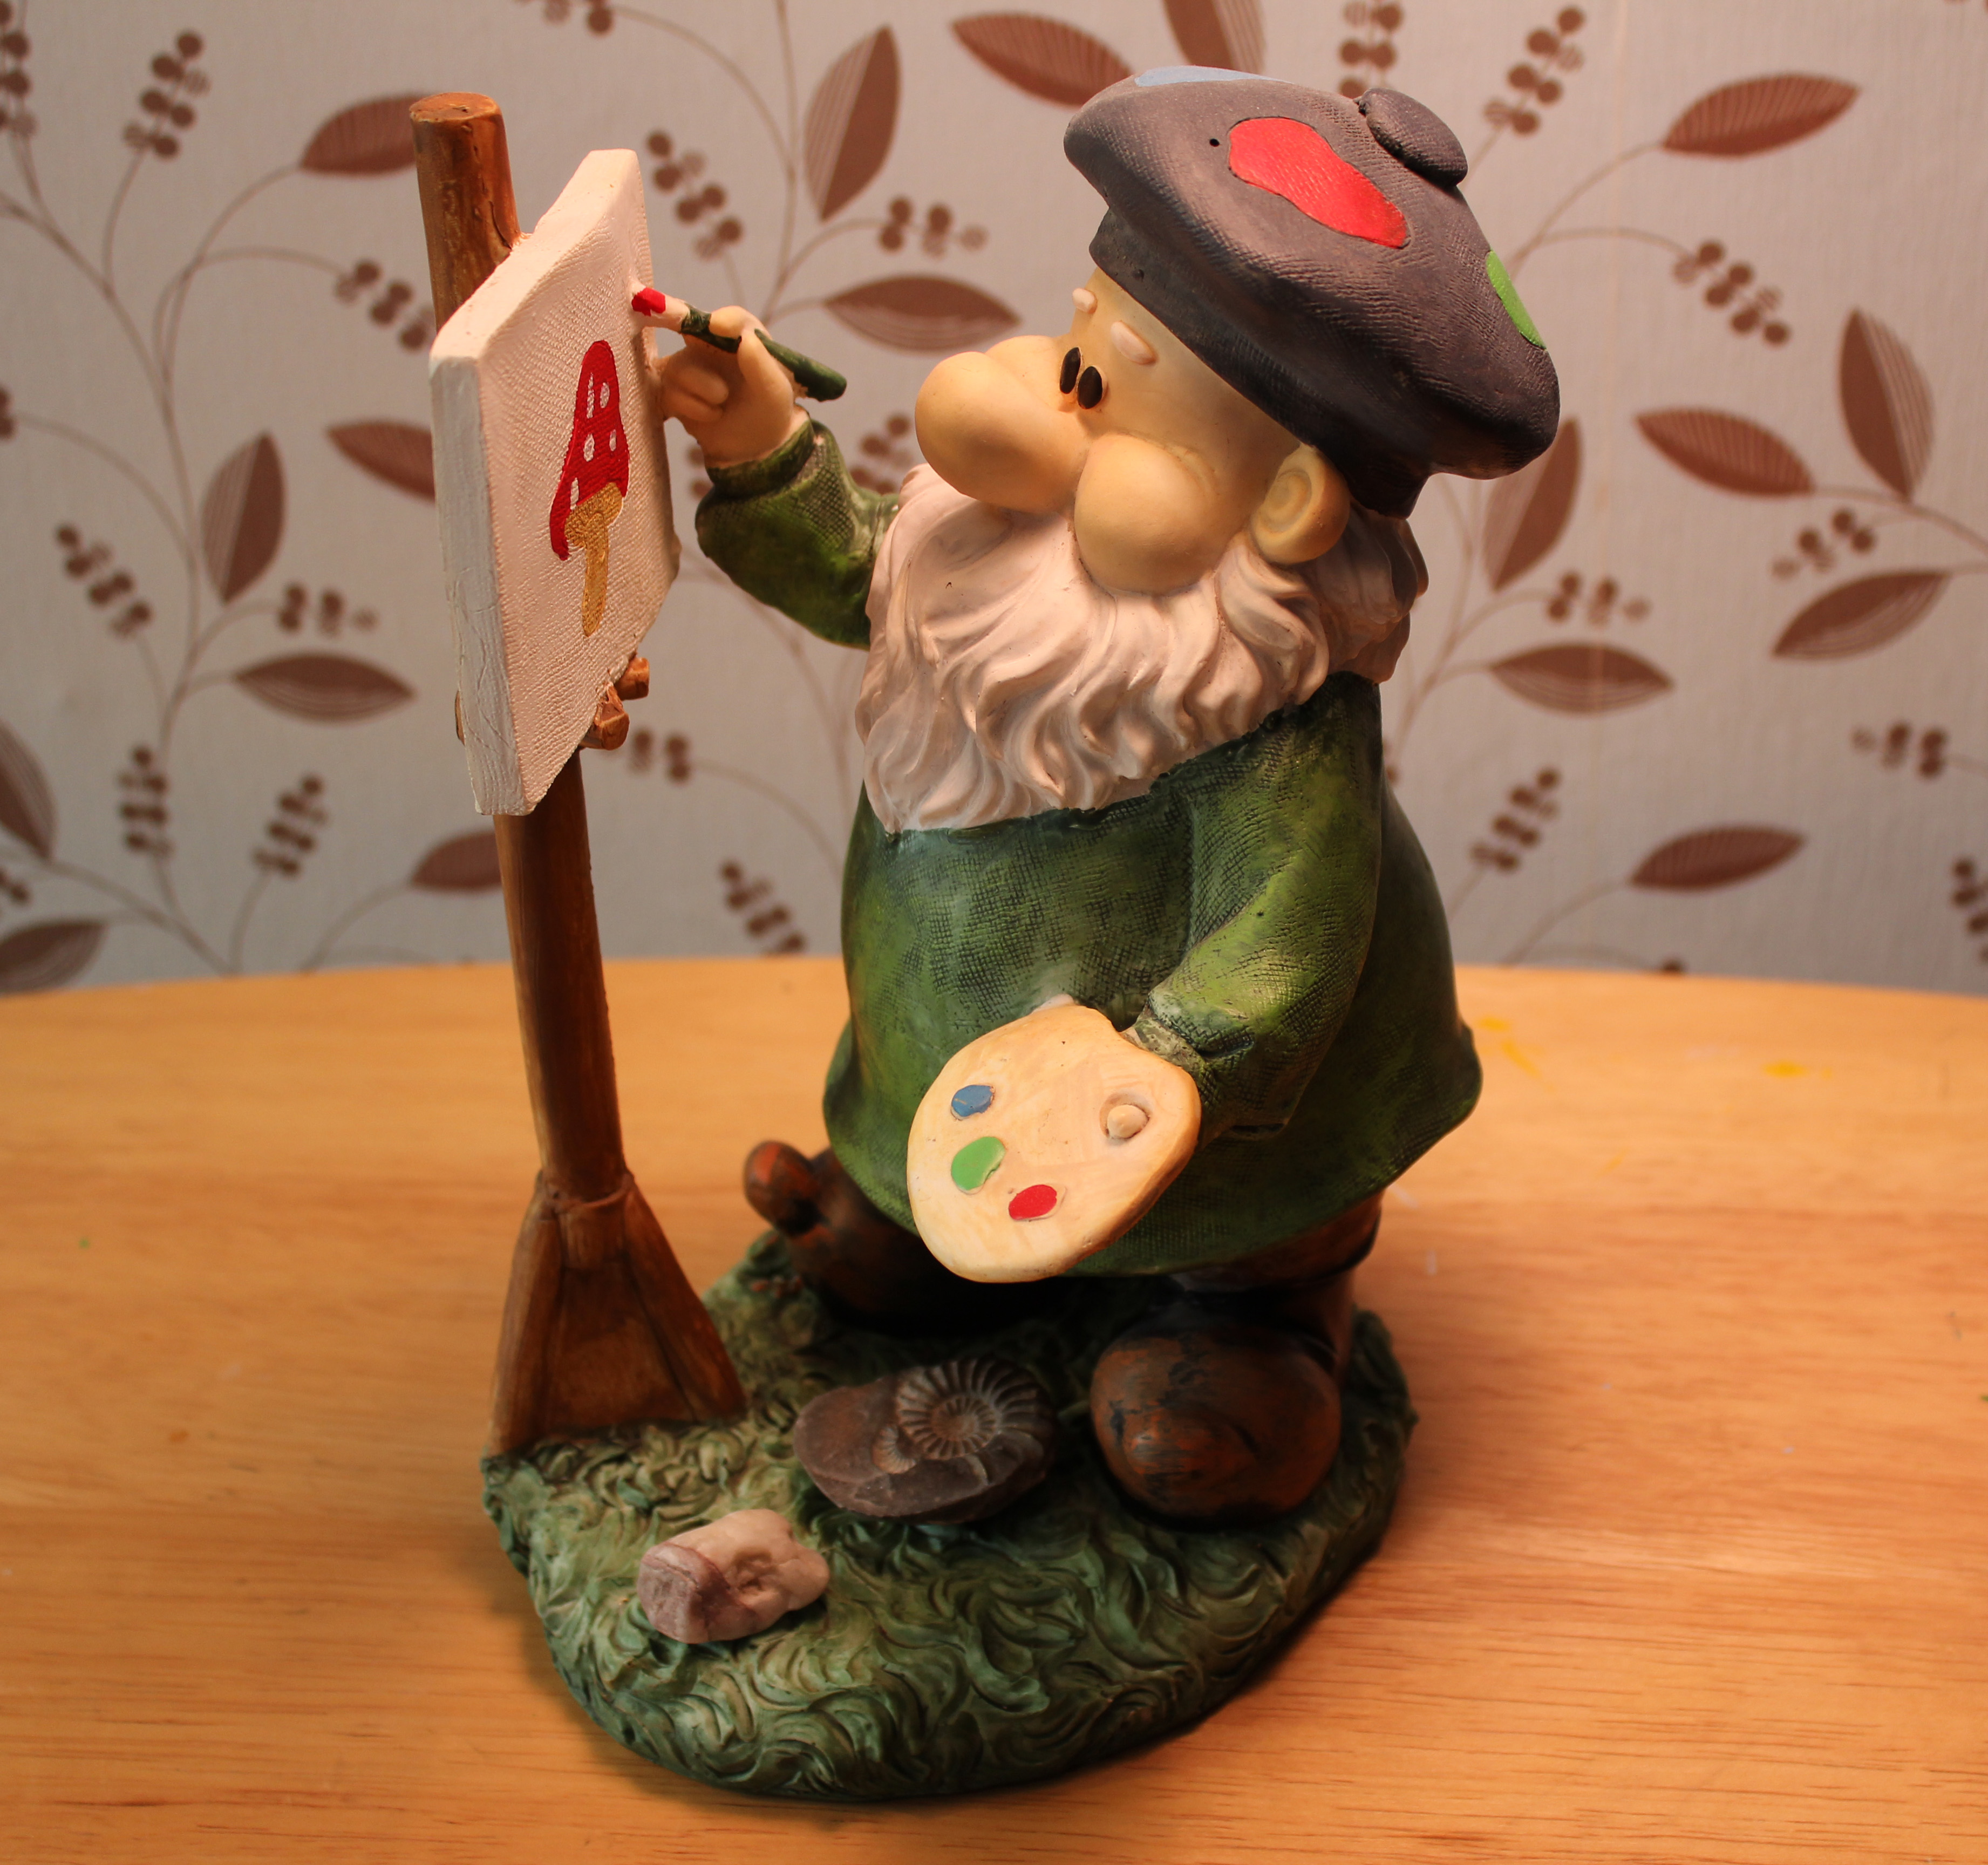
For this image, I decided to stand the artificial light, to the side of the figurine, but pointing upwards. It caused shadows to form, and I was able to see a strong outline of the figure and the clothing on the bear itself, whilst not loosing any details.

IMG_9900

For this image, I decided to do the opposite. I decided to loose all of the strong details, and only focus of the outline of the figure itself. I stood the figure on a stand inside a light box I had. I left the artificial light outside the light box and it caused a diffused light as the sides of the light box are a white material. I positioned the camera inside the light box. I wanted a silhouette, and I was really pleased with the outcome. I managed to keep some small detail as you can see on the feet and the nose. However, the main focus was to cause a silhouette, which I managed to do.

Form: Describe the volume of the object. How 3 dimensional it is. Show as much depth.

IMG_9878

For this image, I decided to use natural lighting. I positioned the figure so that the sun was shining down on one side, which caused a shadow on the other side. As the figure is quite small, I couldn’t use much depth, however, I positioned the camera quite close to the figure. With the help of the shadows falling in the right places, the figure became 3D. This is visible by the figures round belly.

IMG_9909

For this image I decided to use artificial lighting. I positioned the camera quite close to the figure. I held the artificial light above my head causing only some reflection on the figure itself. I wanted to show the 3 dimensional shape of the bears face a lot closer than the other photograph. Moving closer to the figure enabled me to show the 3D shape more.

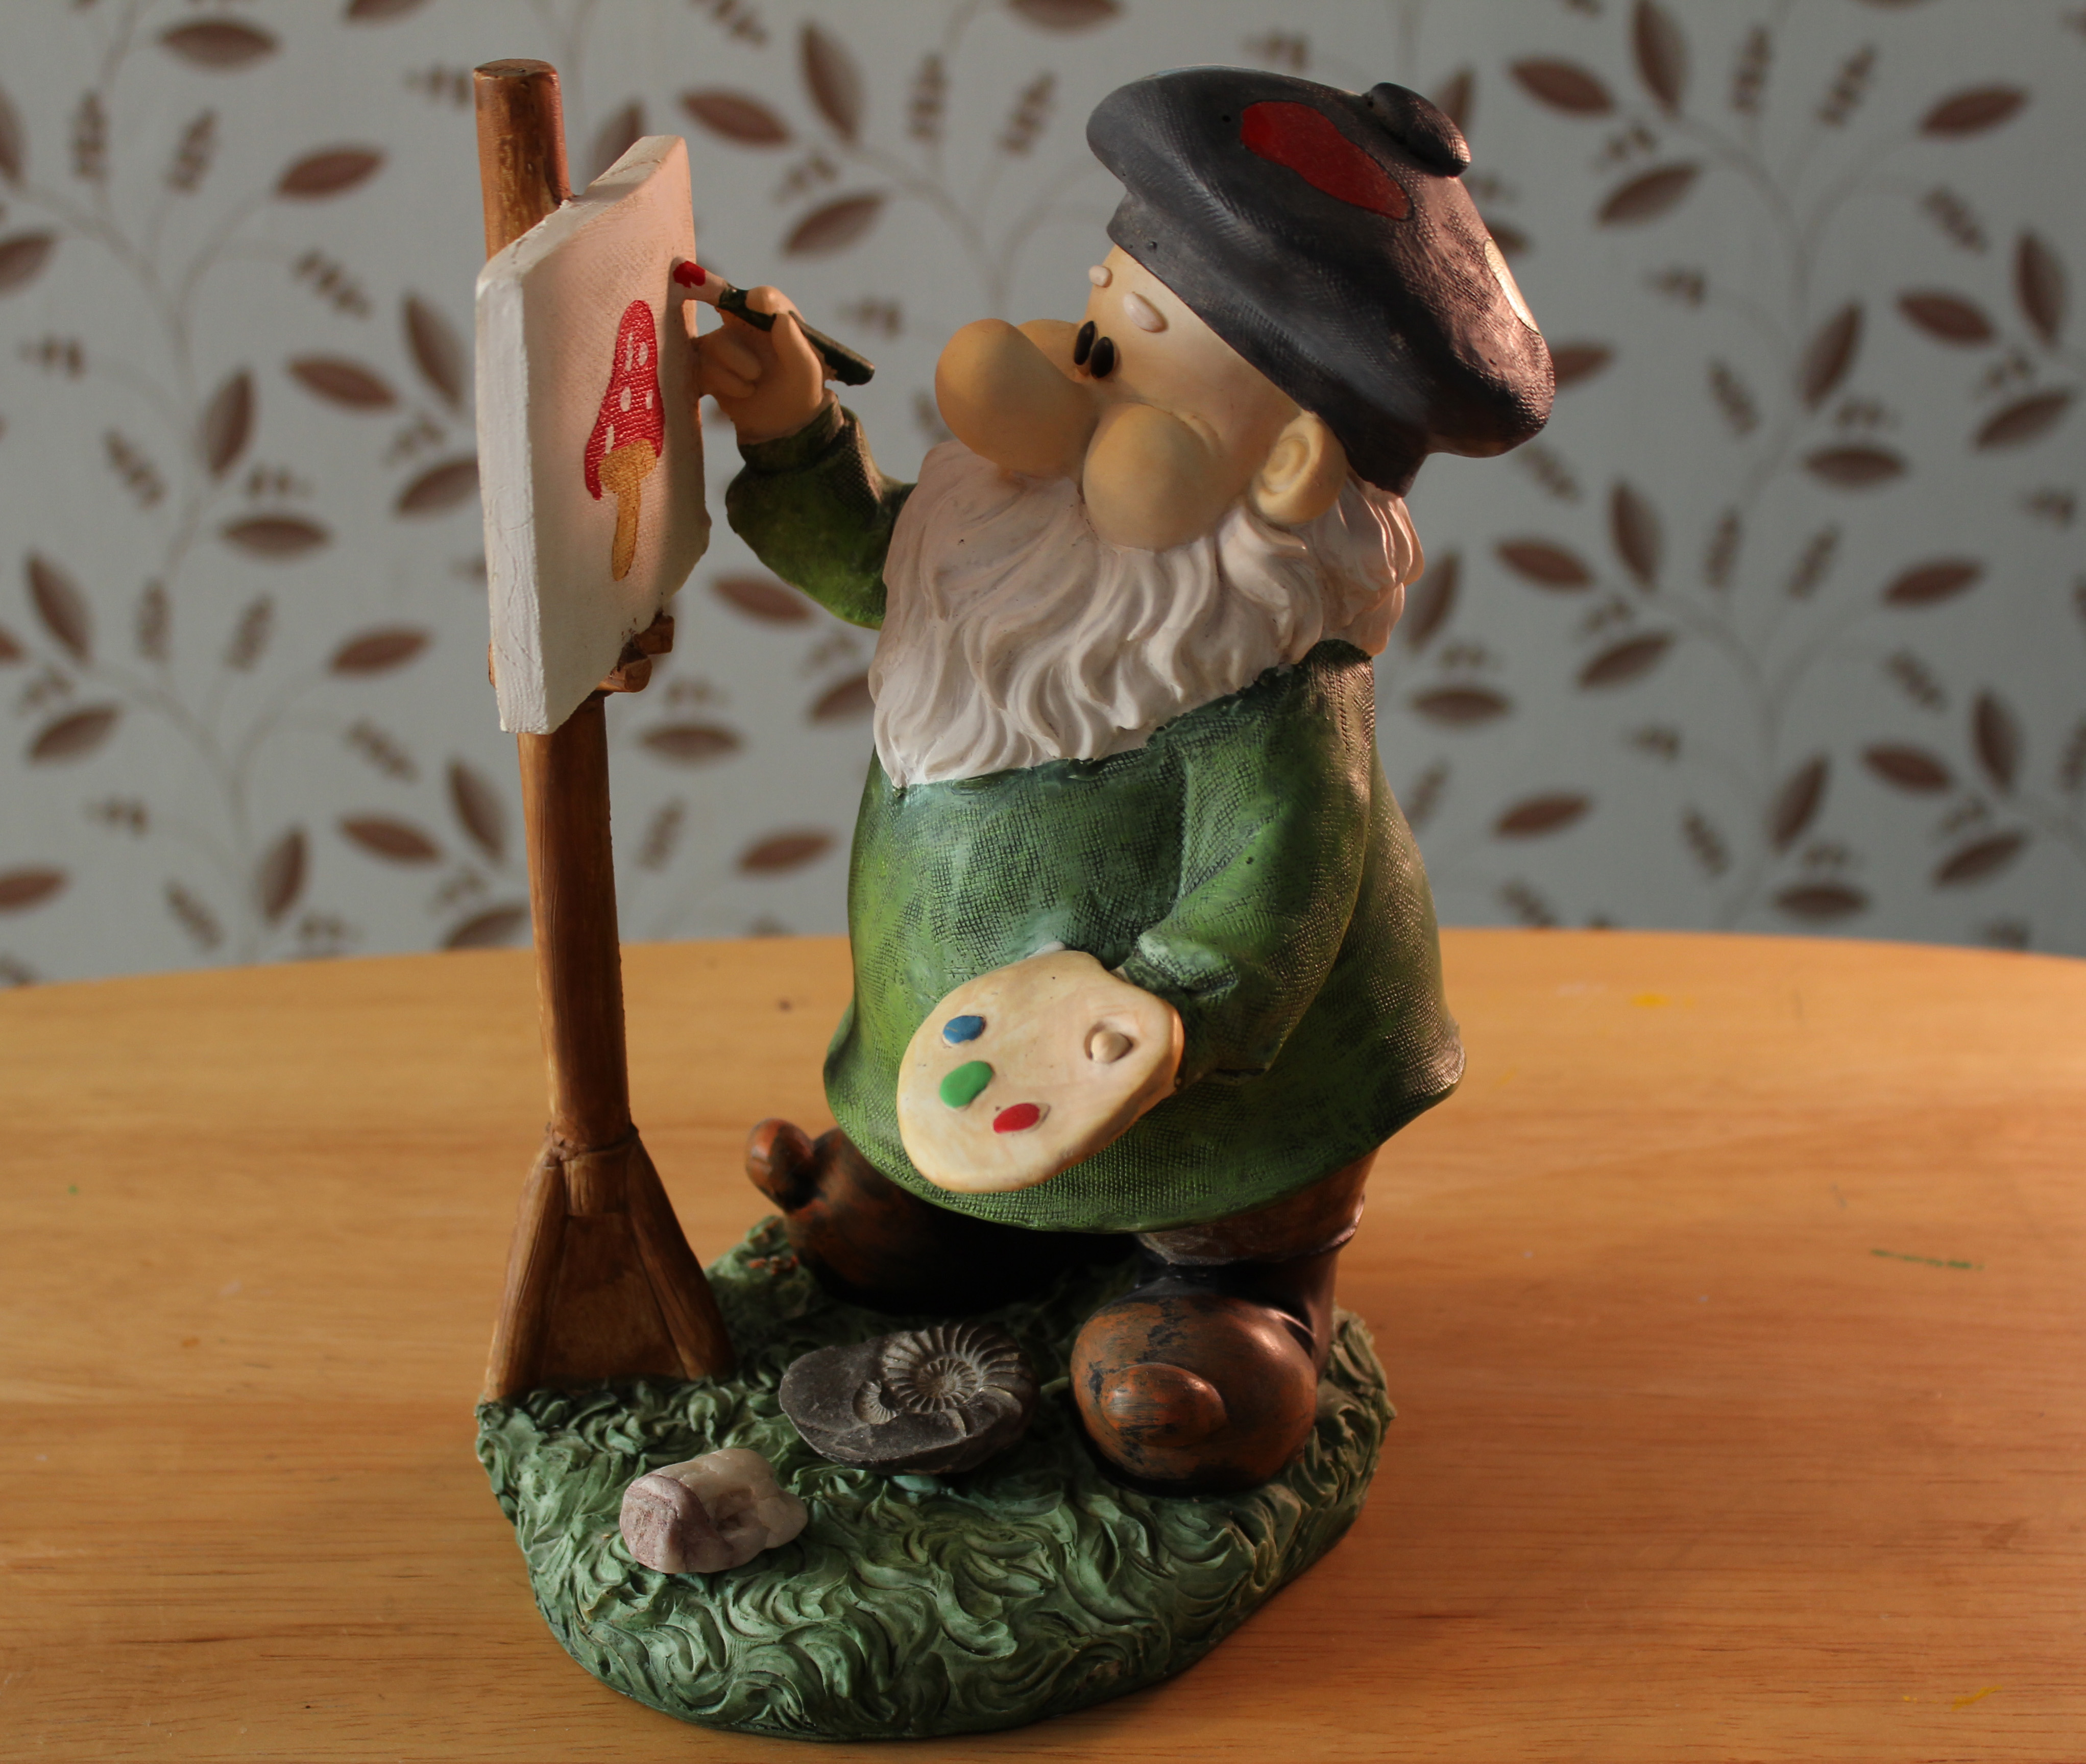
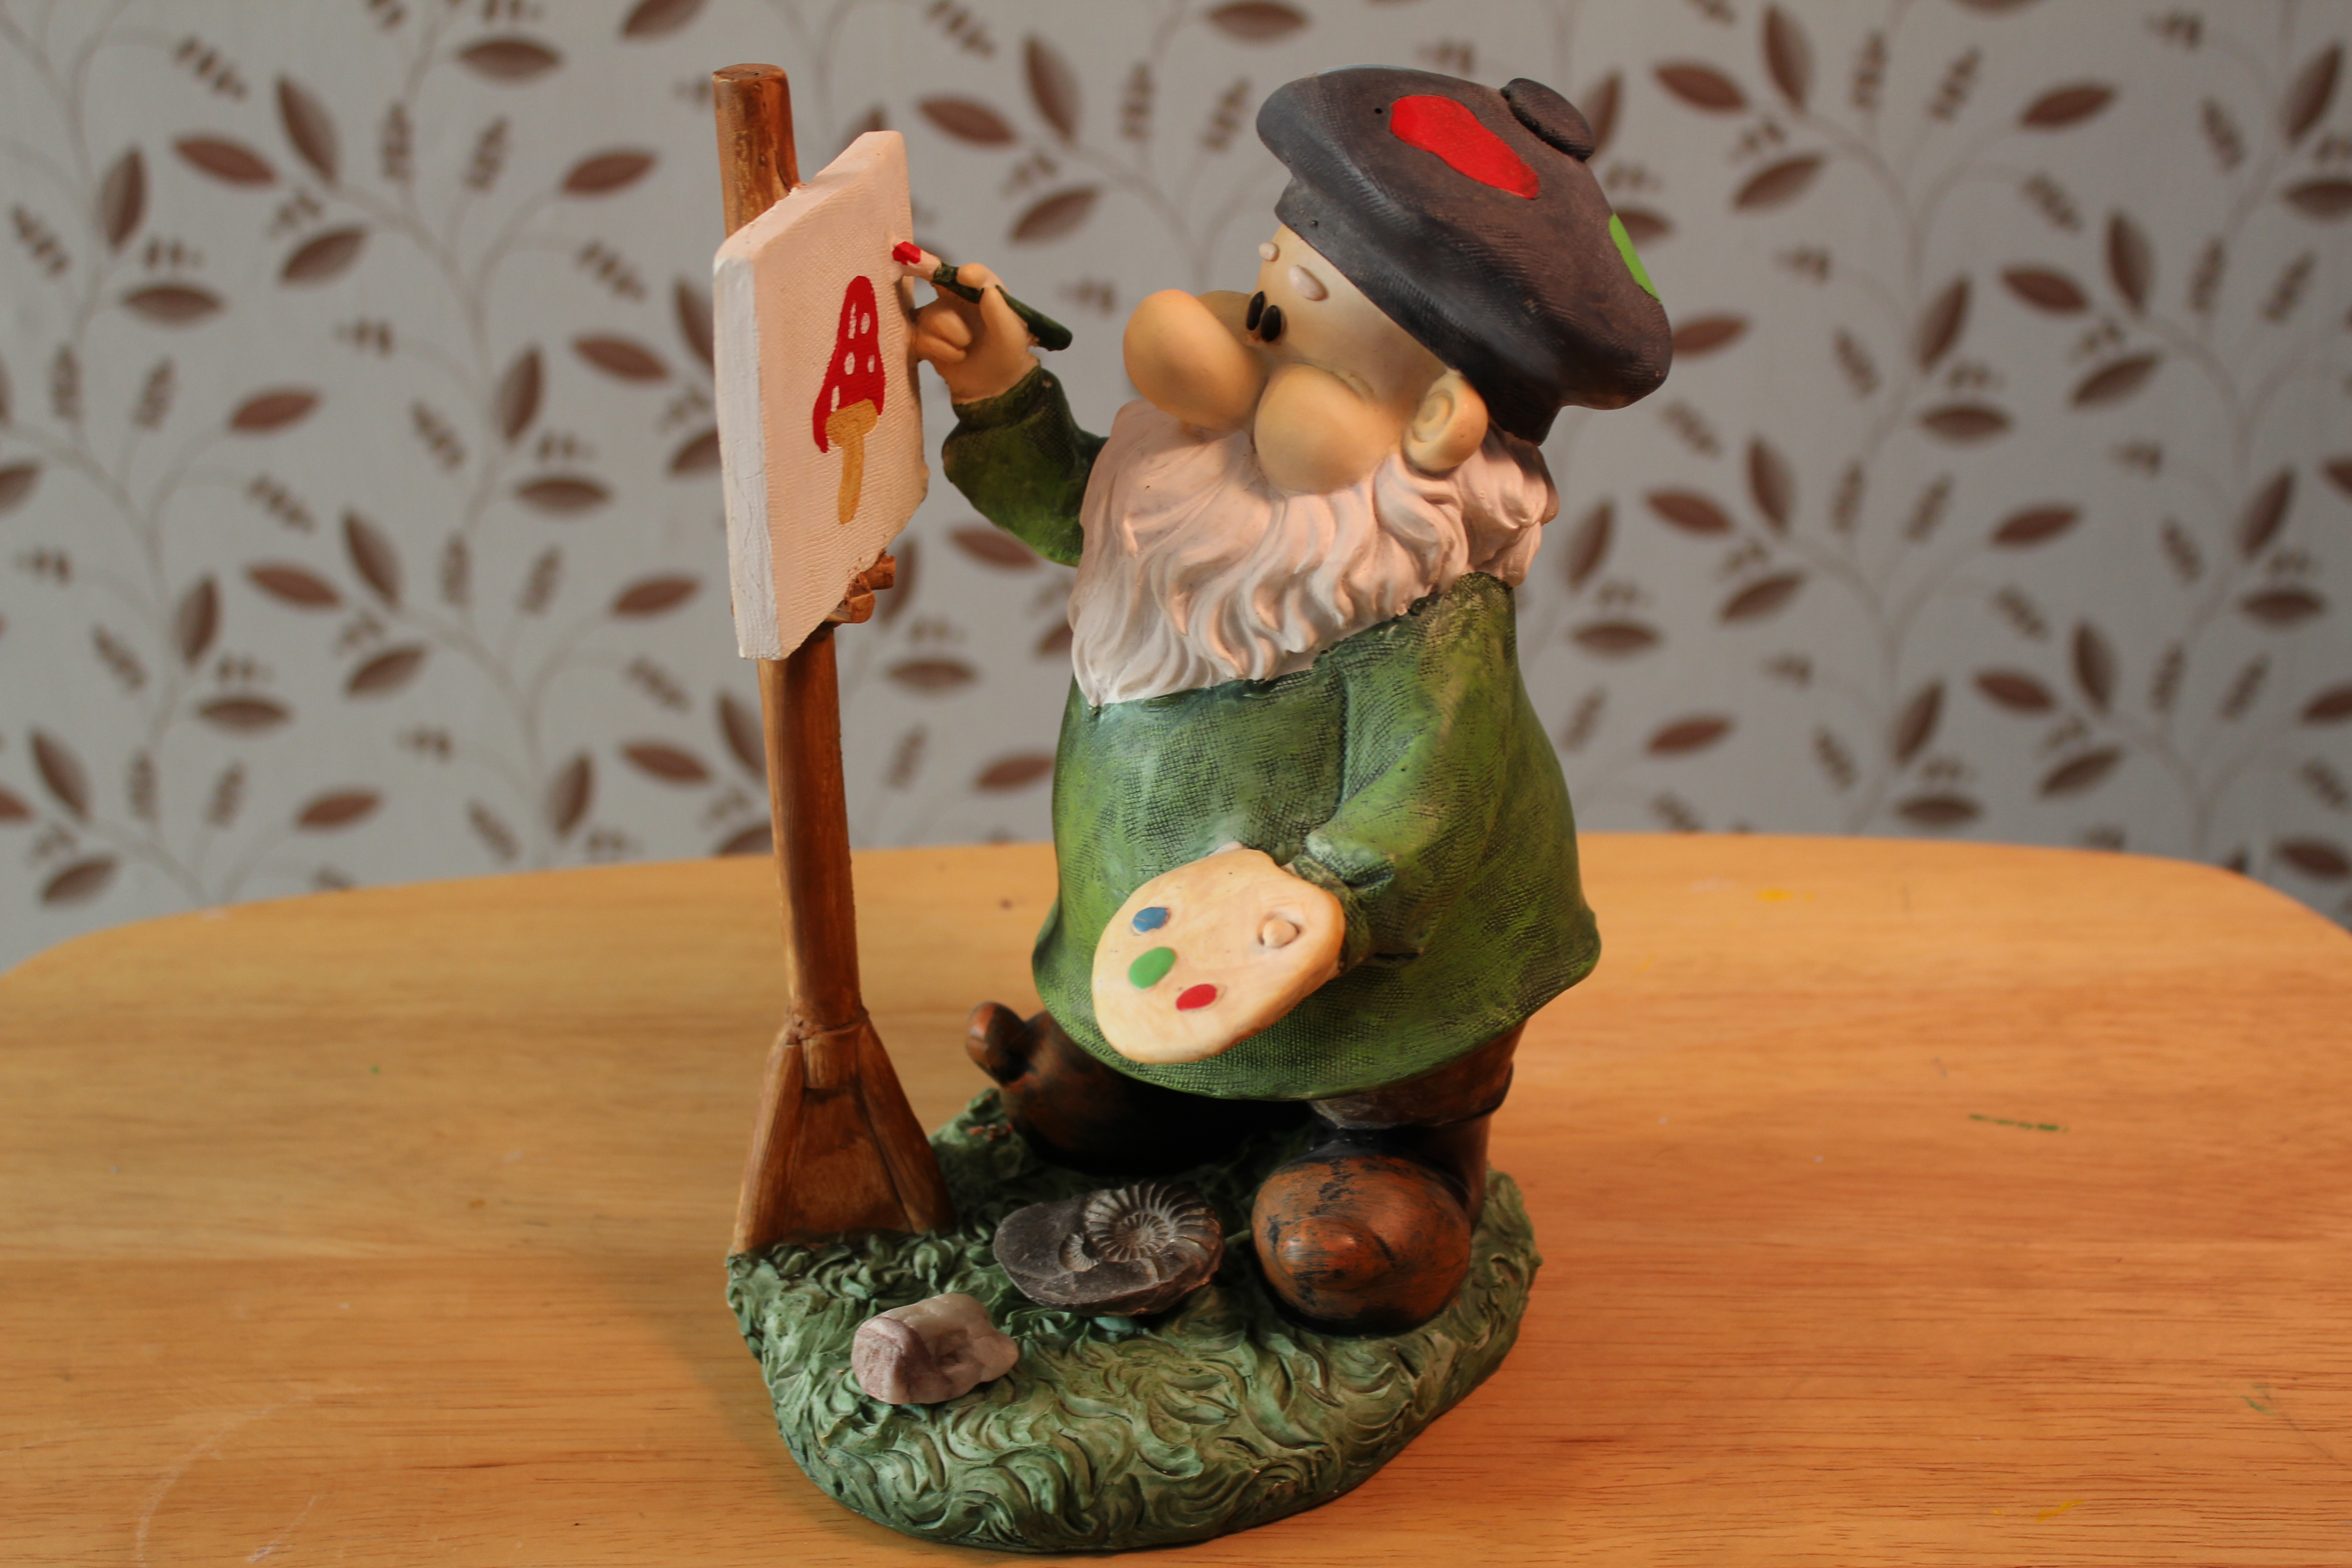
Texture: Surface detail, Fine detail. You may have to use hard shadows or diffusion.

IMG_9888

For this image, I used a diffused light as I didn’t want harsh lighting. Harsh artificial lighting wouldn’t show much detail, and I wanted a more softer tone to the image in order to see all of the detail. I positioned the diffused light to one side of the figure and framed it almost central in the viewfinder. Using the diffused light worked really well, it caused shadows and shading in all the right places and I am really please with this image. You are able to see all of the fine detail on this figure. You are also able to see all of the texture on the figure especially the bumpy feet and hands.

IMG_9905

For this image, I decided to use the diffused light again. I held it above the camera. I positioned the camera above the figure as I now wanted to show the smooth texture of the clothing, goggles and the aeroplane as these had hardly any fine detail on them, but instead, they had the smooth texture. The reflection of the light on the smooth sections caused a ‘shininess’ which helped show the smoothness of the clothing.
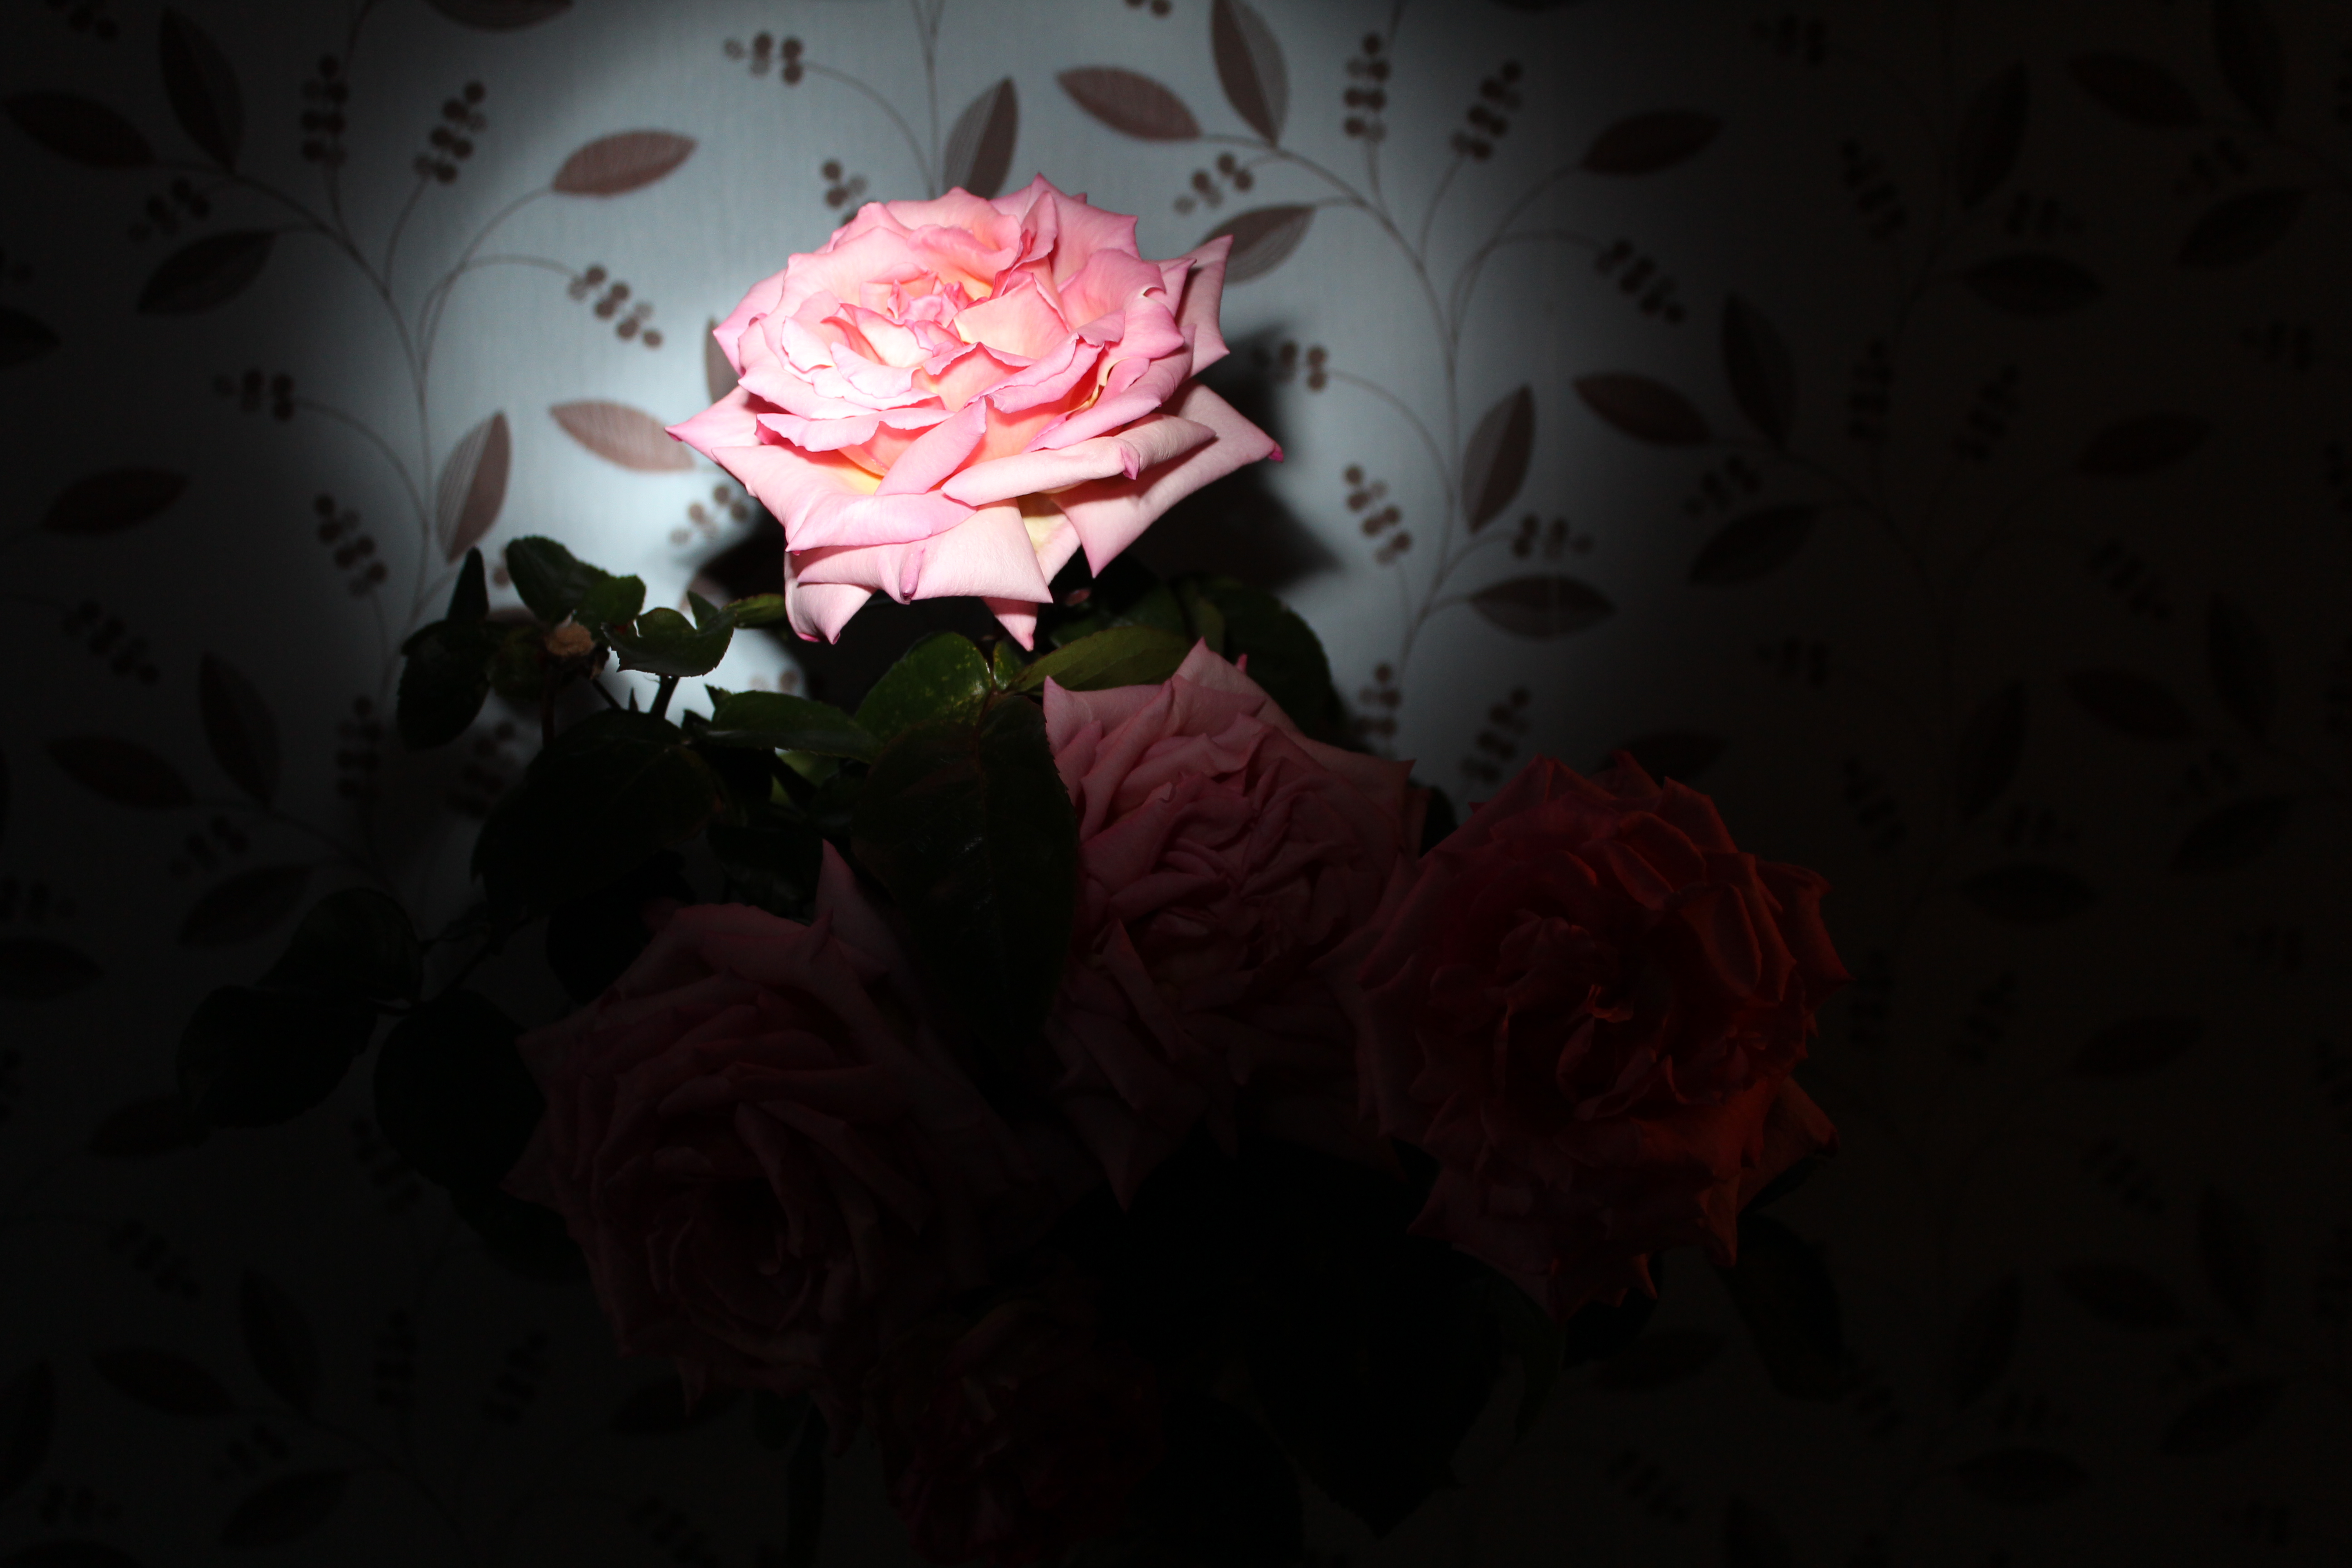
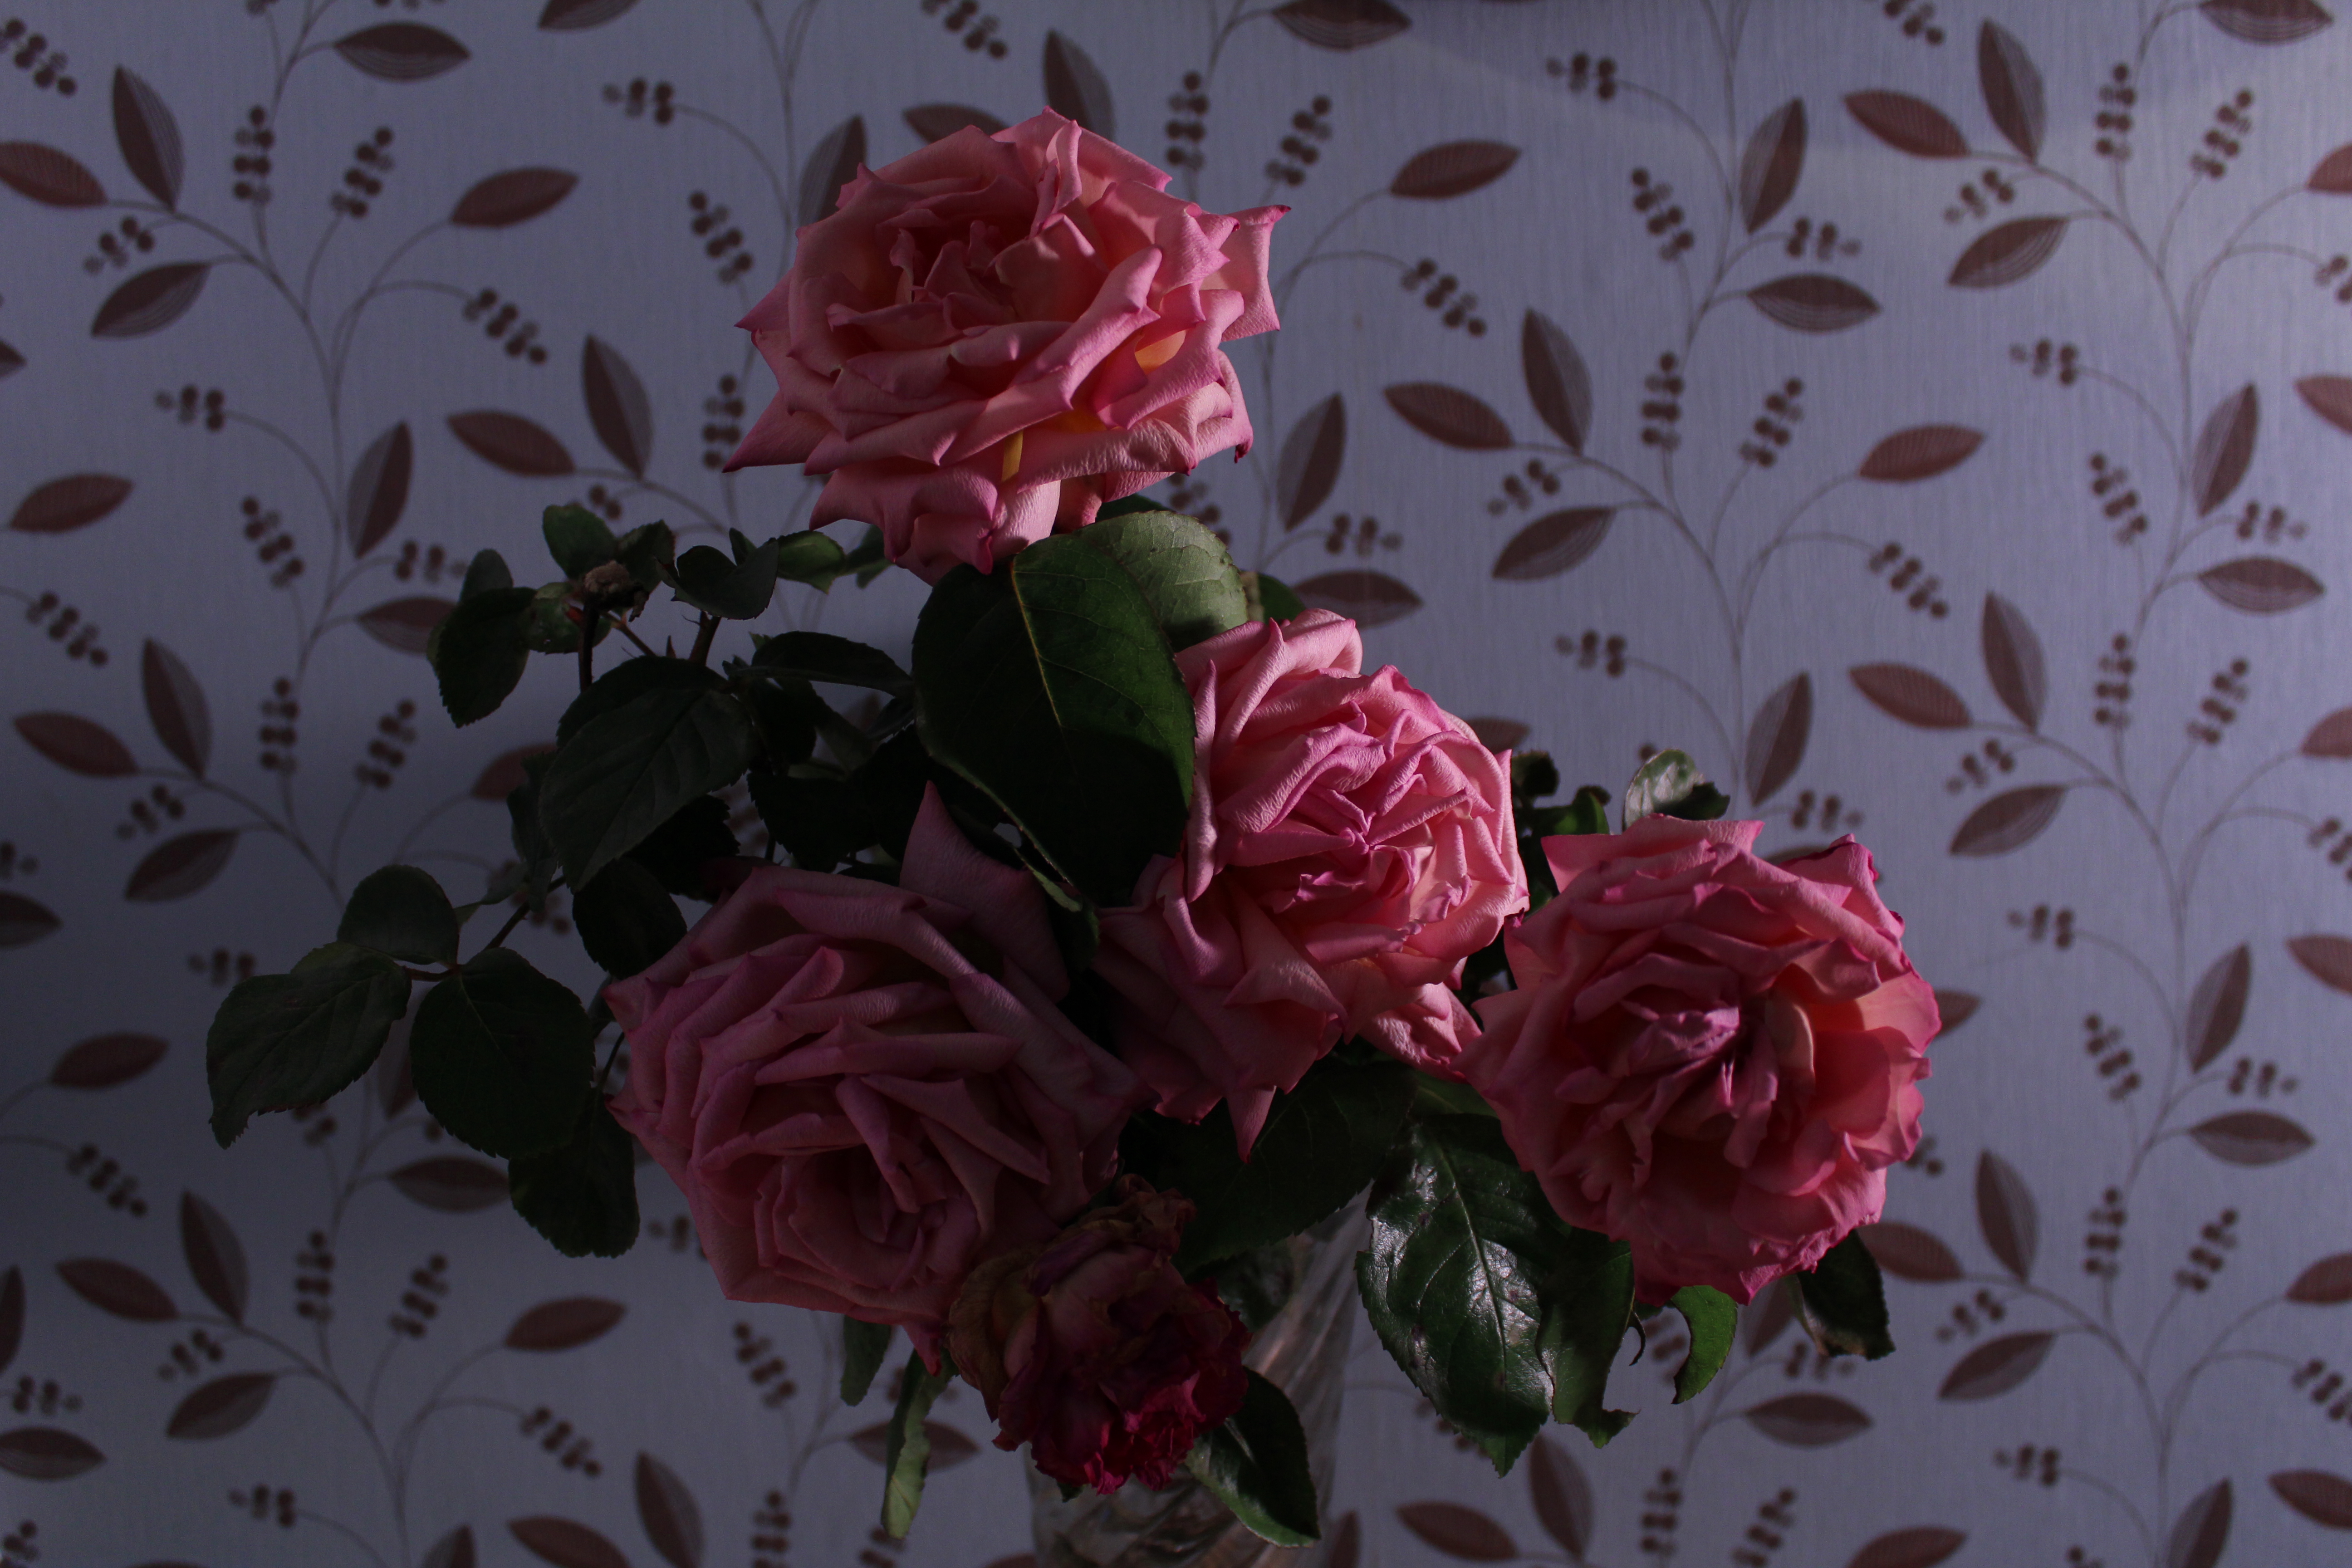
Colour:

IMG_9877

For this image, I decided to use natural lighting as I wanted to show the difference between natural and artificial lighting for this theme. I stood the figure in the sunlight but not directly as I didn’t want the strong sunlight taking the emphasis away on the colour.

IMG_9914

For this image I focused more closely in on the figure. I used the built in camera flash for this, and used the rolled up piece of paper technique I learnt in a previous exercise. I set the camera position and held the rolled up piece of paper so that it would flash only on the figure but mainly on the facial section. This turned out really well. The main focus is his bright blue nose, which wasn’t the main focus in the previous image. You are also able to see a large difference in the colour of the paint. The brown is a lot more darker with artificial lighting than natural lighting, and the same can be said for the colour of the aeroplane.

Overall Opinion:

Part four: Light

Before starting these projects, I researched more into shutter speeds, ISO’s and apertures as this would be essential for this set of projects. As I was still learning how to use settings on my new DSRL camera, I had to re-familiarise myself with the basics of lighting and exposures, and also how to change the settings or enhance the settings on my camera itself.

I enjoyed this set of projects. It was interesting to learn about the colour spectrum, and how lighting can effect the colour spectrum itself. Playing around with the WB settings on my camera helped understand this a lot more as I had never manually changed the WB setting myself until now, and learning that by changing it can cause a different colour temperature was really interesting and a technique which I will use in the future.

I have learnt a lot about how lighting can alter your photographs for better or worse. Learning new lighting techniques such as using reflectors, rolled up paper, diffusers and much more has helped me enhance my images along these projects and has helped me for the final assignment. I enjoyed the tungsten and fluorescent lighting exercise, as I never realised that different light bulbs can cause that much of a difference in a photograph. You don’t realise it until you do an exercise like that one and you understand that even changing the light bulb can help your image 100% more.

I do still have to update my research and photographer research as I haven’t been able to add that to the blog as of yet. I also have missed the Outdoors at night exercise, but I will also add the photographs one I have done that exercise.

Assignment Four:

It took me a while to think about this exercise as I was running a bit behind with the course as it was. When I read through the assignment, I was quite excited, as I would be able to use my home made diffuser again, and make use of my light box etc, as well as using the sun when it decided to show itself in my garden, as just lately it has been nothing but extremely dark clouds or rain. I really enjoyed this assignment and I am more than happy with my final results. Learning the new lighting techniques and applying them to the different themes helped much more. Looking back on some older assignments, I could have definitely used some of the lighting techniques I have learned here to help me. I did take a number of photographs with different lighting positions, angles, with diffusers and without, but the images I have chosen are the ones I believe portray the theme overall with the use of lighting only.

I will now await for my tutors response and post it on here. If there are any changes to be made, I will change them.

Excerise: Shiny Surfaces

Objects with surfaces that reflect brightly, such as anything of chrome or silver, are a special lighting problem. There are ways of dealing with them that make such a remarkable difference to a photograph that this is a very rewarding exercise to do.

First find an object that is so shiny that you can see your face in it. Choose an object you can lay flat and have the camera above the object. Set up the object, and your camera on a tripod, place a light close to the object. Take the first photograph, you should notice how unsatisfactory the image is.

Roll out a long tube made from tracing paper. Stick it together with tape and cover the shiny object. Attach the other end of the paper tube to your lens and stick it down. Or hold it in place. Then take a photograph. For the next set of photographs, play around with lighting in different positions and distances.

For this set of images, I kept the lighting at approximately 1 foot away from the shiny object. I then moved it right next to the shiny object for the other set of images.

I used settings ISO 200, 1/8 , F/5.6

Natural Light:

1 Natural Light

Artificial Light Above Object:

2 Above Light

Artificial Light To the Side of the Object:

3 Side Light

Artificial Light Behind Object:

4 Behind Light

Diffused Light to the side of the Object:

5 Diffused Side Light

Natural Light with Tracing Paper:

6 Natural Light Paper

Artificial Light Above Object with Tracing Paper:

7 Above Light Paper

Artificial Light Side of Object with Tracing Paper:

8 Side Light Paper

Artificial Light Behind Object with Tracing Paper:

9 Behind Light Paper

Diffused Light Side of Object with Tracing Paper:

10 Diffused Light Side Paper

Diffused Light Above Object with Tracing Paper:

11 Diffused Light Above Paper

For the next set of images, I moved the artificial light extremely close to the shiny object.

Artificial Light Above Object:

17 Above light close

Artificial Light Side of Object:

18 Side light close

Artificial Light Behind Object:

19 Behind light close

Diffused Light Side of Object:

20 Diffused light close

Diffused Light Above Object:

21 Diffused light above close

Artificial Light Above Object With Paper:

12 Above Light close paper

Artificial Light Side of Object With Paper:

13 Side light close paper

Artificial Light Behind Object With Paper:

14 Behind light close paper

Diffused Light Side of Object With Paper:

15 Diffused side light paper

Diffused Light Behind Object With Paper:

16 Diffused light behind paper

Overall Opinion:

The set of images taken with no tracing paper, give the ‘shiny’ surface a more dull tone. Whereas you can instantly see the difference with the images taken with the tracing paper. The shiny object becomes even more shiny and a lot brighter overall.

My overall favourite for this exercise would have to be the images taken with the diffused light with tracing paper. The lighting isn’t harsh like with the artificial light. You are able to see the detail with the stones clearer, and the metal is shiny overall.

Exercise: Concentrating Light

Sometimes, you may want the light to fall on just part of a scene, and want the surroundings in shadow. The easiest way to confine the lighting is to place a dark piece of card between the lamp and part of the subject. You can also roll a dark piece of card into a tube and hold it in front of your light or flash. Aim it at the part of the scene you want to remain lit. Then shoot your photograph.

I have a built in flash on my dsrl camera. I arranged some flowers on the table in a vase and took a normal photograph. I then rolled up a piece of black card into a long tube and held it in front of my flash, so the flash was almost inside the tube itself. I then aimed the tube at one of the roses and took the photograph. As the flash went off, it only fired light onto the desired rose, keeping the rest of the image in darkness.

IMG_9803

IMG_9805

I really enjoyed this exercise, It was very interesting. It will be a very useful technique to try out in the future. I like how it focused your eye on the one rose.

Exercise: Contrast and Shadow Fill

For this exercise, you needed a camera, tripod, white card, kitchen foil and still life objects.

You were asked to set up a still life. Something which was accessible to and had enough room around it to be able to move the light around the still life.

You were asked to set the camera up on a tripod and have it at the same level as the still life. Fix your light source about 2 or 3 feet away from the still life and to one side.

  • Your first photograph should be of the still life with the naked light.
  • Second should be with a diffuser
  • White card placed 3 feet away from the still life, to the opposite side of the light. Facing the still life. With diffuser
  • Move the white card twice as close. With diffuser.
  • Attach kitchen foil to the white card. Dull side facing out. Same distance as before. With diffuser.
  • Kitchen foil shiny side facing still life. Same distance as before. With diffuser.
  • Crumpled kitchen foil. Shiny side facing out. Same distance as before. With diffuser.

Compare the results.

I used the settings. ISO 400. 1/6 , F/3.5.

Naked Light:

1 full light

Diffuser:

2 diffuser

White card (2 feet approx. away):

3 white card 3 foot

White card closer:

4 white card closer

Kitchen Foil, Dull Side:

5 dull foil

Kitchen Foil, Shiny Side:

6 shiny foil

Crumpled Kitchen Foil, Smoothed Out:

7 crumpled foil

Differences:

The biggest difference you can see is between the naked lamp, and the diffuser. The photograph taken with the naked lamp is very bright and the light is harsh, whereas when taken with the diffuser, the light is less harsh.

The image taken whilst the card was approx. 2 feet away shows an overall bright image, however when the card was moved even closer, in my opinion, it became a lot darker. I was expecting the light to reflect off of the card a lot more when it was moved closer, so that was a surprise to me.

When I used the kitchen foil, I was also expecting the shiny side to reflect the light a lot more than what it did. The crumpled and smoothed out foil seemed to reflect more light than the smooth shiny side which was un expected.

By doing this exercise, I have learnt that different materials and techniques allow you to reflect light or shade light from certain parts of your image, and can make an overall better image for you.

Exercise; The lighting angle

Once you have worked out a manageable system for diffusing a single light, you can now experiment with using it from different directions.

I decided to use the same figuring I used for the previous exercise.

I kept the camera on a tripod aimed horizontally at the subject.

For the first set of images, the diffuser was fitted to the lamp. I then kept it at the same level as the subject and camera. I took the first image with it facing directly at the subject, second was to the side of the subject, the third was behind the subject whilst being off to the side, fourth was directly behind the subject but not in shot.

Light Directly In front: Light at same level

In front

Light To the side: Light at same level

Side

Light to the side and behind: Light at same level

Side behind

Light directly behind: Light at same level

IMG_9729

The next set of photographs were the same, however, the light was above the subject but pointed down at an angle of about 45 degrees.

Light suspended overhead facing the object

Infront

Light suspended to the side

To the side

Light suspended to the side, behind

Side behind

Light suspended directly behind object

directly behind

Exericse: Softening the Light

Set up a still life arrangement. Use a tripod for this exercise. Face the camera so it is aimed at a slight angle downwards. Fix or hold a naked lamp more or less overhear, pointing down onto your object.

Using a diffused light source to soften the shadows and highlights, take two photographs. One with just the naked lamp, and the other with a translucent material held between the lamp and the subject but not in the shot.

There will be two different exposure settings, look at the results and note down exactly what you see as the differences and the two exposures.

I used a figurine which I stood on a table against the wall. I stood my tripod directly in front of the table. I then asked someone to hold the lamp above the model for me.

Naked Lamp:

IMG_9717

F/4.5 , 1/20, ISO 200

I have this translucent material which I asked to be held up in front of the lamp.

DSCF8590

With Diffuser:

IMG_9718

F/4.5 , 1/8 , ISO 200

Differences:

The shadows in the first image are very dark (Black) almost. The highlights and shadows on the subject are very strong and defined.

The second image however has no shadow, the highlights and shadows on the subject are less noticeable. However the image overall is better than the first.

Exercise: Outdoors at Night

The best place for this night time project is a city centre. They have plenty of brightly lit buildings and streets. The aim of this exercise is to explore the variety of lighting effects and colour in artificial light. A tripod and camera release might be useful for longer exposures, but not essential if you decide to take photographs with high ISO settings.

Try to include in your shooting, the following:

  • A floodlit building, look for a viewpoint from where the lights themselves are hidden
  • A brightly lit store front
  • A large interior with many people, such as a shopping centre. Do not use a tripod for this image.
  • A raised view looking along a busy road, such as from a pedestrian overpass. The idea is to catch the headlights and tail lights of traffic as streaks. The longer the exposure time, the more dramatic the effect will be. .


WILL BE UPDATED SOON

Exercise: Tungsten and Florescent Lighting

For this exercise, you had to find a room fairly lit by tungsten lights. If you have fluorescent lamps, turn them off. Wait until just after sunset, when there is only a little daylight left. With the curtains open, stand close to the window and look out for one minute, until your eyes become adjusted. Turn and look at the room light. Note what colour it seems to be the first instant you see it. When your eyes have adjusted to the room light. Quickly look out of the window once more. Note what colour the daylight seems to be.

You then had to measure the light level in the room with your cameras meter. Take several readings in different parts of the room, including close to the lamp and one in the darkest corner.

Compose a photograph in which both the interior lit by tungsten lamps and the exterior at dusk are both visible. Wait until the light levels inside and outside are approximately equal, and take three photographs, as follows: With the white balance set to auto, With the white balance set to daylight, With the white balance set to tungsten. Compare the results. What differences do you see.

For the second part of the exercise, you were asked to find two different interiors which are lit by fluorescent lamps. If at possible, try and find one interior which is lit by small CFL lamps.

Take two images of each room. One with white balance set to auto, and the other set to Fluorescent.

Part One:

After looking out the window for a while, and then turning back round into the room which were lit by tungsten lights, I noticed that the colour in the room was a orange/yellow colour. I then let my eyes adjust to the tungsten lighting, before then looking out the window. I noticed that the colour was a strong white with a hint of a blue colour tone to it.

I took several meter readings. The required ISO was 200 which I then set. I opened up the aperture to f/4. 5 . After reading the meter readings around the room, I set the shutter speed to 1/10

White Balance: Auto

Auto wb

White Balance: Daylight

daylight wb

White Balance: Tungsten

tungsten

White Balance: Fluorescent White

white fluorescent

Differences: The closets match to how the colours in the room are in real life, would have to be the image taken with the WB set to tungsten. The white balance set to Auto and Daylight, seem to be similar in both photographs.

Part Two:

One interior lit by CFL lights. I used the same room and just changed the light bulb from a tungsten bulb to a fluorescent bulb.

White Balance: Auto

IMG_9741

White Balance: Daylight

IMG_9742

White Balance: Tungsten

IMG_9744

White Balance: White Fluorescent

IMG_9745

Differences:

The white balance set to Auto and Daylight, seem to be similar in both photographs. However, the white balance set to White Fluorescent seems to be more realistic than any of the others. The colours in the room are near enough the same colour in the White Fluorescent WB photograph.

Exercise: Cloudy weather and Rain

Part One:

First part of this exercise, you will have to photograph the same view in sunlight and again under cloud. You can do this at different times or on different days. Choose two or three different subjects. Note the difference in exposures. Keep the White Balance set to Sunlight/Daylight.

Put the pairs of images together and see how many f/stops difference there was between the sunny and cloudy versions. Note if there is a colour difference in the photograph. You should be able to see that the cloudy shots will be slightly Bluer in colour.

First Pair:

Sunny F/5 ,  1/500, ISO 200

IMG_9396

Cloudy F/5.6 , 1/60, ISO 200

IMG_9519

The cloudy image appears more blue in colour, whereas the sunny image appears more orange in colour.

Second Pair:

Sunny F/5 , 1/250, ISO 100

IMG_9167

Cloudy F/5 , 1/500, ISO 100

IMG_9243

Third Pair:

Sunny f/4.5 , 1/100, ISO 200

IMG_9068

Cloudy F/5 , 1/40, ISO 200

IMG_9518

Even though the first image of the lamp was taken in the sunlight, I believe that this is the image which is more Blue in colour. The image taken in cloud appears less blue in colour.

Fourth Pair:

Sunny f/9 , 1/200, ISO 100

IMG_9386

Cloudy F/8 , 1/160, ISO 100

IMG_9497

The image taken in the cloud appears more blue in colour.

Part Two:

For the second part of this exercise, take three photographs outdoors, on an overcast day. Make good use of enveloping and shadow less light. Look for an object with strong detail or a strong colour.

IMG_9245

IMG_9404

Part Three:

For the third part of the exercise, you will need rain. Rain can produce more interesting visual effects, glistening pavements, lots of reflections, patterns of raindrops on glass and even rainbows. Go out and photograph rain!!

IMG_9498

IMG_9506

IMG_9508

DSCF3260

IMG_9511

IMG_9513

IMG_9521

IMG_9499

IMG_9524

IMG_9523

IMG_9692

IMG_9688

IMG_9695