For this exercise, you were asked to find a subject which is clear and set within a large, even background.
I decided to use two subjects with two completely different backgrounds.
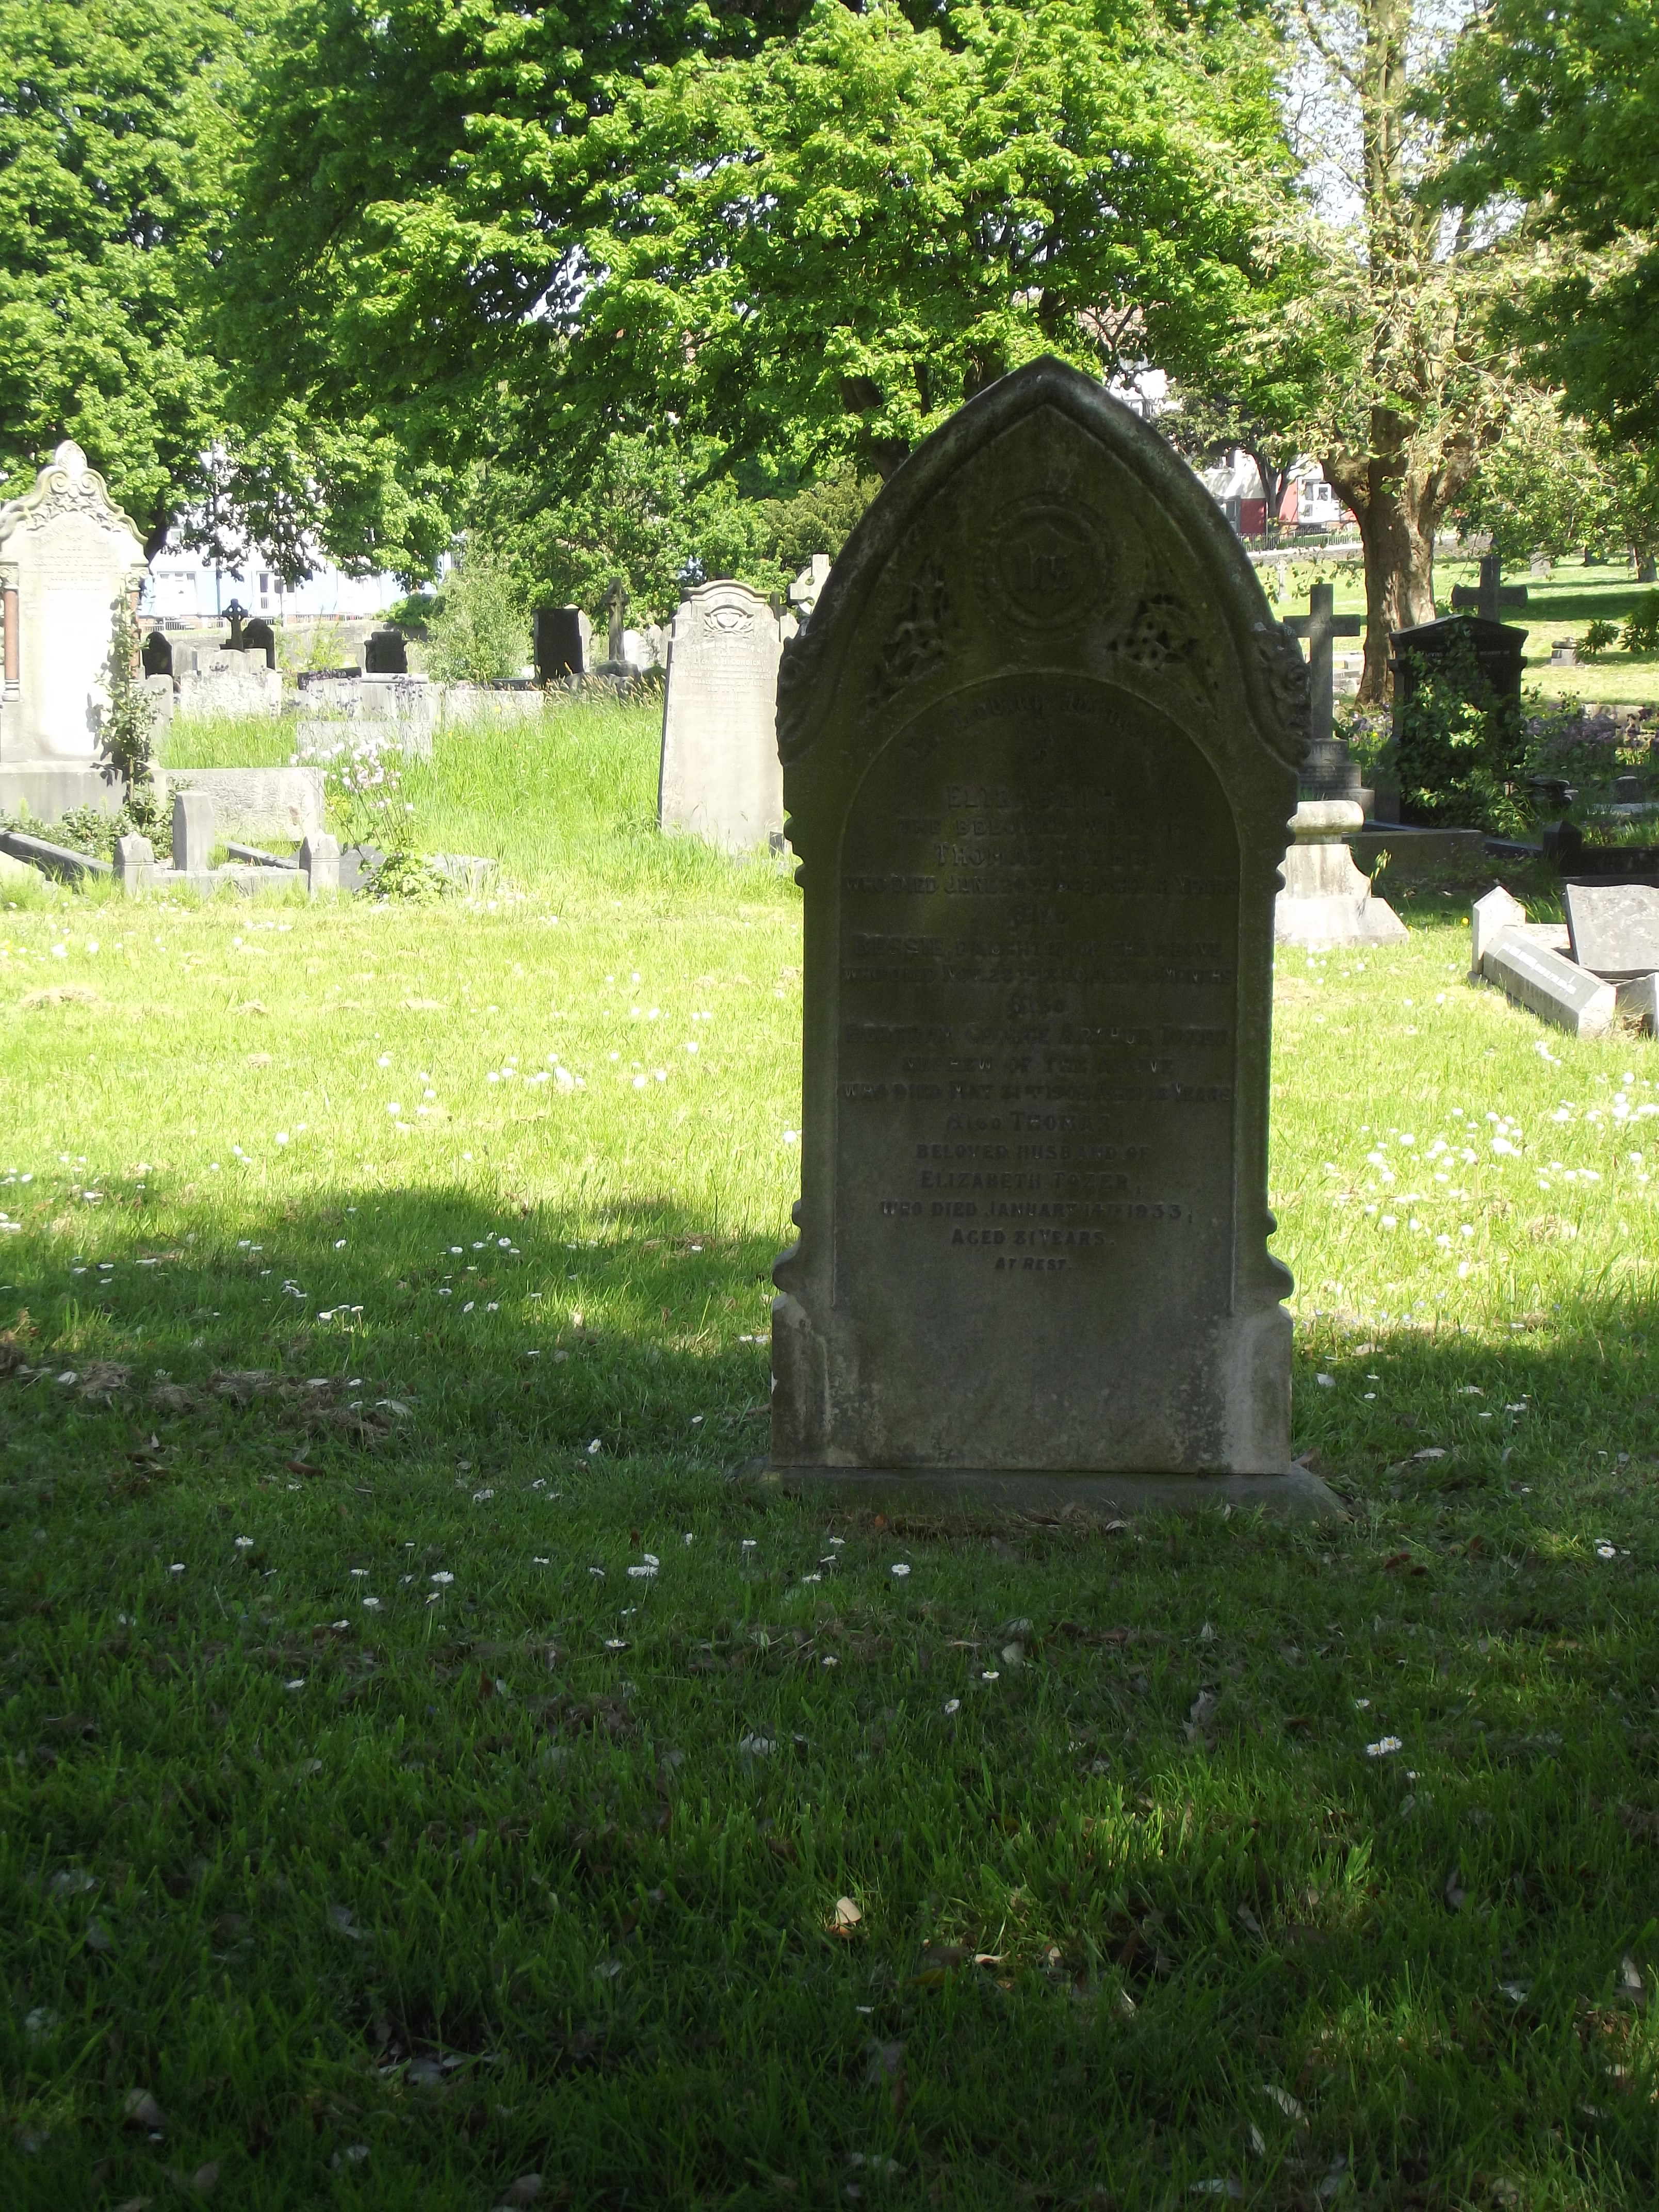
The first would be a gravestone set within the graveyard, the other would be a birdcage on a pink blanket.
You were asked to take a series of photographs in which the subject would be placed in different positions in the frame.
For this series of photographs, I used my tripod as it would reduce any camera shake. I would also be able to move the subject in the frame by gradually loosening the head of the tripod, and tilting the camera.
I used the ‘Best framing; tool which I have on my camera. It divides the frame with small squares which enable you to choose where your subject is positioned.
The first photograph needed the subject to be positioned in the centre of the frame.
First Photograph:

The first photograph was taken using
Shutter Speed:1/125 sec
ISO:64
Aperture:F/4.2
Distance: Focal Length 12.3mm (equivalent to 73mm on a 35mm film camera)
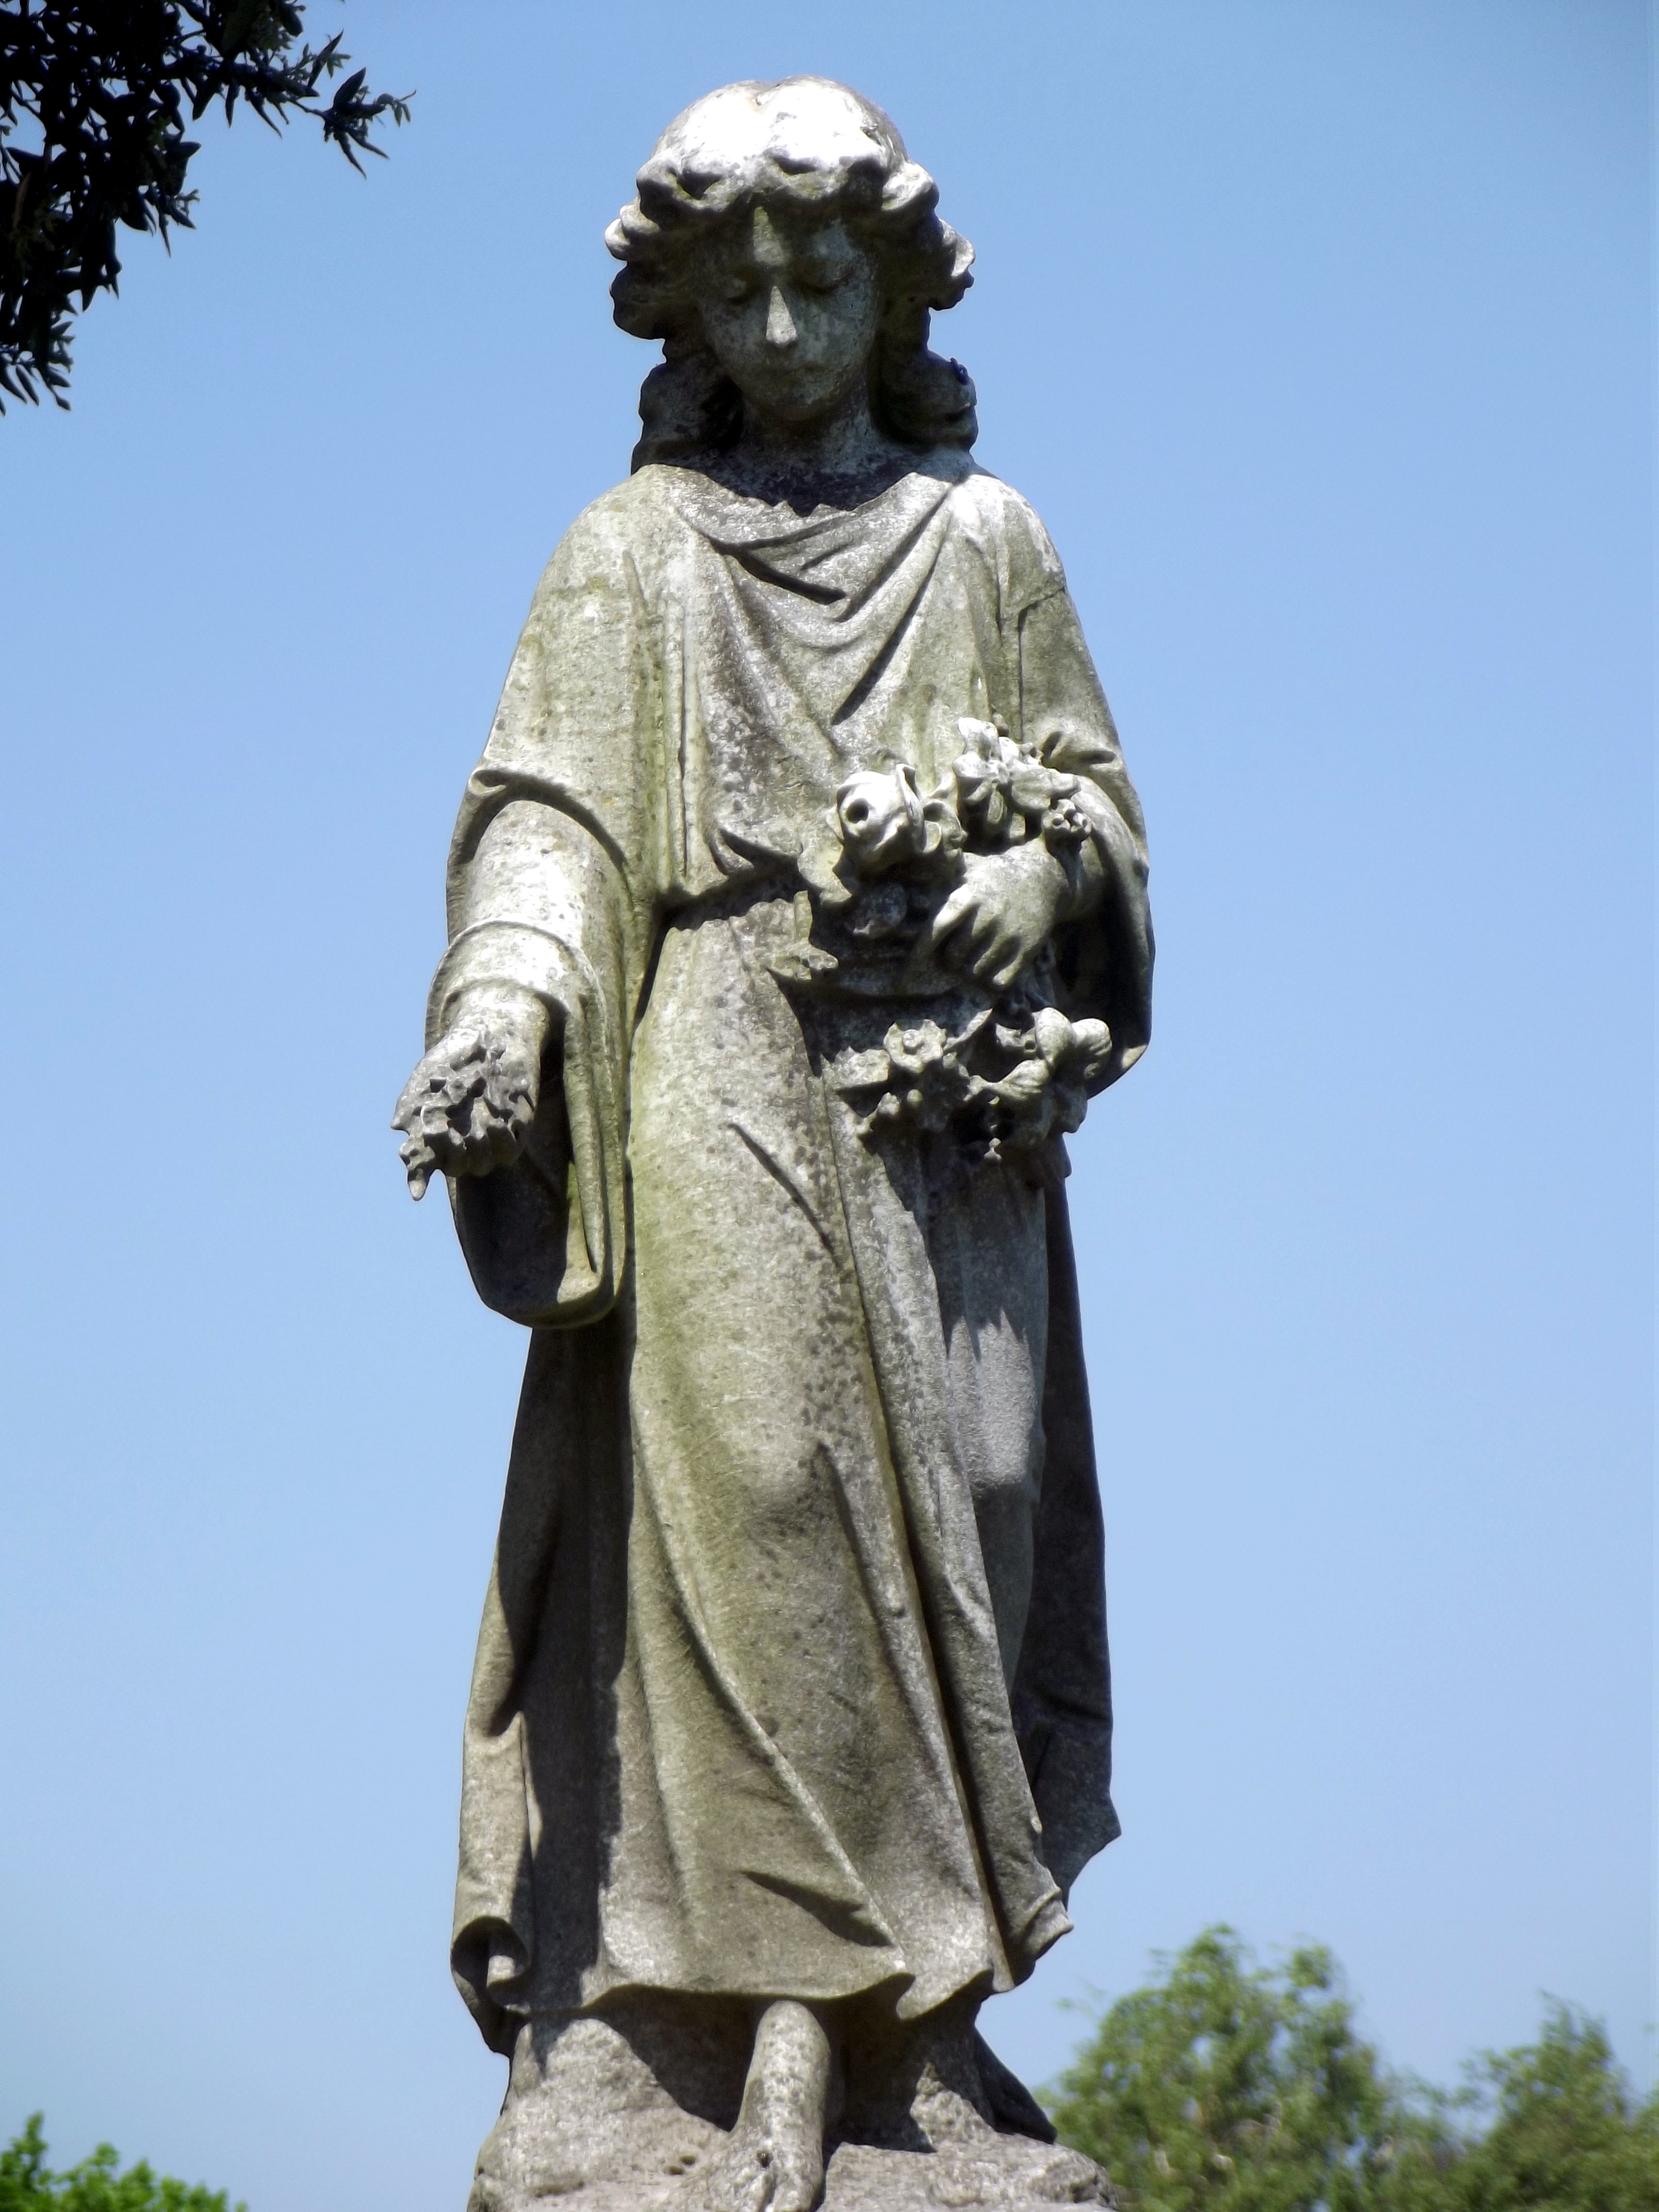
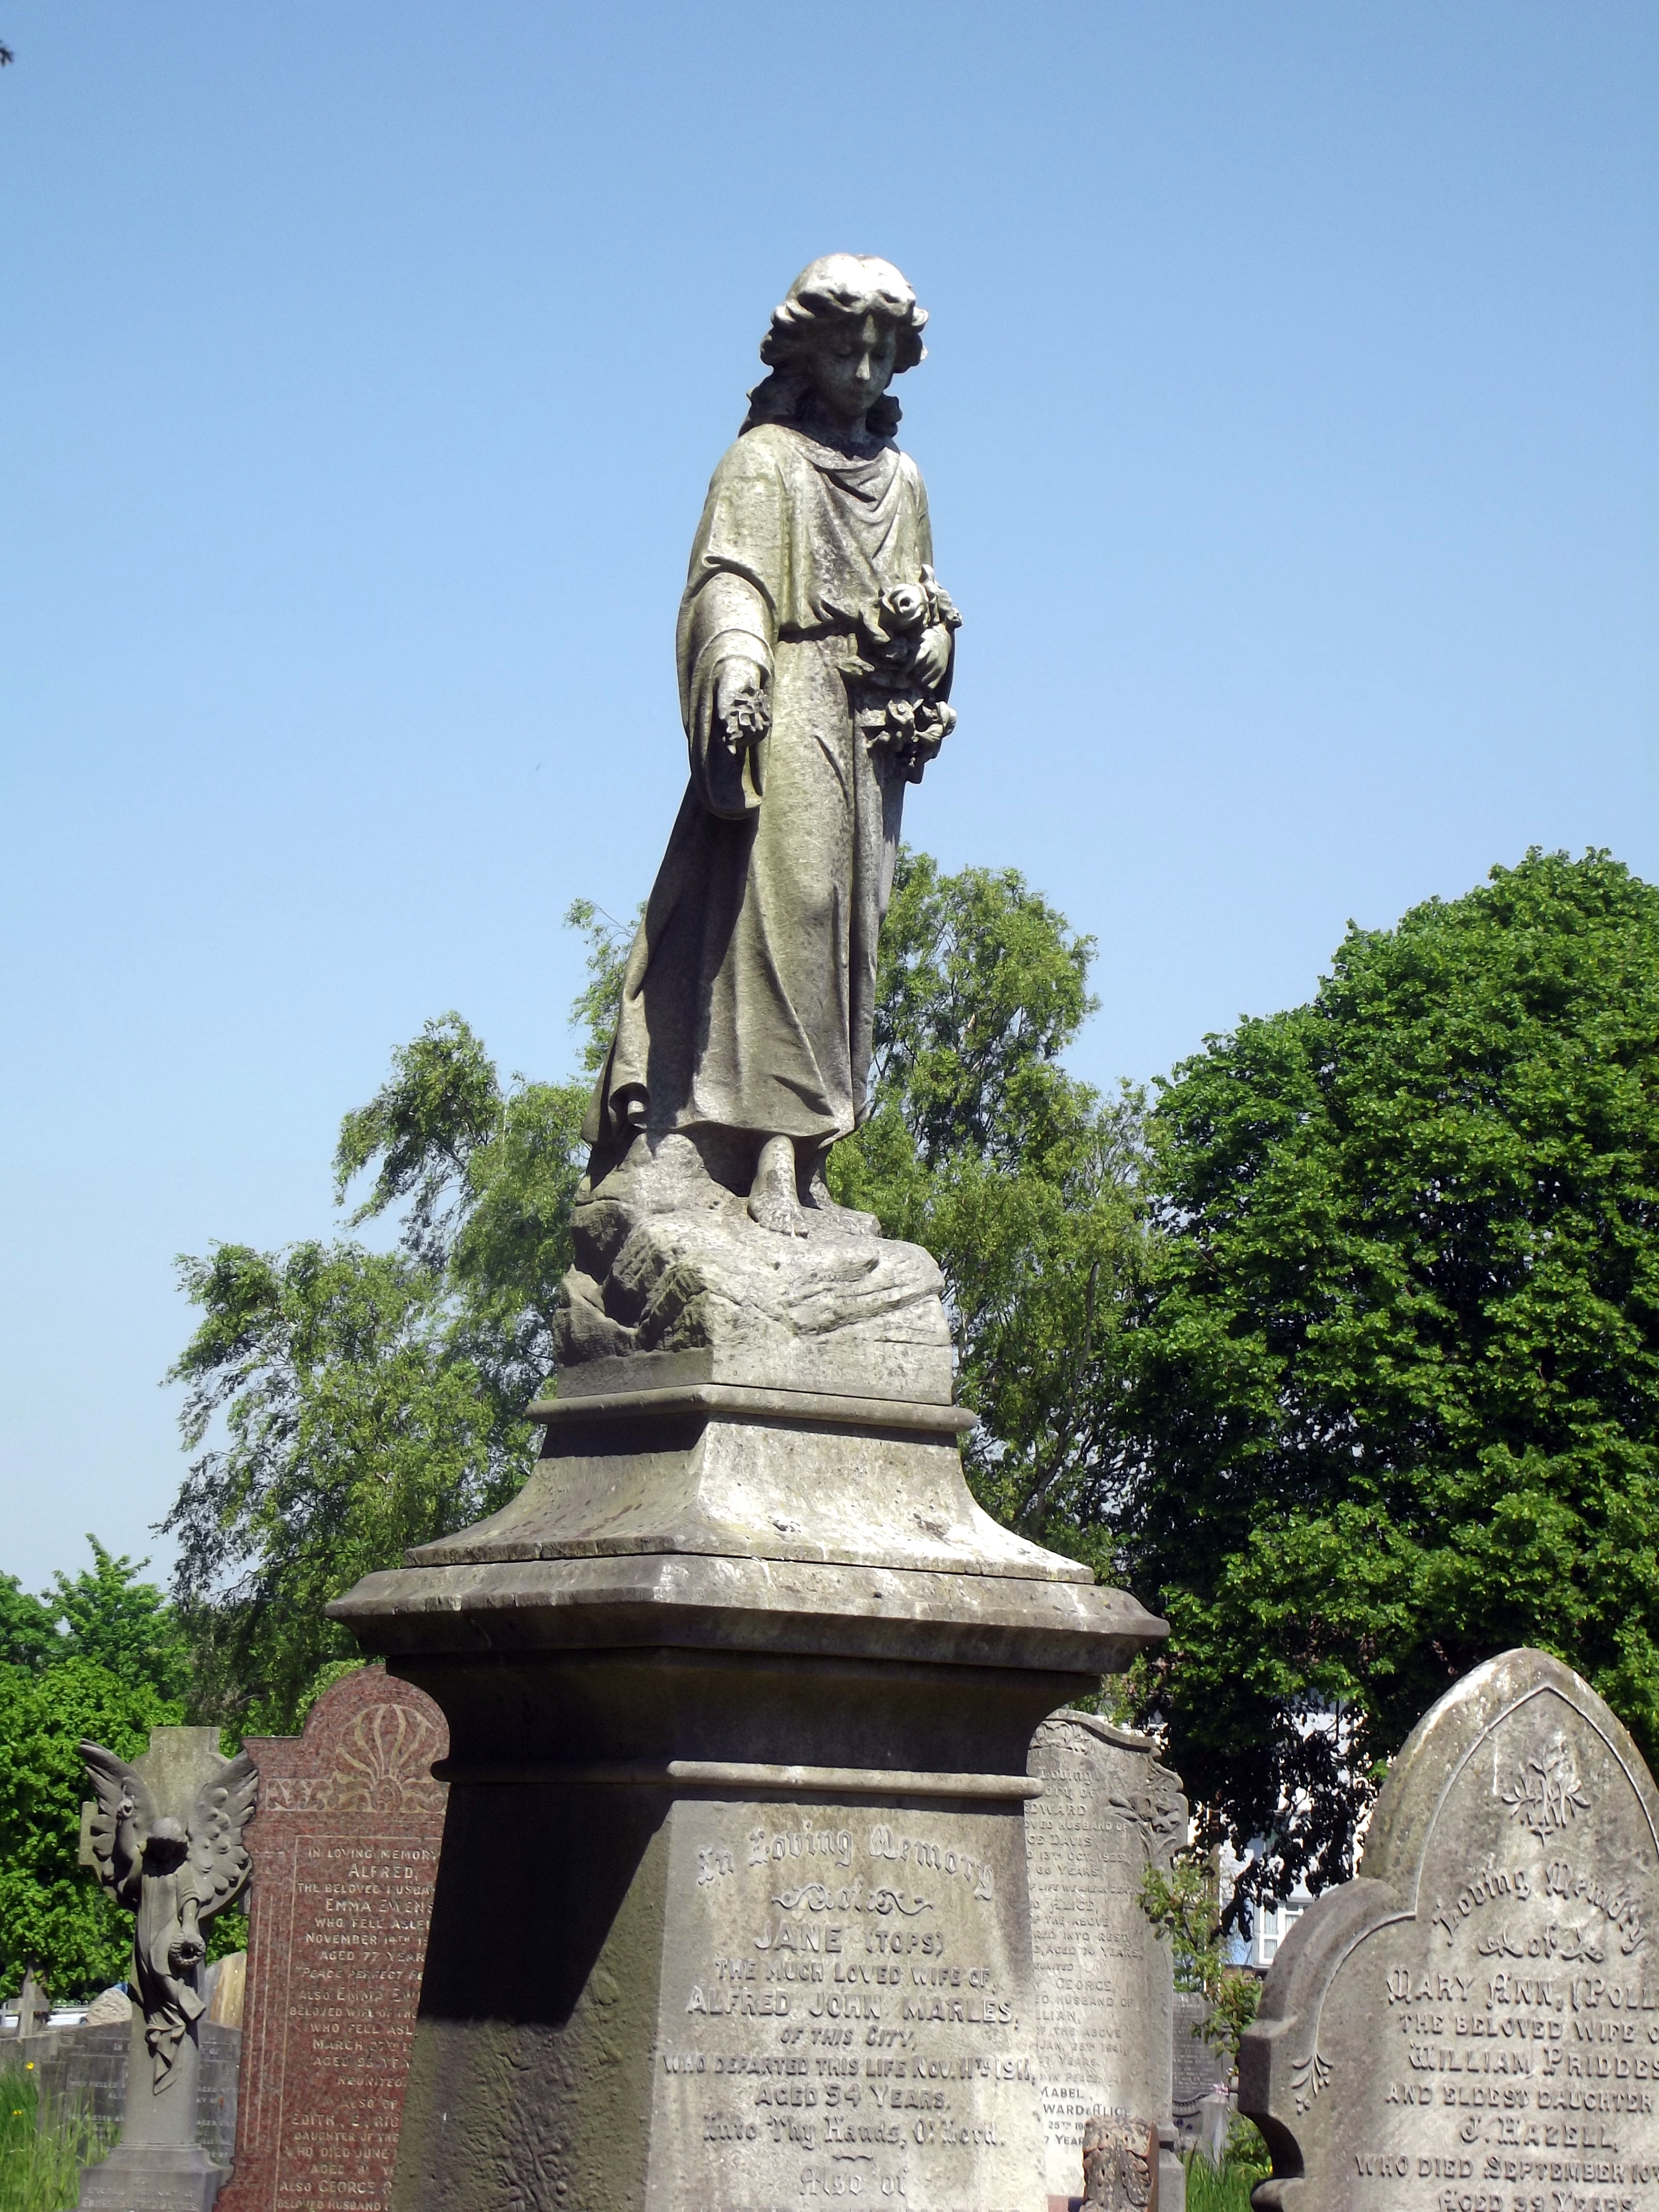
Using the ‘Best framing tool’, I positioned the headstone in the centre box in the viewfinder. This would make the headstone the main focal point in the photograph.
Second Photograph:
The second photograph had to position the subject a little way from the centre.

The second photograph was taken using
Shutter Speed:1/125 sec
ISO:64
Aperture:F/4.2
Distance: Focal Length 12.3mm (equivalent to 73mm on a 35mm film camera)
Using the ‘Best framing tool’, I positioned the headstone in the centre box of the left-hand side in the viewfinder. This would make the headstone appear off centre towards the left hand side of the photograph.
Third Photograph:
I decided to position the headstone in the right hand area of the photograph, whilst remembering to keep it off-centre.

The Third photograph was taken using
Shutter Speed:1/120 sec
ISO:64
Aperture:F/4.2
Distance: Focal Length 12.3mm (equivalent to 73mm on a 35mm film camera)
Using the ‘Best framing tool’, I positioned the headstone in the centre of the box in the right hand area of the viewfinder. This would make the headstone appear off centre towards the right hand side of the photograph.
Fourth Photograph:
The fourth photograph had to have the subject positioned in a corner of the frame.

The fourth photograph was taken using
Shutter Speed:1/200 sec
ISO:64
Aperture:F/4.2
Distance: Focal Length 12.3mm (equivalent to 73mm on a 35mm film camera)
Using the ‘Best framing tool’, I positioned the headstone in the centre box in the bottom right hand corner in the viewfinder. This would make the headstone sit in the right hand corner of the photograph.
Fifth Photograph:
For this photograph I decided to position the head stone in left hand corner.

The fifth photograph was taken using
Shutter Speed:1/160 sec
ISO:64
Aperture:F/4.2
Distance: Focal Length 12.3mm (equivalent to 73mm on a 35mm film camera)
Using the ‘Best framing tool’, I positioned the headstone in the centre box of the left hand bottom corner in the viewfinder. This would make the headstone sit in the bottom left hand corner of the photograph.
Sixth Photograph:
I positioned the headstone in the top left hand corner of the photograph

The sixth photograph was taken using
Shutter Speed:1/100 sec
ISO:64
Aperture:F/4.2
Distance: Focal Length 12.3mm (equivalent to 73mm on a 35mm film camera)
Using the ‘Best framing tool’, I positioned the headstone in the centre box of the top left hand corner in the viewfinder. This would make the headstone sit in the top left hand corner of the photograph.
Seventh Photograph:
I positioned the headstone in the top right hand corner of the photograph.

The seventh photograph was taken using
Shutter Speed:1/90 sec
ISO:64
Aperture:F/4.2
Distance: Focal Length 12.3mm (equivalent to 73mm on a 35mm film camera)
Using the ‘Best framing tool’, I positioned the headstone in the centre box in the right hand corner in the viewfinder. This would make the headstone sit in the right hand corner of the photograph.
- When your photographs have been processed, lay them out and put them in order of preference. Which version appears to work the most comfortably and which the least?
- As you asses what you have done concentrate on the relationship between the subject and its background. When the subject was placed in the middle of the frame, the subject will certainly be prominent, but the background may have no central mass, it has been ‘puncture’ so that it just surrounds the subject equally. Compare this version with your others. Do you think this makes the subject and background work together?
- My personal preference: Most – Least
Photograph 1, Photograph 4, Photograph 5, Photograph 2, Photograph 6, Photograph 3, Photograph 7
In my opinion, the subject fits most comfortably in the middle of the frame. You are able to see the background as well as the grass in the foreground. Having the subject positioned in the centre of the photograph, draws your eye to the image more.
The photograph that is least comfortable would have to be photograph 7. There is too much grass in the foreground and not enough background.
2. When the subject is positioned in the middle of the frame, the background may have no central mass making it surround the subject equally. Compare this version with your others. Do you think this makes the subject and background work together? Comparing Photograph 1 with Photograph 2, 4 and 7. I will determine whether or not positioning the subject in a different position of the frame, will make the subject and the background work better together.
Photograph 2: The subject in this photograph is positioned off centre towards the left hand side. The background surrounds the subject just like when the subject is positioned central in the frame. With this photograph, you become more aware of the background, as the subject is not central, however, the background isn’t too prominent, you are still drawn in by the head stone.In my opinion, the background does work best with subject.
Photograph 4: The subject in this photograph is positioned in the bottom right hand corner of the frame. The background in this photograph is more prominent than the previous two. The colours from the tree and the detail on the head stones behind are what draw your eye in first, then you look at the head stone in the bottom corner.In my opinion, the background doesn’t work best with the subject.
Photograph 7: The subject in this photograph is positioned in the top right hand corner. There is more foreground than there is background. Your eye is more drawn to the foreground and the headstone rather than the background. In my opinion, the background doesn’t work with the subject.
For my second series of photographs, I decided to use a simple white birdcage on a plain pink background. I wanted to see whether or not using a plain background, could enable the subject to be more prominent in the frame. I didn’t want anything in the background to distract your attention.
For this exercise, I also used the ‘Best framing’ tool.
First Photograph:
The first photograph needed the subject to be positioned in the middle of the frame.

The first photograph was taken using
Shutter Speed:1/34 sec
ISO:800
Aperture:F/3.4
Distance: Focal Length 6.3mm (equivalent to 37mm on a 35mm film camera)
Using the ‘Best framing tool’, I positioned the Birdcage in the centre box in the viewfinder. This would make the birdcage the main focal point in the photograph.
Second Photograph:
The second photograph had to position the subject a little way from the centre.

The second photograph was taken using
Shutter Speed:1/30 sec
ISO:800
Aperture:F/3.4
Distance: Focal Length 6.3mm (equivalent to 37mm on a 35mm film camera)
Using the ‘Best framing tool’, I positioned the Birdcage in the centre box of the right hand side in the viewfinder. This would make the birdcage appear off centre in the photograph.
Third Photograph:
The third photograph had to position the subject in a corner of the frame.

The third photograph was taken using
Shutter Speed:1/26 sec
ISO:800
Aperture:F/3.4
Distance: Focal Length 6.3mm (equivalent to 37mm on a 35mm film camera)
Using the ‘Best framing tool’, I positioned the Birdcage in the centre box of the top right hand corner in the viewfinder.
Fourth Photograph:
The fourth photograph had to position the subject in a corner of the frame.

The fourth photograph was taken using
Shutter Speed:1/20 sec
ISO:800
Aperture:F/3.8
Distance: Focal Length 6.3mm (equivalent to 37mm on a 35mm film camera)
Using the ‘Best framing tool’, I positioned the Birdcage in the centre box of the bottom right hand corner in the viewfinder.
Fifth Photograph:
The fifth photograph had to position the subject in a corner of the frame.

The fifth photograph was taken using
Shutter Speed:1/28 sec
ISO:800
Aperture:F/3.8
Distance: Focal Length 6.3mm (equivalent to 37mm on a 35mm film camera)
Using the ‘Best framing tool’, I positioned the Birdcage in the centre box of the bottom left hand corner in the viewfinder.
- When your photographs have been processed, lay them out and put them in order of preference. Which version appears to work the most comfortably and which the least?
- My personal preference: Most – Least
Photograph 1, Photograph 5, Photograph 2, Photograph 3, Photograph 4.
In my opinion, the subject fits most comfortably in the middle of the frame. Having the subject positioned in the centre of the photograph, draws your eye to the image more. The photograph that is least comfortable would have to be photograph 4. The subject doesn’t fit the frame right, In my opinion it looks awkward.
Overall Opinion:
I really enjoyed this exercise. Using the viewfinder, I was able to view a subject and position the camera different ways. After looking at the final series of photographs with the subject in different positions of the frame, I was able to see that subjects can look different depending on where they are positioned. They can be more prominent or less prominent. The background can be more or less defined. Looking back on this exercise, I have learnt that you should take as many different photographs with the subject in different positions in the frame, as you are unaware of what the photograph will look like once it’s processed. It may look like a good shot in the viewfinder, but it may not be what you wanted once it’s been processed. By taking multiple photographs with the subject in different positions, you have the choice of what photograph looks the best in then. This exercise has given me more confidence when taking photographs. I will take more in order to give myself that choice at the end.

 With this image, I decided to focus mainly on the berry with the piece of string attached to it. I decided to crop it horizontally as I wanted to see it more clearly and the up close detail.

 With this image, I wanted to focus in more on her facial area and include as much detail on the cards. I wanted to produce some sort of portrait. I decided to crop it vertical rather than horizontal as I only wanted her top half in the frame.
")
 With this image, I wanted to focus in mainly on the watch which was hanging over the mirror at the back. I liked the effect of it hanging off centre, and wanted to capture the detail on the watch face.
")


")
")
")
")


 of DSCF4541")
 of DSCF4541")