Exercise: Variety with a low sun

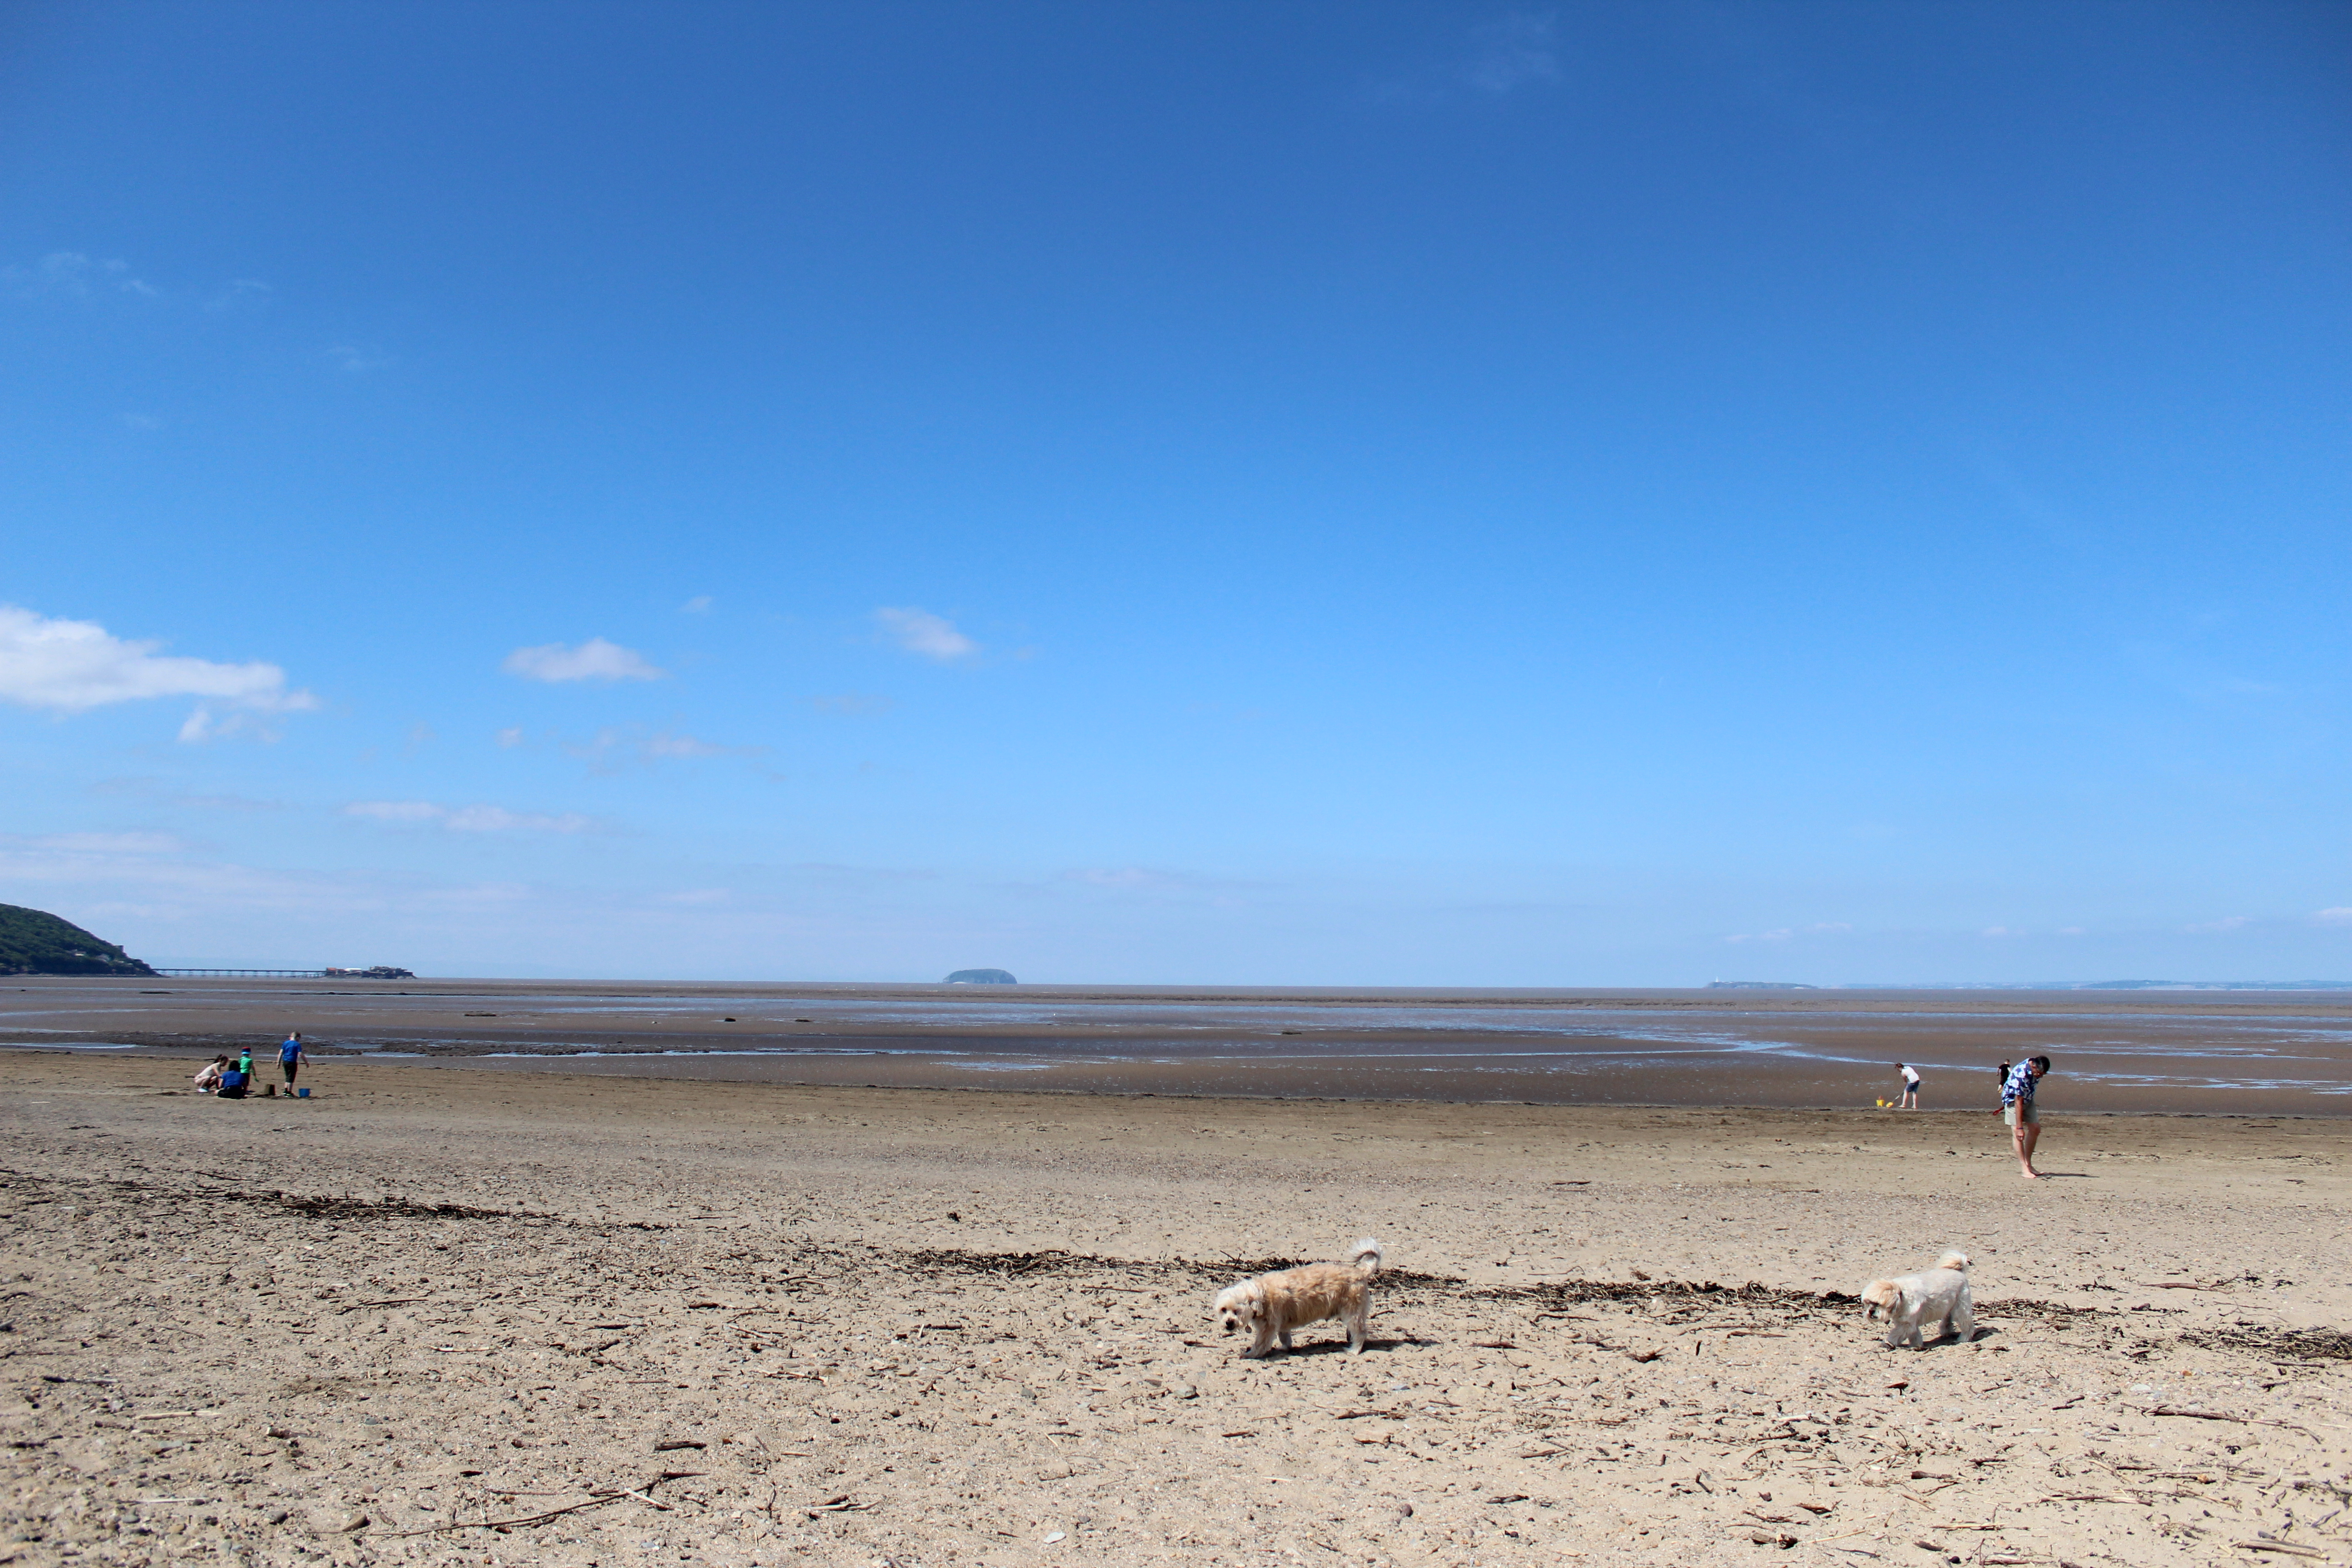
This exercise is used to demonstrate some of the advantages of shooting when the sun is low. Obviously, there is no sudden moment in the day when the sunlight switches between low and high, but as a guide, the sun is low within about two hours of sunrise and sunset, except in winter when it stays low for much of the day.

You can choose any subjects for this project, but they must be in sunlight. Take as many pictures as possible, but aim to produce at least 4 as a final result.

  • Frontal Lighting: With the sun behind the camera, striking the subject fully. The lighting effect should appear intense, and any shiny parts of the subject will reflect the sun.
  • Side Lighting: With the sun to the left or right. More or less, half of the subject will be lit, and half will be in shadow.
  • Back Lighting: Shoot towards the sun light. Depending on whether the sun is in view or hidden behind the subject, the exposure may be difficult to predict.
  • Edge Lighting: This is a special condition for shooting towards the sun, in which the sun is outside the viewfinder frame and the edge of the subject is lit. This is not a common type of lighting and you may have to work hard to find it. If you choose a small or moveable subject, you could move it into position against a shaded backdrop because a dark background shows up rim lighting more clearly.

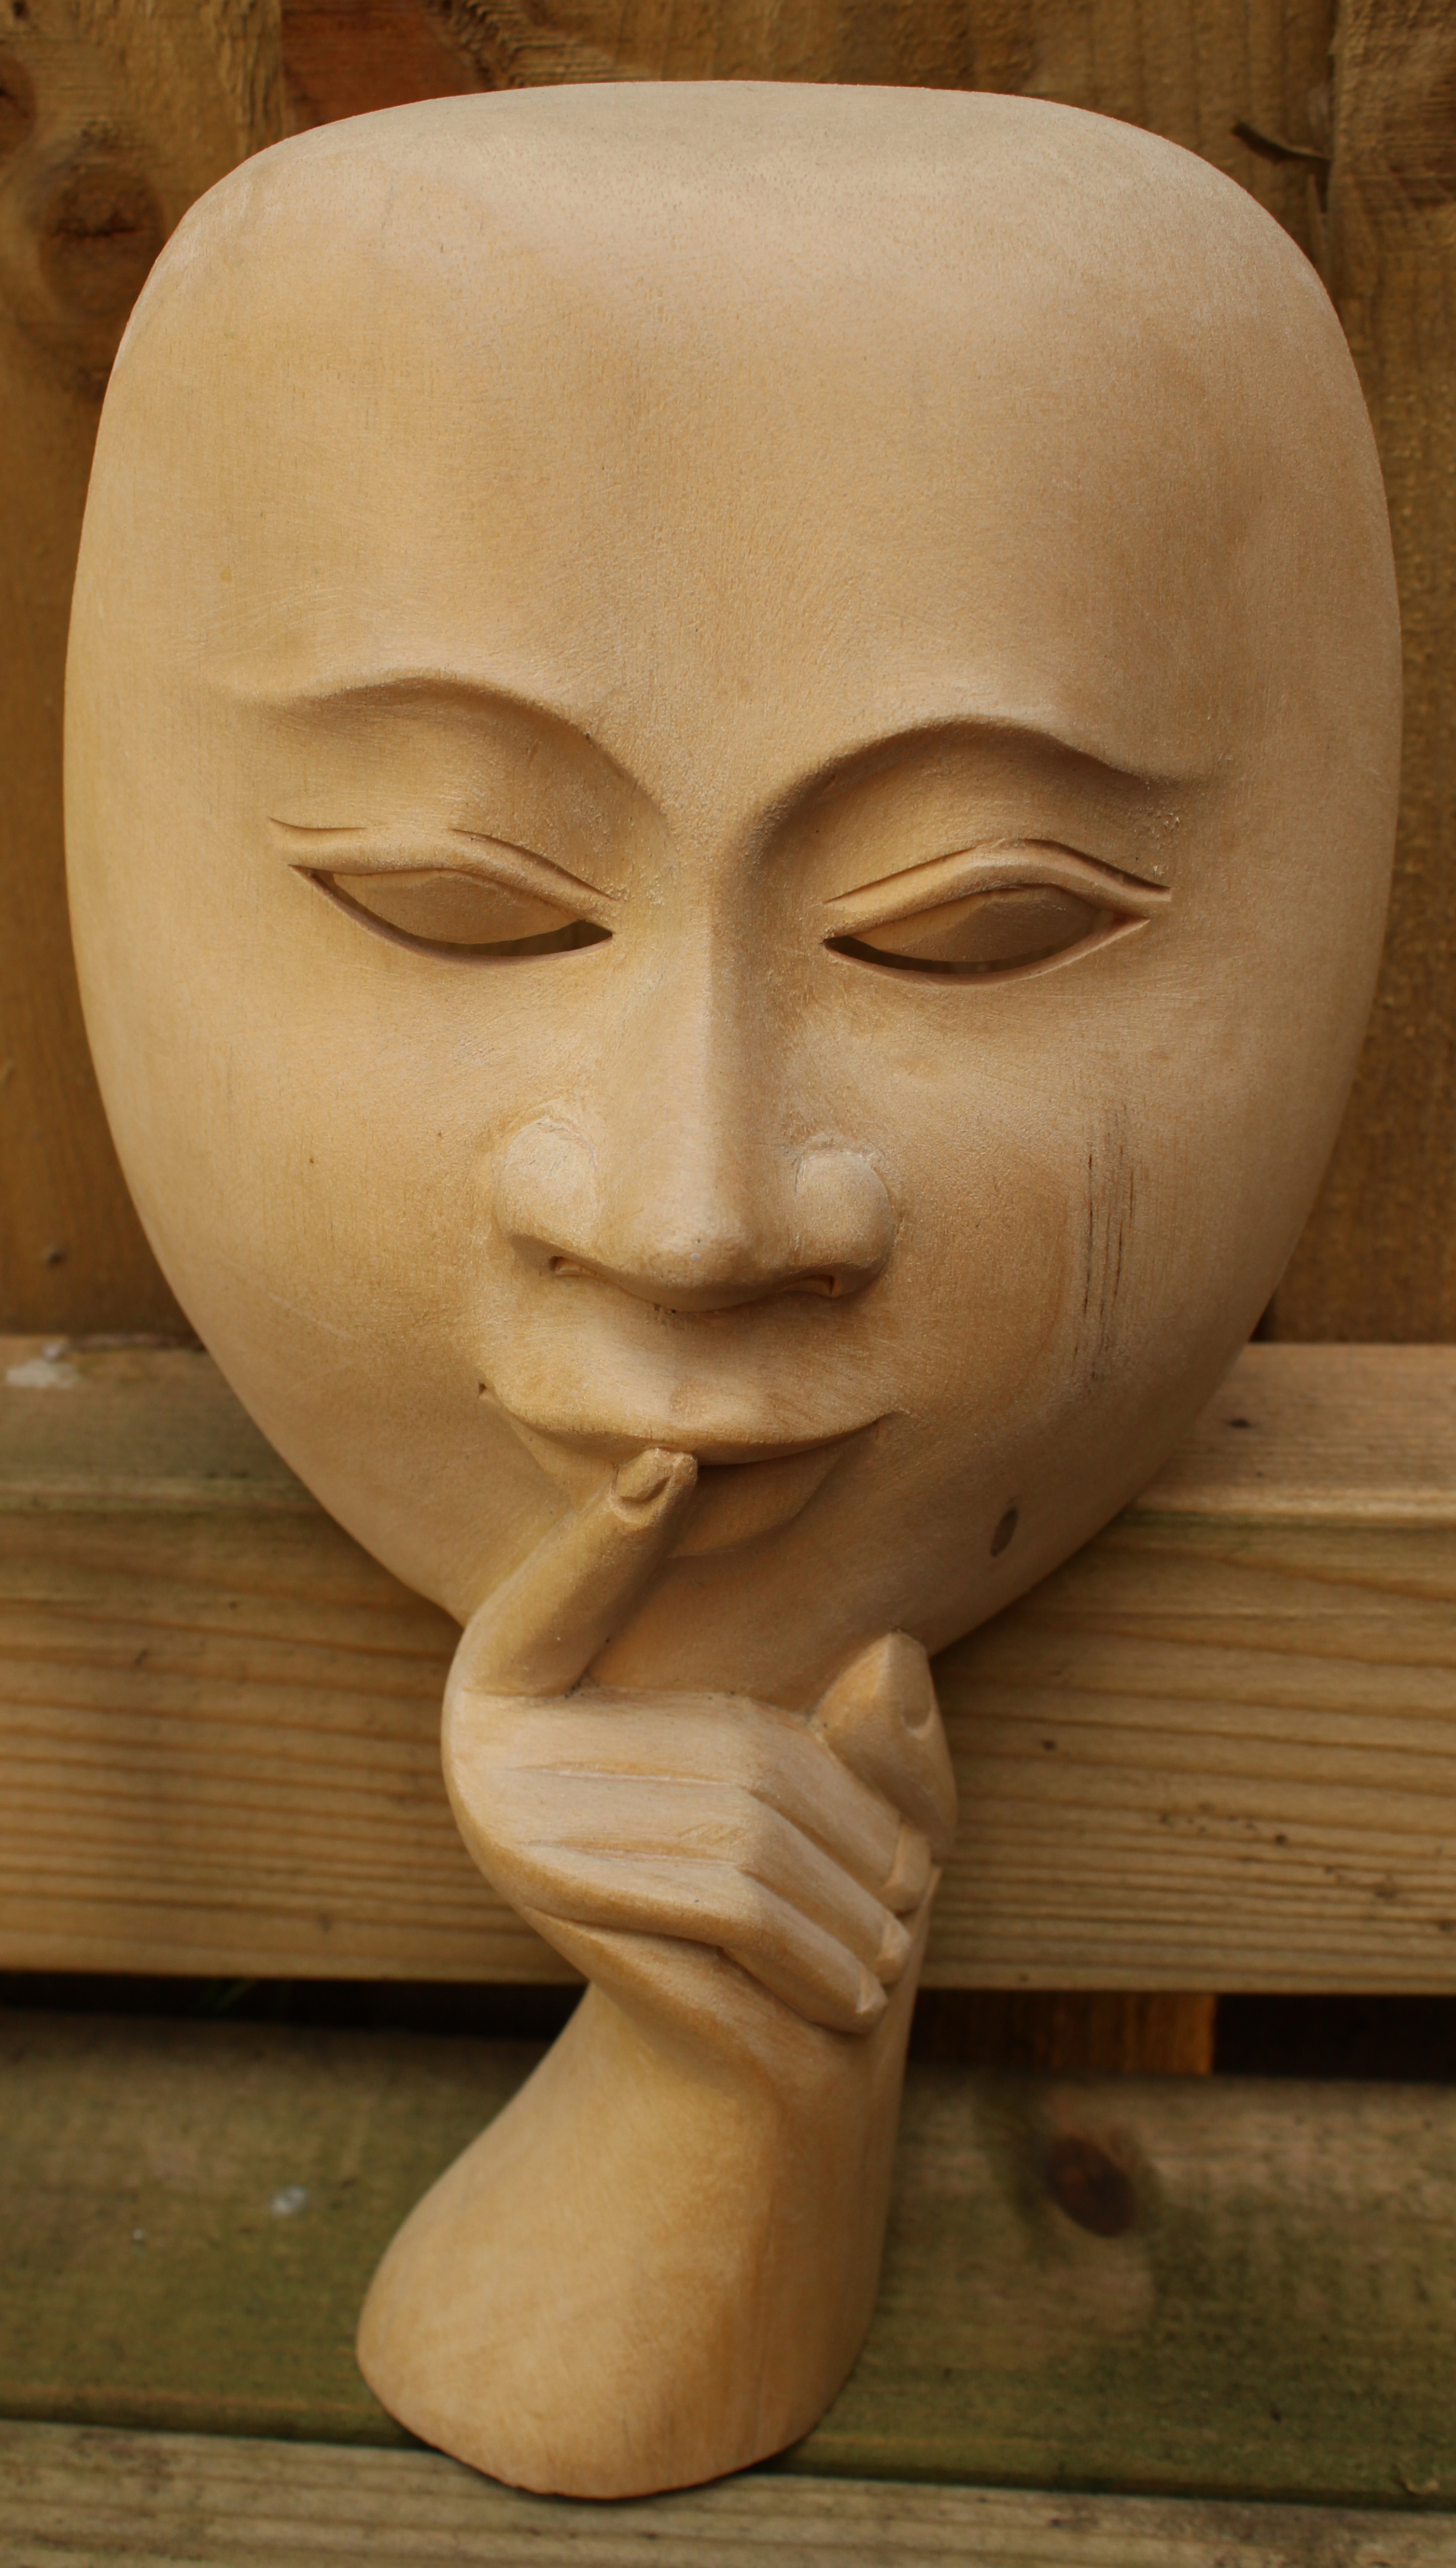
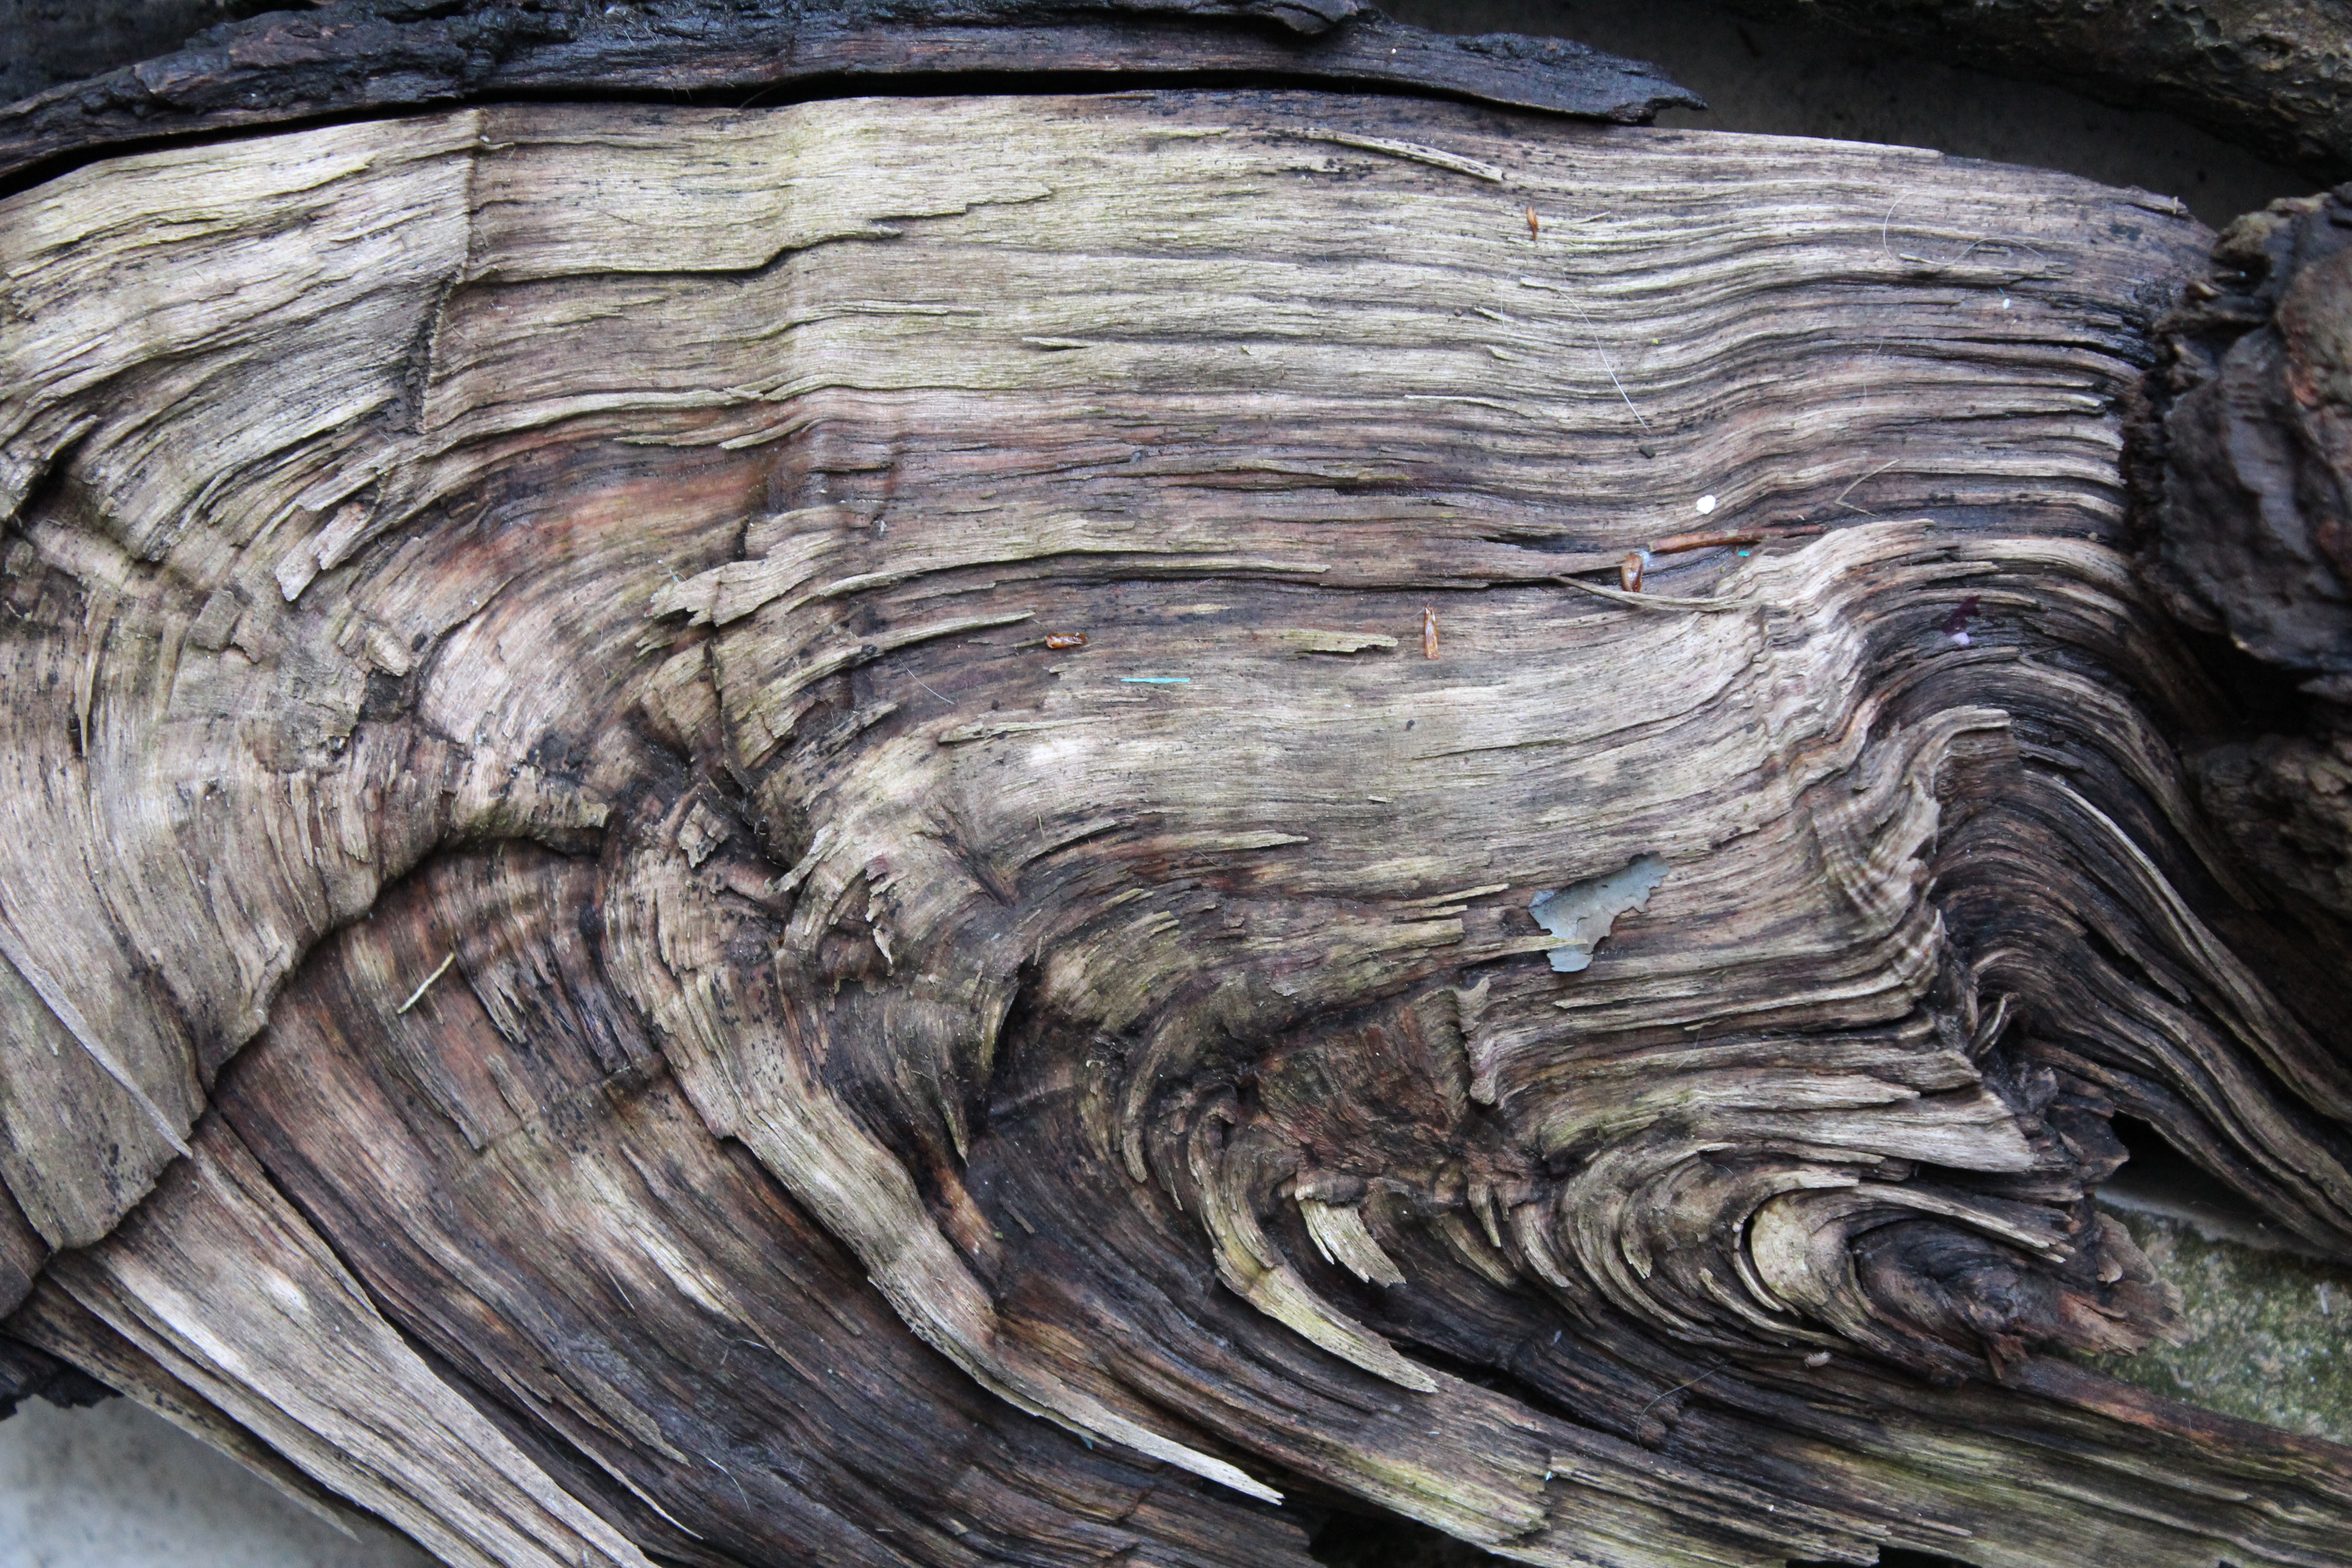
For this exercise, I decided to use the same wooden model I used for the exercise ‘Colour Temperature’ as I would be able to move it around in order to achieve the desired lighting effect.

Frontal Lighting:

frontal lighting

This was taken with the sun behind me. The book tells you that when the sun strikes the subject fully, the lighting should appear intense and any shiny parts should reflect the sun. With this, the lighting is intense, its very bright. The smooth sections of the model reflect the sunlight more, making them appear more brighter in places.
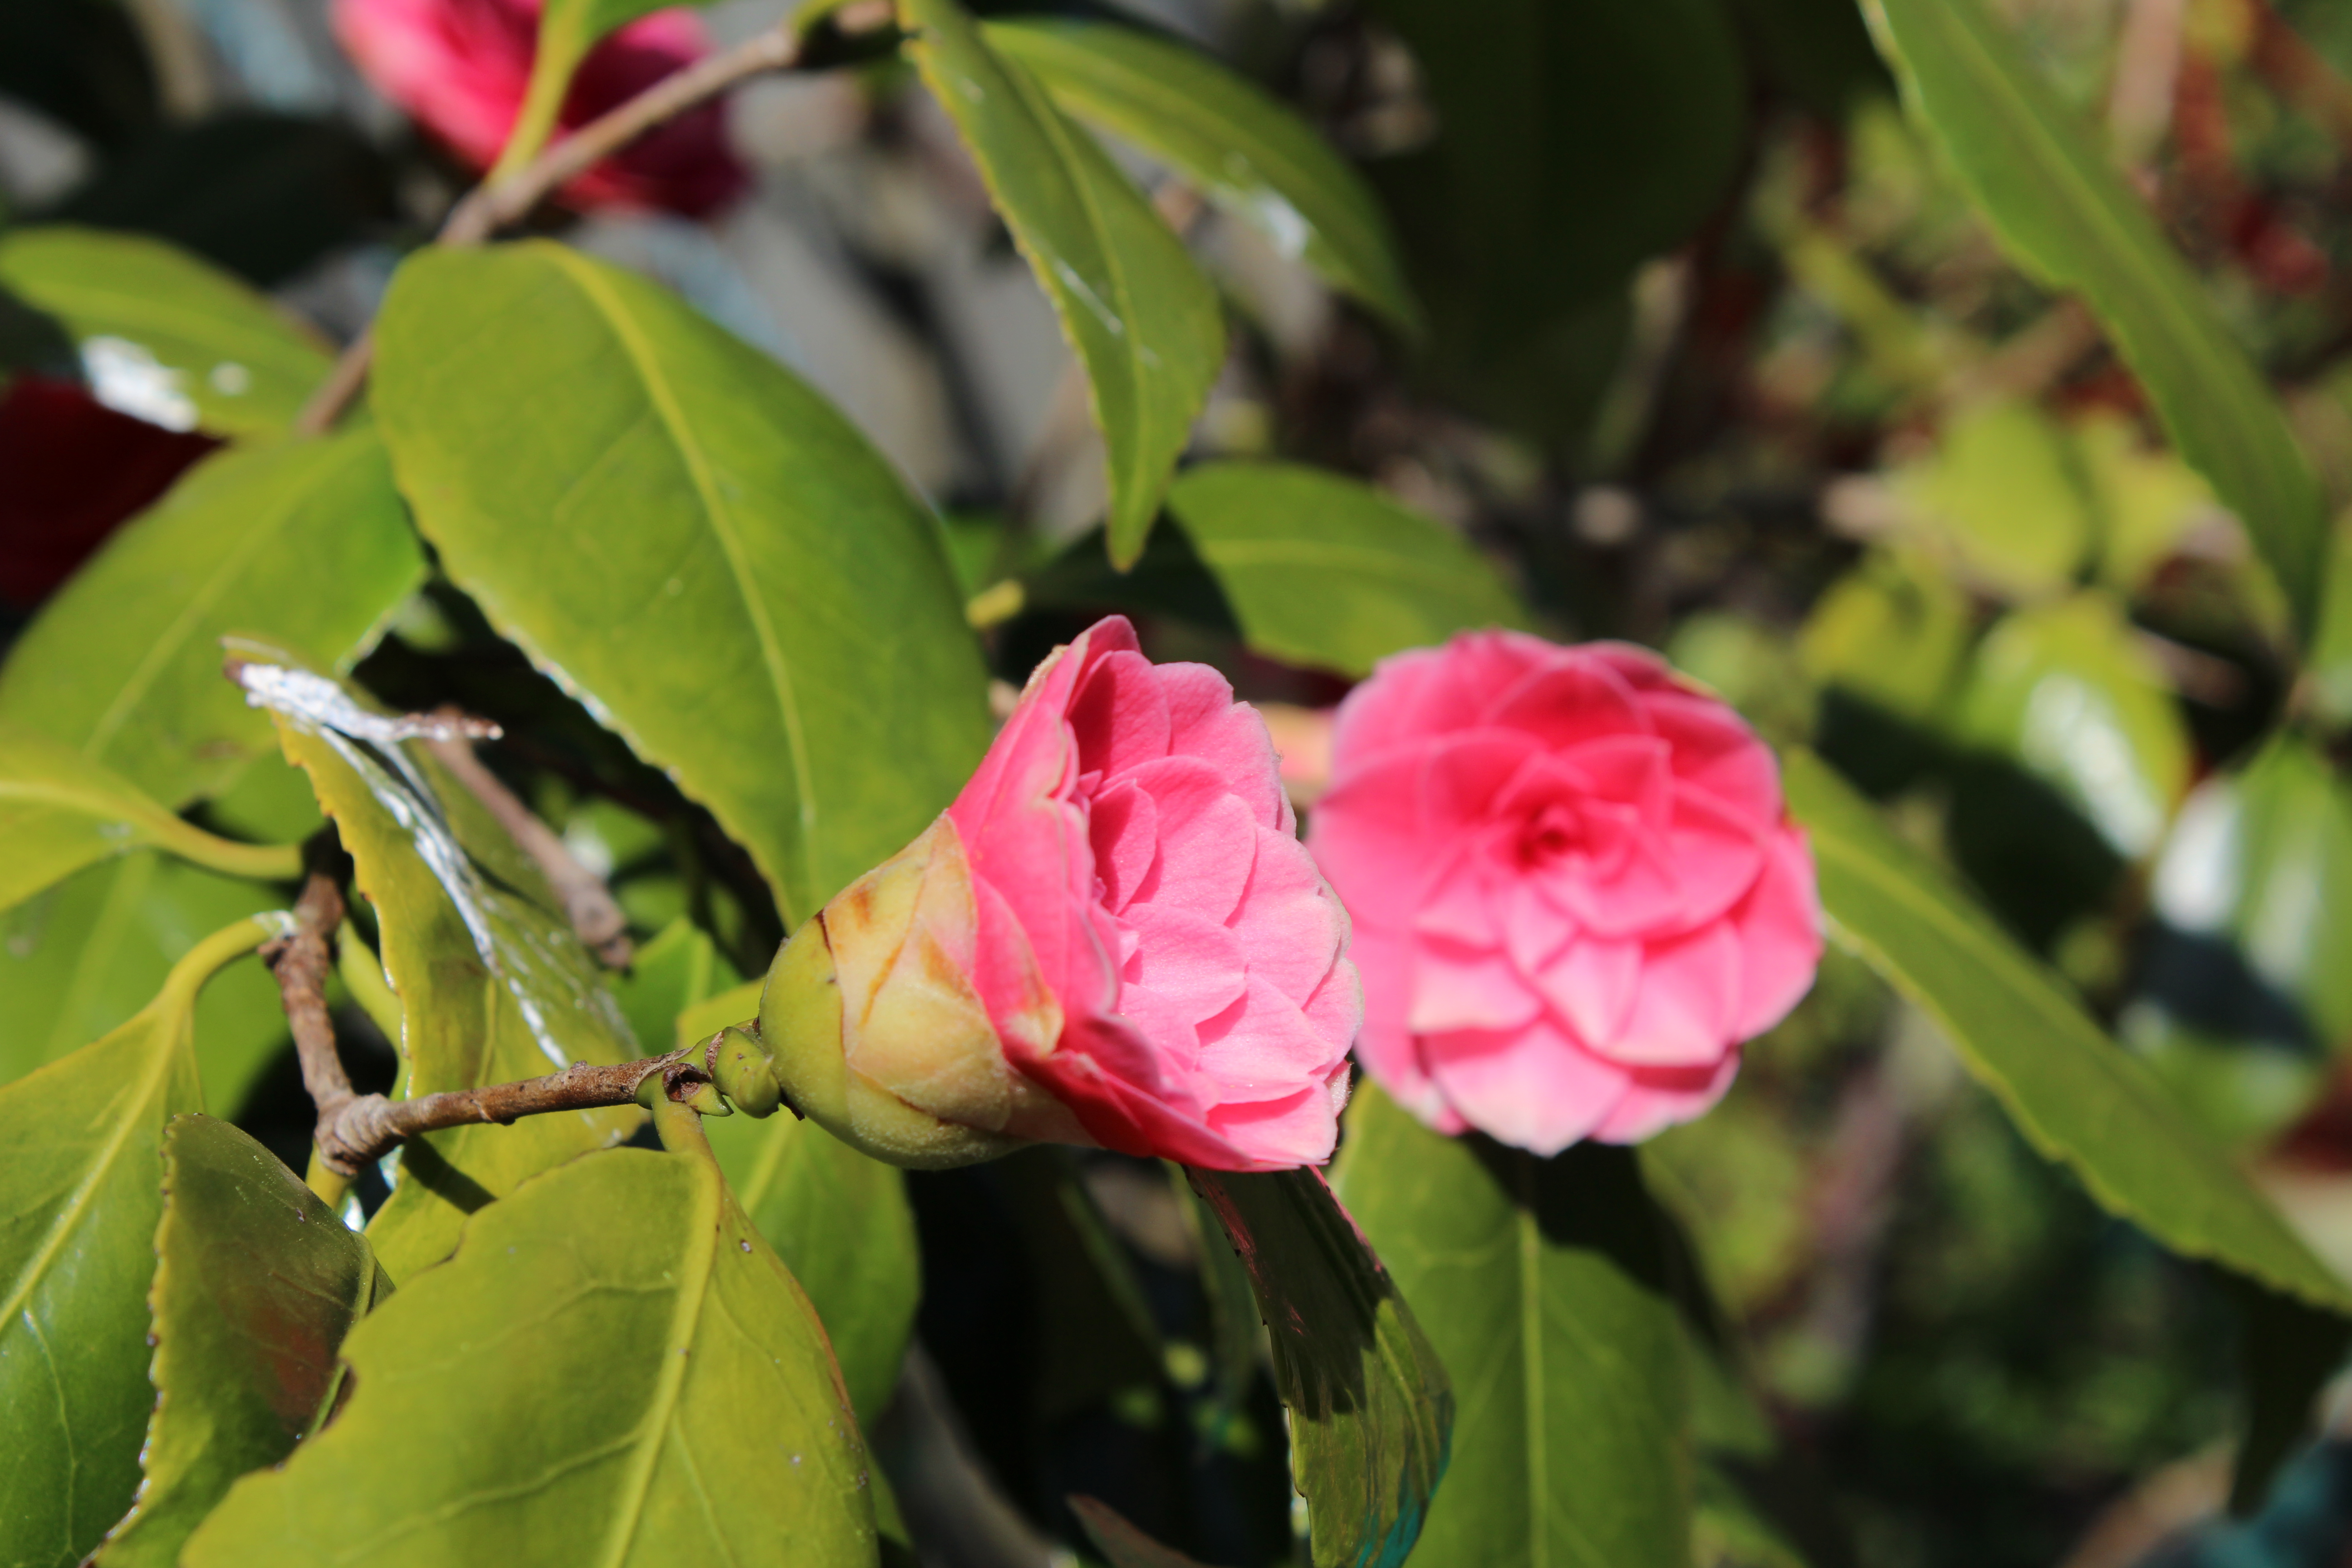
Side Lighting:

side lighting

I turned the model so the sun was on its left hand side. Half of the subject has been lit with sunlight, and the other half is in shadow. It said that you should be aware of over exposure, however, I think this has managed to sort the exposure out itself.
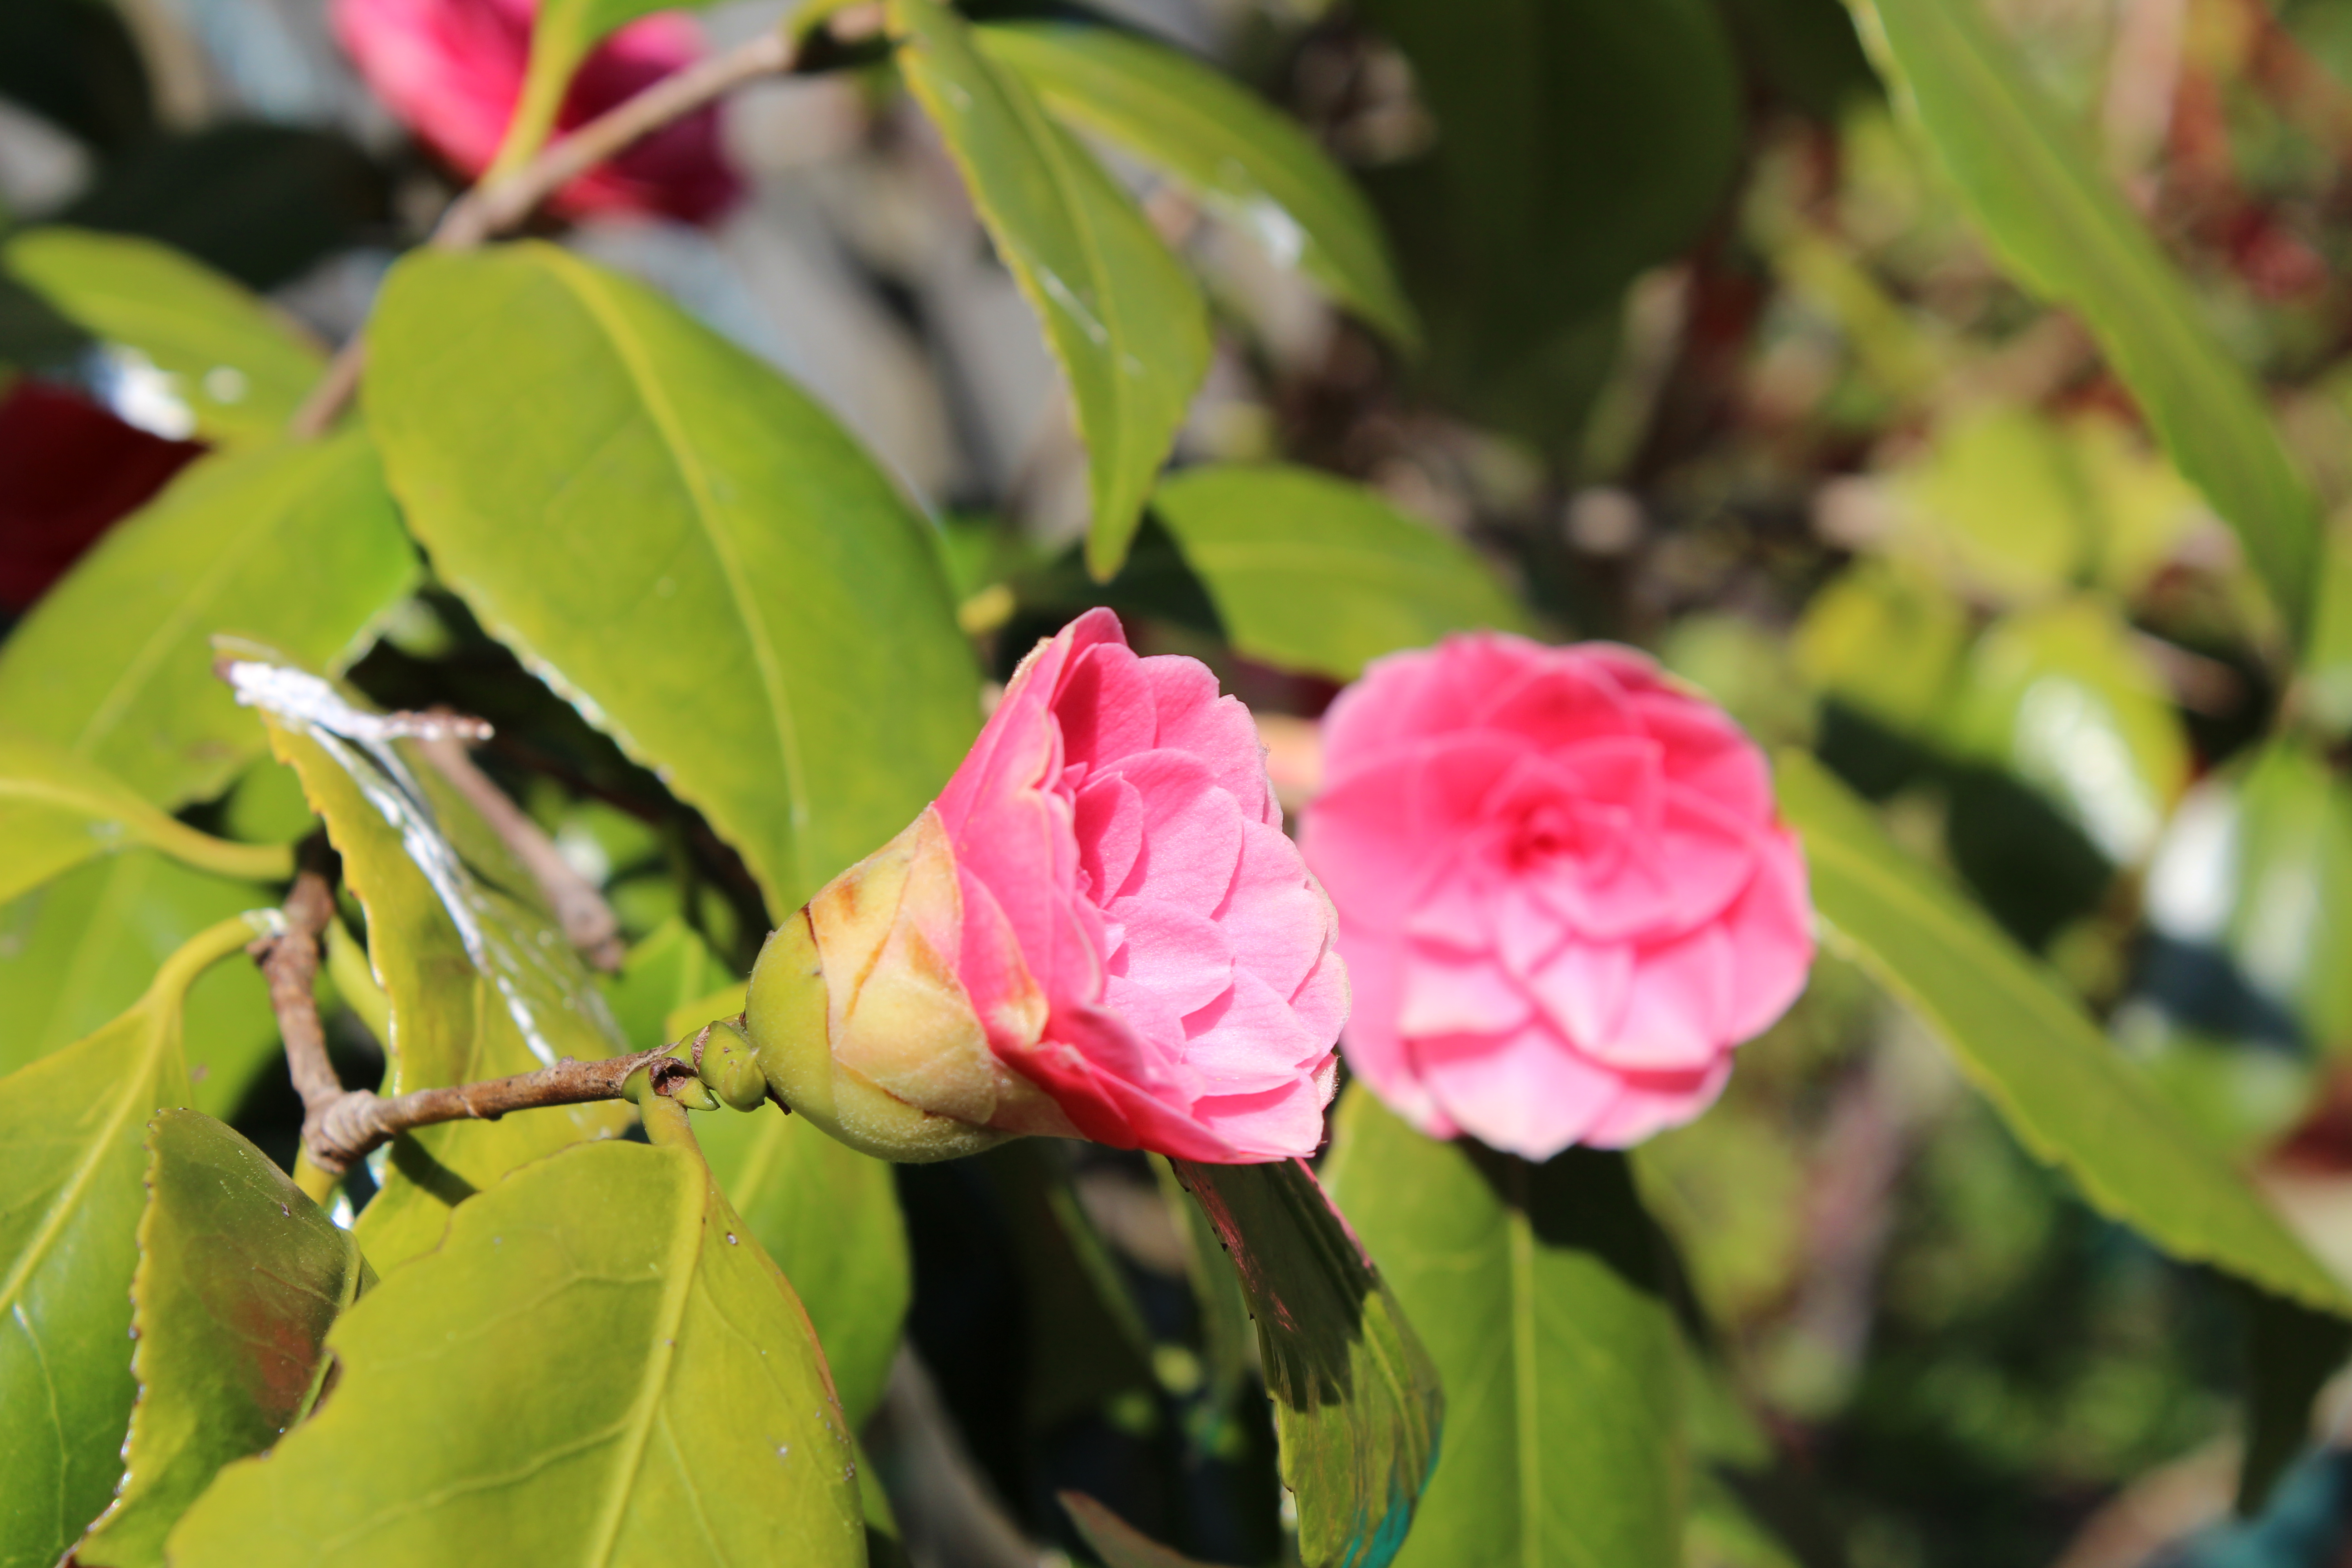
Back Lighting:

back lighting

Back lighting was harder to do as I had to turn the model away from the sun whilst climbing around a table to try and photograph the model. I prefer the colour temperature of this image. The subject isn’t too light and isn’t too dark, unlike the previous two. I should have also re focused on the face as it is a little bit blurred.
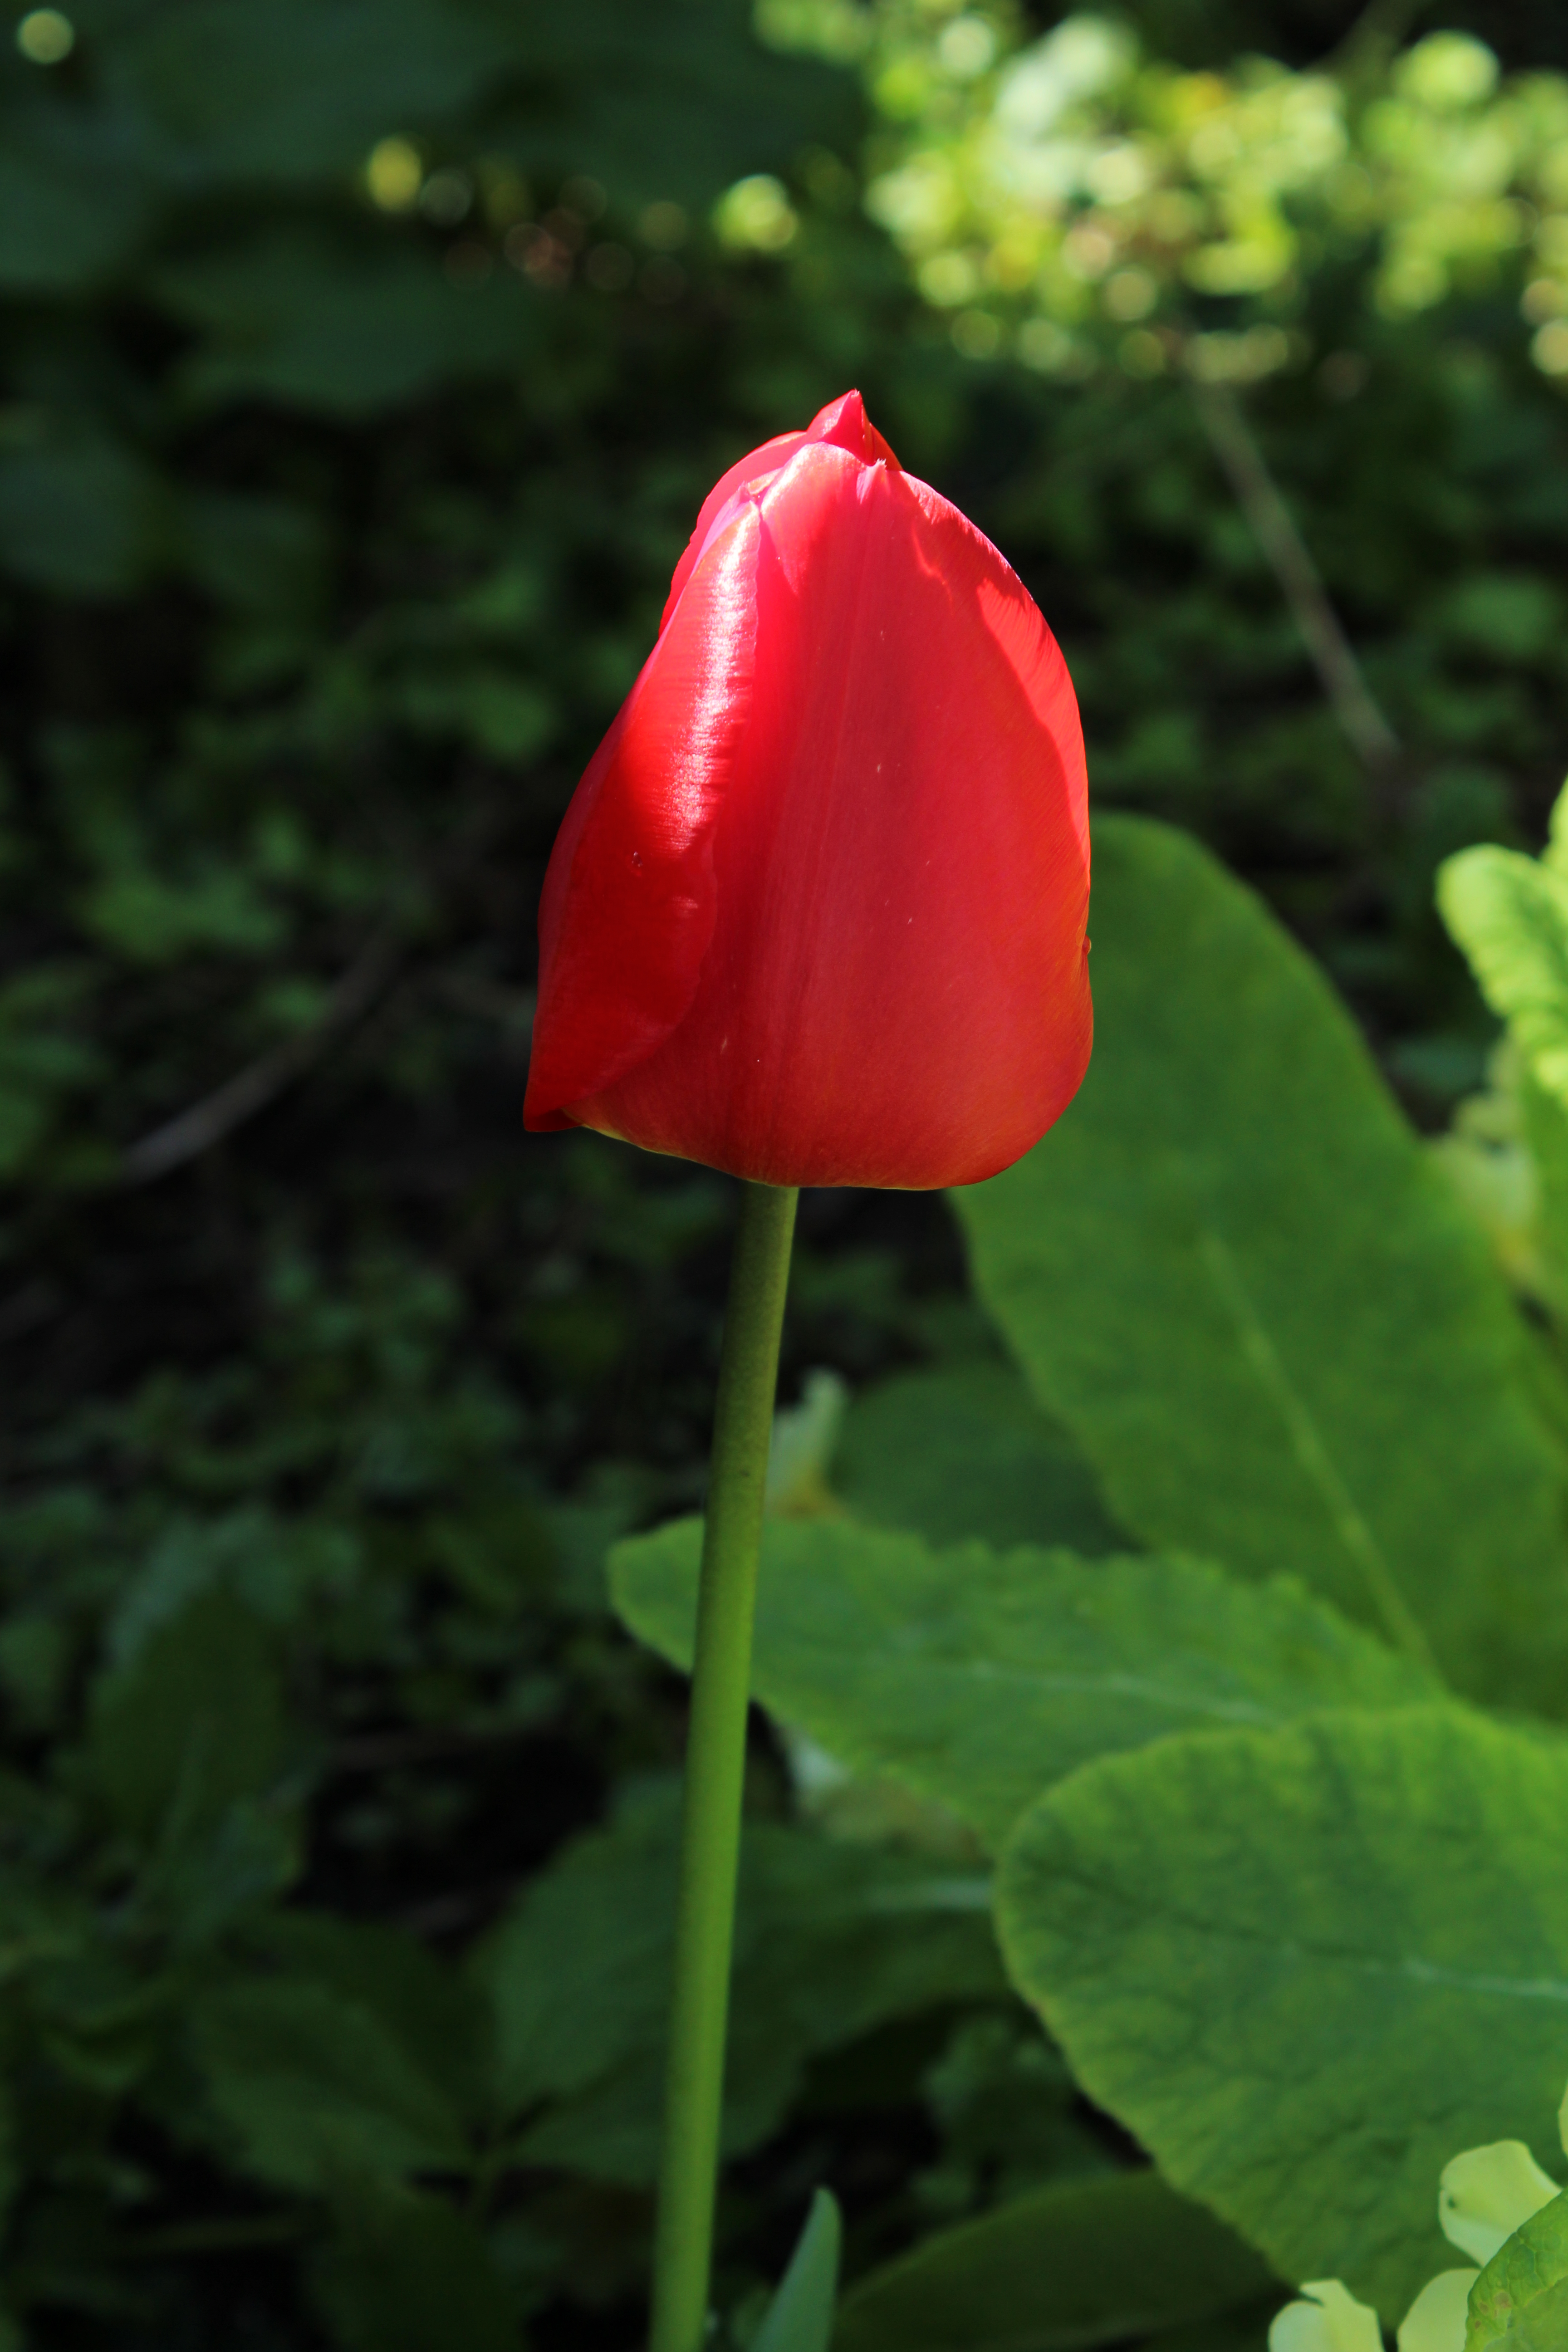
Edge Lighting:

edge lighting

Side lighting was also difficult to do, I had to move the object into the shade by my steps, and try to position it with the sun not on the object but shining on the step, but at the same time, I needed to keep some of the sun near the edge of the object. This image is a lot similar to the Side Lighting image.

Exercise: Light through the day

You are going to take a very detailed look at what happens to a view as the sun moves, and when the sun is close to the horizon, it can bring a surprising urgency even to landscape photography. The brighter and clearer the weather, the more definite you will find the changes in the light, and so the more successful the exercise will be.

You will need a sunny day for this exercise, or else sun at different times on different days. You are going to photograph one scene from dawn to dusk. The number of pictures you take will depend on the time of year. But try and get at least one per hour, and more at the end of the day when the light is changing faster.

Find a landscape location with a fairly definite subject that will catch the sunlight even when the sun is close to the horizon. It needs to offer a good, clear view that is lit throughout the day, containing an isolated building, perhaps, but convenient to reach, as you will need to keep going back to the exact same spot.

First, make a reconnaissance of the scene, and arrive ready for photography earlier than necessary. One of the things that you should learn from this exercise is that you can anticipate the movement of light and shadows to some extent, and yet there is often an element of unpredictability.

I decided to go to a beach about 40 mins away where a friend lives. I knew it would be secluded and I would be able to get a perfect spot sat on the beach, away from other people walking past my camera. I set off just after 8am as the cloud was low in the sky and there was no sun at all. I honestly thought it was going to rain and I would have to abandon this exercise before I even left the house. But I thought, No,  go and do it because the forecast for the rest of the week was rain, rain and more rain. I set off at 8am and by time I got to the beach and set up with all my junk, the first photograph I took was roughly 9:20am. The sun was just beginning to show itself, so technically I arrived just in time. I then took the rest of the photographs roughly every 1hour so every 20past the hour I took a photograph. At 15:20pm, I unfortunately had to move from the spot I was sat in since 9am, as I was getting extremely sunburnt and needed to sit on a bench, you can see that I still focused on the same spot but I am at a more higher location compared to being sat on the beach itself. At 18:20pm, I had to move again as the pain from the sunburn became too much. I walked down to my friends house and left all my junk at her house. I kept going out to the beach every 20 or 30 mins as the lighting and sun was changing. Around 20:00 hours, I couldn’t take any more, the sun wasn’t set to go down until near on 22:00 hours, and being as sunburnt and hungry as I was, I needed to get home, therefore, my last photograph was about 19:45pm. Below are the images I took.

IMG_9526

09:20am

IMG_9530

10:20am

IMG_9533

11:20am

IMG_9538

12:20pm

IMG_9542

13:20pm

IMG_9547

14:20pm

IMG_9561

15:20pm

IMG_9567

16:20pm

IMG_9576

17:20pm

IMG_9585

18:20pm

IMG_9599

18:51pm

IMG_9636

19:12pm

IMG_9648

19:45pm

I have three favourite photographs, I like the photograph taken at 10:20am because I love the bright blue sky contrast against the sand.  The second is taken at 16:20pm as this shows just how sunny and hot the weather was. The last photograph I like is taken at 19:12pm. The sun was beginning to hide behind the clouds, the sun is becoming a lovely pale blue colour.

I did enjoy myself doing this exercise, mainly because I was sat on a beautiful beach all day, although I most certainly paid for it as I am now extremely burnt 😦 ouch.

993780_10151653138547412_83722510_n

Project: The time of the day

Dawn to Dusk:

As the sun moves through the sky, it creates new possibilities for photography. Sunrise, early morning, mid-morning, midday, afternoon, late afternoon and sunset, all have a special character in their light. There is very little that a photographer can do to change the way that natural light appears, except on a small scale and with certain filters. But what you can do is choose the time of day at which you shoot. The main control that a photograph ahs over outdoor lighting is simply to wait. Landscape photographers do this a lot.

Most casual snapshots are taken some time around the middle of the day, between mid-morning and mid-afternoon . The main reason is simply convenience. This is an undemanding time of day to shoot. By the time the causal amateur has woken up, had breakfast and travelled to wherever the photographs will be taken, the sun is already fairly high. On top of this, taking photographs under bright lighting is easier for shooting. But midday light, whether sunny or cloudy, is not necessary the  most interesting or attractive. For one thing, it is over familiar and by definition, not special. If you are planning on learning how to use natural light, you will need to work more in the early morning or late afternoon.

Exercise: Judging Colour Temperature. Part Two

White Balance:

Digital camera’s have a way of dealing with differences in colour temperature built into the cameras operating system. This is ‘White Balance’, which adjusts the overall colour of the images so that the very brightest parts of the scene are recorded as pure white, without a colour tinge.

Most cameras have a choice of settings that include Daylight, Cloudy, Tungsten and Fluorescent, and also an automatic mode. Some cameras allow you to set the white balance (WB) yourself.

There may be some confusion with WB. Its natural to describe reddish colours as ‘warm’ and the Blueish tones as ‘Cool’, whereas the colour temperatures are in fact the opposite. Blue is a ‘Higher’ colour temperature than red. Beware if you use these words, you are talking about the general visual effect, and not the colour temperature.

Conventionally, sunrise and sunset views are left alone and unfiltered, because most people find them attractive. On the other hand, photographs taken completely in blue shade do look wrong to most people unless the colour has been corrected.


Exercise:

For this exercise, you will decided what correction a scene needs, if any at all.

You were asked to look at the last three photographs you took for the previous exercise. Take a similar situation as the previous one.  I decided to use the same subject.

You then had to take Nine photographs. These will be split into Three’s. For each Three, you were asked to vary the camera’s white balance setting.

  • Three photographs: Taken with the Daylight setting.
  • Three photographs: Taken with the Shade setting.
  • Three photographs: Taken with the Auto setting.

You then had to compare the three versions for each. What differences do you notice? Which white balance setting do you prefer for each of the three lighting conditions?

  • Set One:

sunlight

WB: Sunlight

shade

WB: Shade

auto

WB: Auto

  • Set Two:

sunlight shade

WB: Sunlight

shade shade

WB: Shade

auto shade

WB: Auto

  • Set Three:

Daylight

WB: Sunlight

Shade

WB: Shade

Auto

WB: Auto

For all three sets of photographs, I prefer the white balance set to Sunlight. It helps define the subjects details unlike when set to Auto. It gives the subject an overall warm colour, not too dark like when set to Shade, and not too light like when set to Auto. From now on, I will remember that setting your white balance to Sunlight will help your photograph.

Exercise: Judging Colour Temperature. Part One

In most photography, there is no need to be exact about colour temperature. It is enough to know when the light is not white, and if only by a little, or by a lot. For this exercise, you will need a subject you can move around and which does not have a  strong colour. The other thing you will need is a less reliable, yet very clear weather.

You were asked to take  3 photographs. One of the subject sat in direct sunlight during the middle of the day (Mid morning to mid afternoon). One in the shade during the middle of the day, and one in sunlight when it is close to the horizon. Make sure that the camera’s white balance is set to Daylight and not Automatic.

You should already know that the full midday sunlight is colourless, so compare the other two kinds of lighting with this. The images will show these differences when viewed side by side.

Full Sunlight. (White balance set to Daylight)

Full sunlight

In Shade. (White balance set to Daylight)

Full sunlight-shade

Sunset. (White balance set to Daylight)

sunset

I decided to use plain wooden model I had, as it was easy to move around and had no dominant colour to it.

From memory. The first photograph taken in full sunlight, I was shocked to see that the object came out brighter when I looked at it on the computer. It looked more darker in the view finder when I looked at the image after I had taken it. The details on the object are easy to see.

The photograph taken in the shade doesn’t surprise me that the object had a blue colour temperature as it did when I looked through the viewfinder when taking it. The details on the object are flat and less defined than the image taken in full sunlight.

The photograph taken with the object in the sun during sunset, came out on the computer exactly how it looked through the viewfinder when I took the photograph. The wood has a more yellow colour temperature. More darker than the image taken in direct sunlight. I have also noticed that the details are a lot more defined than the other images. They are defined more thanks to the shadows. There is almost a 3D feel to this image unlike the other two.

The Colour of Light

Radio waves, x-rays, radar and light are all electromagnetic radiation. What makes light visible and others not is simply the sensitivity of our eyes. Radiation is defined by wavelength.

Imagine moving along the scale of radiation from long wavelengths (which includes radio waves) to short. Leaving radio and radar far behind, we come to infrared, which is given off by hot things. Wavelengths that are short than this just become visible, as a deep red. A little shorter again, we see orange. Shorter still is Yellow, then Green, then Blue, then Violet. After Violet, the radiation become invisible once more, it is ultra-violet.

Visible wavelengths are the colours of the rainbow. More particularly, they are the colours of the spectrum. Sunlight contains all of them (Plus some of the invisible radiation like infra-red and ultra-violet). White light is the result of mixing all of these colours together, and this is what our eyes do.

Sunlight is out standard not only for brightness, but for colour. In the middle of the day, it seems colourless, we usually call it White light, because we are so you to it. Colourless/White is, simply, normal. Even so, our eyes are more sensitive to some colours than others.

Light becomes colour, when some part of the spectrum is missing. Daylight normally becomes coloured in just two directions.

On a clear day, what happens to the colour of the sun as it sets. Much depends on the weather, but usually, as it starts to get lower in the sky, it becomes yellow, a little lower it becomes orange. In the best of sunsets, the colour is red by the time it reaches the horizon.

The reason for this is that all the particles in the atmosphere scatter some of the light and there is more atmosphere between you and the sun at sunset. The scattering, however, is selective. The shorter wavelengths get scattered more easily, leaving the longer ones visible. It is the blue that gets scattered, so that what remains looks orange or reddish. This same scattering makes the sky away from the sun look blue. You are therefore looking at the wavelengths that have been scattered. In shade on a sunny day, the light comes from the blue part of the sky.

The possible colours of daylight can be laid out on a scale that goes from red, through orange, straw coloured, white, to blue. This is important in colour photography because there are times when you will not want coloured daylight.

Exercise: Higher and Lower Sensitivity

For this exercise, you were asked to take similar kind of photographs to the previous exercise.

You were asked to take at least 12 photographs for this exercise.

Choose a situation which is marginal, where the mixture of light level and subject movement or depth of field is only just possible , for instance, a busy street market on an overcast day.

Shoot first at normal iso, then change to higher sensitivity. Did the change make shooting easier ? In particular, were there photographs that you could not take successfully at the lower  iso but were possible at a higher one?  Compare the images, and note the difference in texture and details within the image.

Flower:

Iso 200, F/7.1, 1/500Sec

IMG_9355

ISO 1600, F/7.1, 1/4000Sec

IMG_9356 

I used a tripod to take the photograph of the flowers. Using a higher ISO didn’t have any noticeable change in the photograph. All I can see are some of the details on the leafs becoming a tiny bit more defined with a higher ISO.

Lamp:

Iso 200, F/7.1, 1/60Sec

IMG_9360

Iso 1600, F/7.1, 1/500Sec

IMG_9359

I also used a tripod for this photograph. As with the previous image, there is no noticeable change in the image. There is a slight difference between colour. The lower ISO image is slightly lighter.

Tree:

Iso 200, F/7.1, 1/500Sec

IMG_9357

Iso 1600, F/7.1, 1/3200Sec

IMG_9358

I used a tripod for these photographs. However, the tree was blowing in the wind, so I had to catch it as quickly as I could. When I zoomed in onto the image with a higher ISO, I could see that there was a lot of noise on the image. In my opinion, the image with a lower ISO is better out of the two. I find it more clearer.

Lamp:

Iso 200, F/5.6, 1/250Sec

IMG_9366

Iso 1600, F/5.6, 1/1600Sec

IMG_9367

I didn’t use a tripod for these images, and you can tell the difference between the ones taken with a tripod, and the ones taken without. The image taken with a low ISO, is not that clear, is blurred in some parts and shows camera shake. However, the image taken with the higher ISO, is much more defined, a lot clearer, which shows that using a high ISO with a faster shutter speed allows you to take clear photographs especially if you are not using a tripod.

Wood:

Iso 200, F/6.3, 1/15Sec

IMG_9370

Iso 1600, F/6.3, 1/125Sec

IMG_9371

I didn’t use a tripod for these images, and you can tell the difference between the ones taken with a tripod, and the ones taken without. The image taken with a low ISO, is not that clear, is blurred in some parts and shows camera shake. However, the image taken with the higher ISO, is much more defined, a lot clearer, which shows that using a high ISO with a faster shutter speed allows you to take clear photographs especially if you are not using a tripod.

Flower:

Iso 100, F/5.6, 1/125Sec

IMG_9155

Iso 800, F/5.6,  1/160Sec

IMG_9156

I used a tripod to take the photograph of the flower. I decided to use an ISO of 100 to begin with then changed it to an ISO of 800. The image taken with the low ISO is a lot better than the image with a high ISO. The higher ISO image is way to bright. The darker image shows a lot more detail on the flower head, whilst having a blurred base, but the image taken with a high ISO, isn’t much better either. I should have tried this with an ISO of 200 then perhaps 400 as it may not have been as bright as the 800ISO image.


Exercise: Measuring Exposure Part Two

For this exercise, you were asked to produce 5-6 photographs of any subjects. Each subject, you were asked to make five exposures of. You firstly needed to find out what the average exposure for the subject was. You then arranged the exposures around this. The first should be one stop darker, the second should be half a stop darker, then the third image should be the average image, the fourth should be half a stop lighter and the fifth should be one stop lighter.

You were then advised to look at the average exposure image and see if it was as you would expect. You then had to look at the other exposed images to see if any others were acceptable.

One: Dark to Light

dark

less dark

average

less light

light

I am pleased with the average exposed image as it does show how the plant looked when I photographed it, however, I am pleased with the image which was taken a half stop darker. I believe that the half stop darker image shows a lot more detail on the flower itself than with the average exposed image.

less dark

Two: Dark to Light

dark tree

less dark tree

average tree

less light tree

light tree

I am also pleased with the average exposed image as it does show how the tree looked when I photographed it, however, I am pleased with the image which was taken a half stop darker and one stop darker. I believe that the half stop darker image shows a lot more detail on the tree however, I also like the one stop darker image as well.

less dark tree

Three: Dark to Light

dark

dark2

average

light

light2

Im pleased with the average exposed image as it does show how the plant looked when I photographed it, however, I am pleased with the image which was taken a half stop darker. I believe that the half stop darker image shows a lot more detail on the plant and the surrounding leaves.

dark2

Four: Dark to Light

dark

less dark

average

less light

light

Im pleased with the average exposed image, however, I am pleased with the image which was taken a half stop lighter.

less light